
The thought of painting your cabinets can be both exciting and terrifying. You envision a bright, modern kitchen, but the fear of a botched DIY job-with its tell-tale brush strokes and peeling paint-is enough to stop you in your tracks. You’re not alone in wondering if a beautiful, durable finish is even possible without a full, costly remodel. The truth is, it’s absolutely achievable, but the difference between a stunning transformation and a disappointing mess lies entirely in the process.
In this step-by-step guide, we’re pulling back the curtain on the professional method. We’ll demystify the entire journey, from meticulous surface preparation and choosing the right industrial-grade coatings to the spray application techniques that create a flawless, factory-like finish. By the end, you’ll understand exactly what it takes to achieve a long-lasting, beautiful result, empowering you to make the best decision for your home: tackle it yourself or hire a pro.
Step 1: The Foundation – Meticulous On-Site Preparation
Ask any professional painter, and they’ll tell you the secret to a flawless finish isn’t in the final coat of paint-it’s in the preparation. This meticulous setup is the most crucial phase when painting your cabinets, separating an amateur job from a durable, factory-like result. The goal here is twofold: to create an impenetrable shield to protect your home and to prepare the cabinet boxes and frames for a perfect bond with the new paint. Professionals dedicate a significant portion of the project timeline to this step, ensuring every line is crisp and not a single drop of paint ends up where it shouldn’t.
To visualize the level of detail involved in professional prep work, take a look at this helpful overview:
Deconstruction and Labeling
The process begins with careful deconstruction. Every cabinet door, drawer face, and piece of hardware is methodically removed. To ensure a seamless reassembly, we use a systematic labeling system-often a small piece of painter’s tape with a corresponding number on both the door and inside the cabinet box. All hinges, knobs, and pulls are bagged and labeled for their specific door, eliminating any guesswork later on.
Creating a Protective Cocoon
Next, we transform your kitchen into a protected work zone. We meticulously cover every surface that won’t be painted. This includes masking countertops with durable paper, protecting floors and backsplashes, and draping appliances and light fixtures with plastic sheeting. The entire work area is often sealed off with plastic walls to contain dust from sanding and prevent any paint overspray from drifting into other parts of your home.
Deep Cleaning and Degreasing
Years of cooking can leave a thin, often invisible, layer of grease and grime on cabinet surfaces. Paint simply cannot adhere to this residue, making a thorough cleaning non-negotiable. Using a professional-grade degreaser, we scrub every inch of the cabinet boxes, frames, doors, and drawers. This vital cleaning is the true first step in any proper wood finishing process, as it guarantees that the primer and paint have a pristine surface to bond to for a long-lasting, peel-resistant finish.
Step 2: The Perfect Canvas – Professional Sanding and Priming
Many people think sanding is just about roughing up the surface, but it’s a far more technical step. This is where the foundation for a durable, beautiful finish is laid. Proper sanding and priming are the non-negotiable steps that prevent the chipping, peeling, and stain bleed-through that plague so many DIY projects. This two-part process is the single most important factor in guaranteeing your new cabinet color looks flawless and lasts for years to come.
Why Professionals Always Sand
Sanding isn’t about aggressively stripping the old finish; it’s about creating the perfect surface for adhesion. The primary goal is to de-gloss the existing varnish or paint, creating a microscopic texture, or “tooth,” that the primer can grip onto. This step also allows us to smooth out any minor nicks, dings, or imperfections in the wood surface. Because this process generates fine dust, our teams use commercial-grade sanders with integrated dust-extraction systems to maintain a clean environment in your home. For older homes, it’s crucial to follow proper safety protocols; all professional work should adhere to the EPA’s Lead-Safe work practices to manage any potential hazards.
Choosing the Right Bonding Primer
Not all primers are created equal. While a general-purpose latex primer might seem sufficient, it will fail when painting your cabinets, especially those made of oak, cherry, or mahogany. These woods contain natural oils and tannins that will “bleed” through water-based products, causing ugly yellow or pinkish stains to appear in the final paint color. Professionals prevent this by using high-performance, stain-blocking primers. Depending on the cabinet material and original finish, we use specific shellac-based or oil-based primers that create an impermeable barrier, locking in stains and ensuring your chosen color stays true.
Priming Application Technique
A flawless topcoat is only possible with a flawlessly applied primer. For all doors and drawer fronts, we apply primer in a controlled environment using professional spray equipment. This delivers a perfectly even, consistent layer without any brush or roller marks. For the cabinet boxes inside your home, we use a meticulous brush-and-roll technique to ensure complete coverage. But the secret to an ultra-smooth finish comes after the primer dries. We lightly sand the entire primed surface with a fine-grit paper (220-grit or higher) to eliminate any tiny imperfections, creating a velvety foundation for the final color.
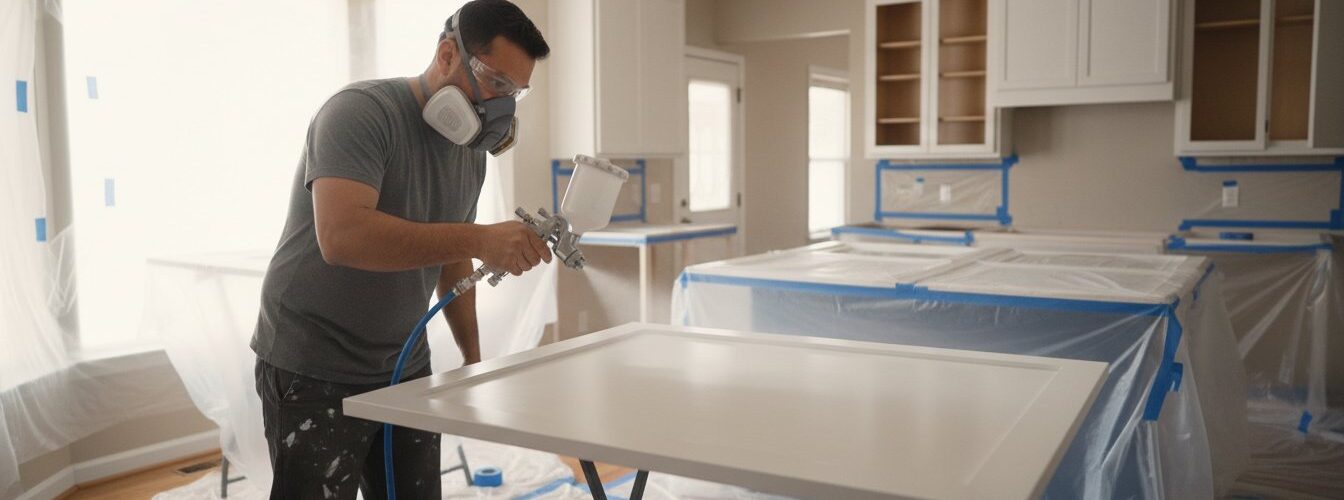
Step 3: The Factory Finish – Professional Paint Application
After meticulous preparation, this is where the transformation truly happens. The application phase is what separates a standard paint job from a stunning, factory-quality finish. The goal is to create a surface that is not only beautiful but also incredibly hard and durable, free of any brush strokes or roller marks. When it comes to painting your cabinets, this professional application process ensures they can withstand the daily demands of a busy kitchen for years to come.
Spraying vs. Rolling: The Pro’s Choice
To achieve a flawless, glass-smooth surface, professionals rely on specialized equipment. All cabinet doors and drawer fronts are removed and taken to an off-site, climate-controlled spray booth. This dust-free environment allows for the perfect application of paint, atomizing the coating into a fine mist that settles evenly. Meanwhile, back in your home, the cabinet boxes and frames are meticulously masked off and either skillfully hand-painted or sprayed with precision to ensure a seamless match.
The Power of Professional-Grade Coatings
The paint you find at a local hardware store simply can’t compare to the industrial-strength coatings used by specialists. We utilize premium products like catalyzed lacquers and two-component (2K) urethane enamels. Unlike consumer-grade latex paints that simply dry, these advanced coatings undergo a chemical curing process. This creates a significantly harder, non-porous finish that offers superior resistance to chipping, staining, and moisture-essential for a high-traffic area like the kitchen.
Building the Finish with Multiple Coats
A long-lasting finish isn’t achieved with a single thick coat. The key is to build the surface methodically with multiple thin coats. After the primer is perfectly smooth, we apply 2-3 coats of the topcoat. Between each coat, the surfaces are allowed to cure properly before being lightly sanded. This methodical process of sanding and recoating is a non-negotiable step for professionals, and even top-tier DIY guides on how to paint kitchen cabinets stress its importance for creating a durable bond and an impeccably smooth result. This layered approach is what produces a resilient, easy-to-clean cabinet surface that feels as good as it looks.

Step 4: The Final Touch – Curing, Reassembly, and Clean-Up
The last coat of paint is on, and the color looks fantastic. But a true professional knows the job isn’t finished when the paint is dry. This final stage is where meticulous attention to detail ensures your newly painted cabinets not only look incredible but also stand the test of time. It’s the difference between a good finish and a great one.
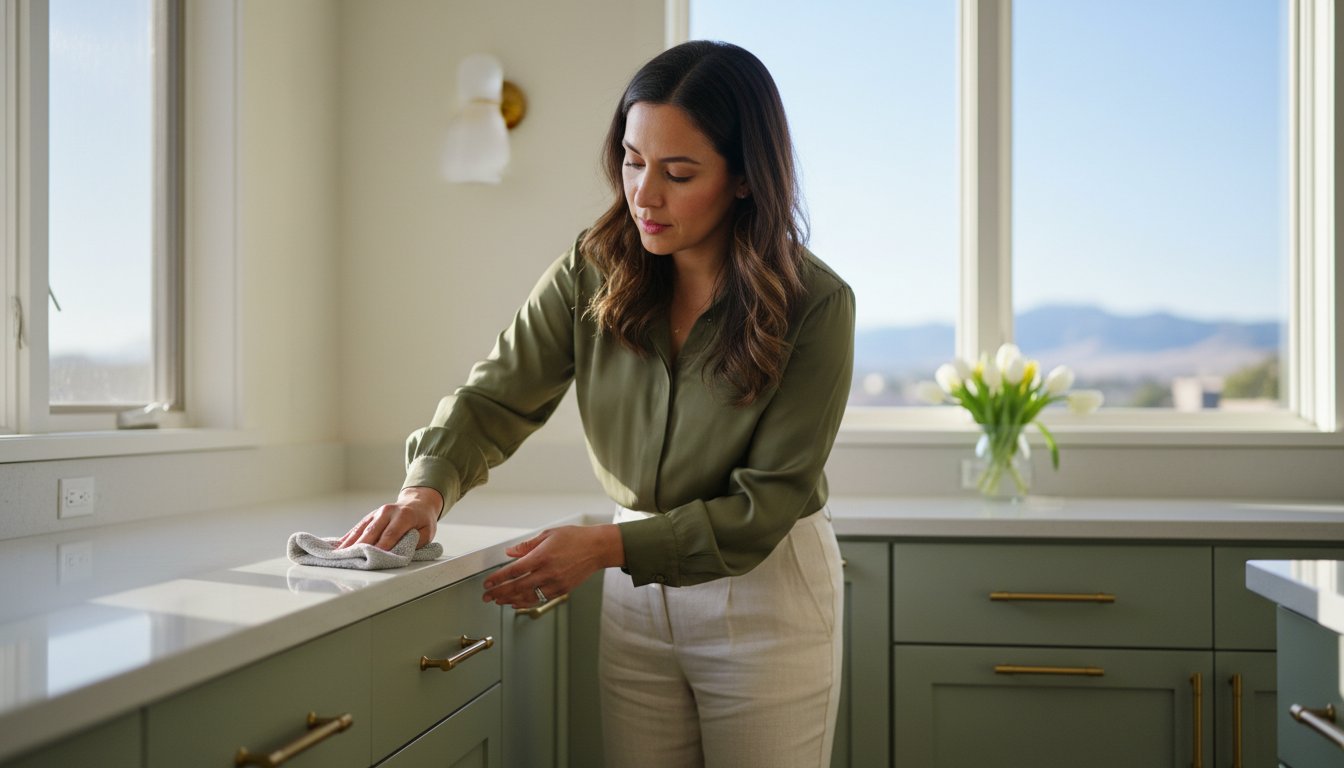
The Importance of Curing Time
There’s a critical difference between paint that is dry to the touch and paint that is fully cured. Dry paint simply means the solvents have evaporated, but the paint film remains soft and vulnerable. A full cure, which can take several days or weeks, is when the paint hardens into its maximum durable state. We allow your doors and drawers to cure in a controlled shop environment before transport to prevent dings and smudges. For the first 30 days, we advise treating your new surfaces with care:
- Use gentle, non-abrasive cleaners for any wipe-downs.
- Avoid placing heavy or sharp objects directly on the surface.
- Wipe up spills promptly with a soft, damp cloth.
Precise Reassembly and Hardware Installation
Reassembly is a delicate, precise process. We carefully transport and reinstall each door and drawer, ensuring no damage occurs. We then install your new or existing hardware with absolute precision, making sure every knob and pull is perfectly aligned and secure. The final, critical adjustment involves the hinges. We meticulously align every door, so the gaps are uniform and everything opens and closes smoothly. This step is essential for achieving that clean, high-end look you expect from professionally painting your cabinets.
Final Walk-Through and Clean-Up
Our commitment to a professional experience extends to the final clean-up. We remove all masking materials and protective coverings, then thoroughly sweep, vacuum, and wipe down your space, leaving your kitchen pristine and ready for you to enjoy. Once everything is spotless, we conduct a final walk-through with you to inspect the work, answer any questions, and ensure you are completely thrilled with the transformation. This dedication to a flawless finish from start to finish is our promise. Ready for a professional finish that redefines your kitchen? Get your free estimate in Denver.
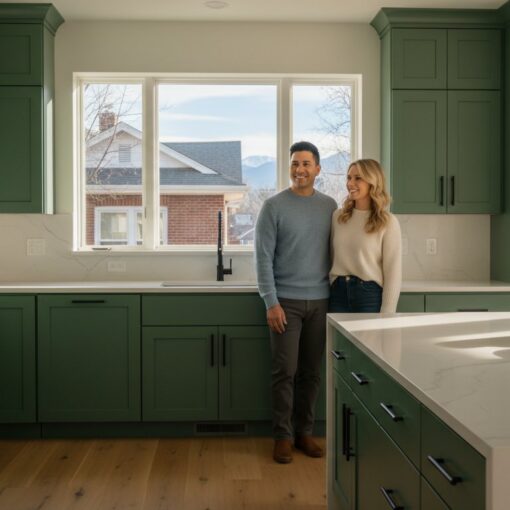
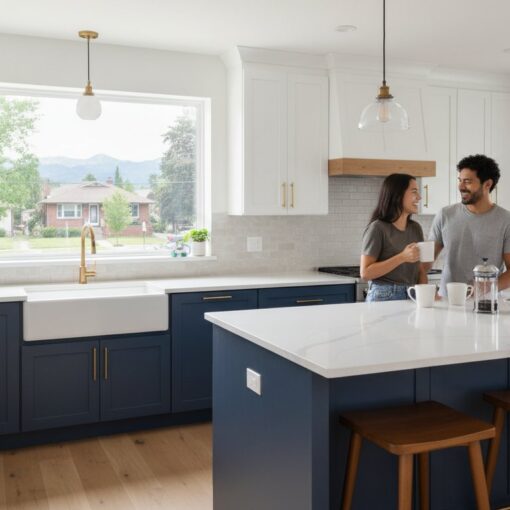
Transform Your Kitchen with a Flawless Finish
As you can see, the professional approach to painting your cabinets is a meticulous craft, far removed from a simple weekend DIY project. The secret to a stunning, long-lasting transformation isn’t just the paint-it’s the process. From the detailed preparation that creates a perfect canvas to the controlled application and proper curing, every step is crucial for ensuring a durable, beautiful outcome that stands the test of time.
By utilizing professional-grade spray equipment and durable, industrial-strength coatings, we deliver that coveted, smooth-as-glass factory finish that elevates your entire space. Don’t settle for less than the best for the heart of your home. See the difference a professional process makes. Get your free Denver quote today! We look forward to helping you create the kitchen you’ve always wanted.
Frequently Asked Questions About Cabinet Painting
How long does the professional cabinet painting process take from start to finish?
The entire process of painting your cabinets professionally typically takes 5 to 7 days. Your kitchen is only disrupted for about 2-3 days for on-site prep and frame painting. The majority of the work, like sanding, priming, and spraying your cabinet doors and drawers, is completed off-site in our controlled facility. This ensures a flawless, factory-like finish while minimizing the inconvenience in your home, allowing you to regain use of your kitchen much faster.
Will my house be filled with strong paint fumes?
We prioritize your comfort and safety by using low or zero-VOC (Volatile Organic Compound) paints, which significantly reduce strong odors. Our team also employs professional-grade ventilation systems, including air scrubbers and exhaust fans, to capture airborne particles and maintain clean air quality throughout the project. This controlled approach ensures that your home remains a pleasant and fume-free environment, unlike many DIY projects that rely on simply opening a window for ventilation.
What type of paint is the most durable for kitchen cabinets?
For maximum durability, we recommend a high-quality urethane-alkyd enamel. This type of paint combines the hardness and smooth finish of traditional oil-based paints with the low-VOC and easy cleanup of water-based formulas. It creates a hard, non-porous surface that resists chipping, scuffing, and staining from daily kitchen use. This professional-grade coating ensures your cabinets look beautiful for years and can withstand the rigors of a busy household.
Can you paint laminate or thermofoil cabinets professionally?
Yes, laminate and thermofoil cabinets can be painted to achieve a beautiful, lasting finish, but it requires special preparation. The key is proper adhesion. We use advanced techniques, including a thorough cleaning and scuff-sanding of the non-porous surface. We then apply a specialized bonding primer designed to adhere tenaciously to slick surfaces. This critical step ensures the topcoat of paint will not peel or chip, providing a durable and professional result.
How should I clean my newly painted cabinets to ensure they last?
To clean your newly painted cabinets, wait for the paint to fully cure, which typically takes about 30 days. For routine cleaning, use a soft, lint-free cloth dampened with water and a small amount of mild dish soap, like Dawn. Gently wipe the surface and dry immediately with another soft cloth. Avoid using abrasive sponges, harsh chemical cleaners containing ammonia or bleach, or excessive moisture, as these can damage the paint finish over time.
Is it cheaper to paint my cabinets myself?
While the upfront material cost for painting your cabinets yourself is lower, a professional job provides significant value. Professionals invest in specialized equipment like HVLP sprayers for a factory-smooth finish that’s difficult to achieve with a brush. We also use premium-grade primers and paints for superior durability. Factoring in the value of your time and avoiding costly mistakes, hiring a pro often proves to be a more cost-effective investment for a long-lasting, flawless result.

