

Why does a professional cabinet finish that cost $6,500 start peeling, sticking, or yellowing in less than twelve months? The answer isn’t bad luck; it’s a forensic breakdown in the Prep-Product-Environment triad that governs every successful coating. This cabinet painting failure analysis uncovers the specific reasons your investment might be flaking away, especially when 85% of your project cost was likely spent on labor. You chose to paint your cabinets to refresh your kitchen, but a failed finish creates a sticky, unsightly mess that’s harder to fix than the original wood.
By reading this guide, you’ll learn to spot the root causes of paint failure and how to ensure a factory-quality finish that remains durable for a decade. You’ll gain the confidence to look past a low-ball estimate and understand the science of proper adhesion. We’ll examine the critical importance of bonding primers, explore why 96% of 2026 projects favor matte or satin finishes, and provide a professional checklist to vet any contractor before they touch your kitchen doors.
Key Takeaways
- Identify why most cabinet finishes fail within the first 24 months due to the high-stress kitchen environment of heat, grease, and moisture.
- Utilize this cabinet painting failure analysis to recognize that 90% of finish breakdowns result from errors made during the first two hours of a project.
- Learn how to perform a “Fingernail Test” and use visual diagnostics to pinpoint exactly where a previous application’s adhesion or film integrity failed.
- Understand why a failing finish requires aggressive recovery rather than a simple topcoat and how to choose the right path for a permanent fix.
- Discover the long-term durability benefits of KCMA-rated coatings and why a foundation-first “Forensic Prep” system is non-negotiable for a professional result.
The Anatomy of Cabinet Painting Failure
In the world of professional refinishing, a cabinet painting failure analysis begins by defining the lifespan of a finish. We define failure as any significant loss of adhesion, film integrity, or color stability that occurs within the first 24 months of application. While a bedroom wall might look fine for a decade, cabinets are high-traffic machinery. When a finish starts to flake around the handles or peel in sheets, it’s a sign that the fundamental bond has been compromised. The psychological toll is heavy. Homeowners who spend the national average of $4,000 on a professional job feel a deep sense of betrayal when their kitchen looks worse than it did before the upgrade.
Your kitchen is a hostile environment for standard coatings. Between the high heat from stovetops, constant grease splatter, and the mechanical wear of doors slamming, the paint film is under constant assault. Using “wall paint” or standard latex on cabinets is the most common mistake. These products lack the block resistance needed to prevent doors from sticking and don’t have the chemical resistance to withstand skin acids or degreasers. It’s a recipe for disaster.
To see exactly how a professional identifies and corrects these common mistakes, watch this forensic breakdown:
The Difference Between Adhesion and Cohesion
A durable finish requires more than just a surface-level coat; it needs a mechanical and chemical bond. Adhesion is the paint’s ability to “bite” into the substrate, while cohesion is the internal strength of the paint film itself. Sanding creates a profile for mechanical grip, but without the right chemical bond, the paint will eventually shear off. Professionals use standard paint adhesion tests to determine if a coating has truly fused with the wood. Inter-coat adhesion refers to the specific bond between the primer and the topcoat, which is vital for preventing delamination between layers.
Why Cabinets Are Not Just ‘Vertical Walls’
Treating cabinets like vertical walls ignores the biological and physical realities of wood. Skin acids from fingers and harsh cleaning chemicals can dissolve low-quality finishes over time. Beyond that, wood is a living material. It expands and contracts with humidity changes. If a coating is too brittle, it will crack at the joints as the wood moves. Bridging the gap between a field application and a factory finish requires specialized KCMA-rated coatings. These are engineered for specific movement and chemical exposure. Without them, the finish won’t survive the daily rigors of a modern kitchen.
The ‘Big Three’ Root Causes of Finish Breakdown
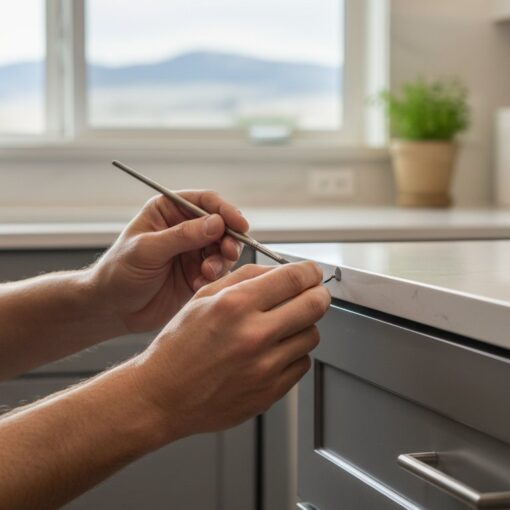
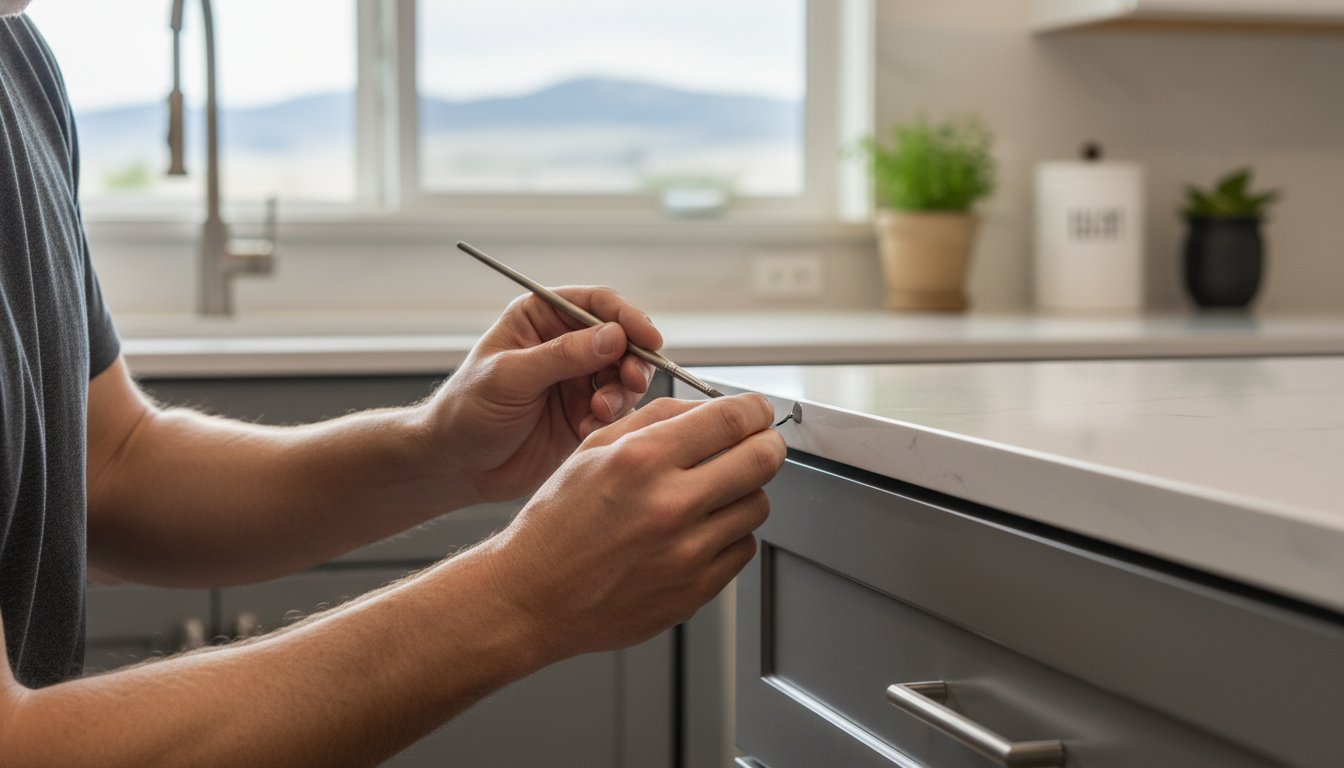
Every cabinet painting failure analysis eventually leads back to a breakdown in one of three areas: preparation, product selection, or environmental control. While many homeowners assume the topcoat is the most important factor, 90% of finish failures are actually rooted in the first two hours of the project. This is when the foundation is laid. If the surface isn’t chemically and mechanically prepared to receive a new coating, even the most expensive industrial finish will eventually peel. Many “professional” painters fail because they treat cabinets like drywall, using standard brushes and rollers instead of high-volume, low-pressure (HVLP) sprayers that provide a factory-smooth, level film.
Avoid the “all-in-one” products that promise to skip the priming or sanding phases. These coatings often prioritize convenience over chemistry. They lack the specialized resins required to withstand the 20 to 50 daily “open and close” cycles a typical kitchen cabinet endures. Without a dedicated bonding agent, these products essentially sit on top of the old finish rather than becoming part of it. If you’re unsure if your current finish is salvageable, consulting with a specialist in cabinet refinishing can prevent a costly redo.
Preparation Failures: Beyond the Surface
Inadequate degreasing is the silent killer of adhesion. Kitchen cabinets are coated in invisible layers of aerosolized cooking oils and skin acids that standard cleaners won’t touch. If these aren’t removed with a professional-grade degreaser, the paint will slide right off. Furthermore, skipping the deglosser is a critical error. You must break the existing factory seal to create a profile for the new paint. Even microscopic dust particles left behind can prevent the primer from making contact with the wood, resulting in a “sandpaper” texture that eventually flakes away.
Product Compatibility: The Chemistry of Failure
Tannin bleed is a frequent issue when using water-based primers on woods like oak or cherry. Without a shellac-based or high-solids primer, the natural oils in the wood will seep through, creating yellow or brown stains that ruin a white finish. This is why understanding the U.S. Forest Service’s Wood Handbook is so vital for professionals; it details how wood moisture and extractives interact with modern coatings. Many painters also fall into the “Latex Trap.” They use flexible house paint that never fully cures. When the doors hit the frames, the soft paint sticks and then rips away, a failure known as poor block resistance. A true chemical “handshake” between the primer and topcoat is the only way to ensure the layers don’t delaminate under stress.

Forensic Symptom Guide: Identifying the Culprit
Identifying why a finish failed requires looking at the damage like a crime scene. A professional cabinet painting failure analysis often starts with a simple “Fingernail Test.” If you can scrape the paint away with light pressure from a thumbnail, the bond never formed. Some failures show up within 48 hours, while others, like tannin bleed, might take six months to emerge as the wood reacts to its environment. By mapping these visual symptoms to specific procedural errors, you can determine if a contractor cut corners or if the wrong product was used for the job.
Peeling, Chipping, and Flaking
When paint peels away in large, flexible sheets, it’s the classic sign of zero surface preparation. This happens when the new coating sits on top of old grease or a factory gloss without any mechanical profile to grab onto. Chipping at the edges usually points to a failure of film hardness or the complete absence of a durable topcoat. Blocking occurs when the paint film remains soft, causing the doors to fuse to the frames and pull the finish off when they are opened. This is a common result of using standard latex paint instead of a specialized cabinet coating.
Discoloration, Yellowing, and Staining
Yellowing is a frequent chemical reaction seen in older oil-based topcoats, which naturally amber as they age. If you see blotchy brown or yellow stains appearing through a fresh white finish, you’re witnessing tannin migration. This occurs when a non-sealing primer fails to block the natural oils in woods like oak or cherry. In Colorado, Denver’s intense sun and high UV exposure can also cause low-quality pigments to fade or shift color in as little as 90 days. Professional cabinet painting failure analysis shows that only high-solids, UV-resistant coatings can maintain color stability in these conditions.
Sticky, Tacky, or Gummy Finishes
The “Never-Dry” syndrome is almost always caused by chemical interference. If old wax or furniture polish wasn’t fully removed during the cleaning phase, the new paint will remain tacky for weeks. Environmental factors also play a role. If the temperature was below 50 degrees or the humidity was too high during application, the curing cycle is permanently disrupted. Over-application is another hidden culprit. When too much paint is applied in a single pass, the surface “skins over” and prevents the bottom layers from ever hardening, leaving you with a gummy finish that is easily damaged by a single touch.
Prevention and Recovery: How to Fix a Failed Job
Fixing a failed finish is significantly more labor-intensive than doing it right the first time. The hard truth is that you cannot simply paint over a failing finish. If the base layer has lost its bond, any new paint applied on top will eventually pull that layer away from the wood. A proper cabinet painting failure analysis at this stage usually reveals that the only path forward is aggressive removal of the compromised material. Whether that means total chemical stripping or hours of intensive mechanical sanding depends on how deep the failure goes. If your doors are currently peeling in sheets, adding more weight with a fresh coat only accelerates the delamination process.
In Denver’s unique climate, recovery also requires managing the “altitude factor.” Our high-altitude, low-humidity environment, which often sees humidity levels drop below 15% in the winter, means coatings dry much faster than they do at sea level. This can be a double-edged sword. While it speeds up the production schedule, it can cause the surface of the paint to “skin over” before the solvents have fully escaped. This leads to brittle finishes that crack under the stress of wood movement. Professionals must use specific application techniques to ensure the film cures evenly from the bottom up. If you are struggling with a finish that’s already failing, it’s time to seek a professional evaluation before more damage occurs.
The Professional Recovery Process
When a finish has completely failed, chemical stripping is often the only way to return to a raw, stable substrate. This process removes the layers of incompatible house paint or failed lacquer that are preventing a new bond. Once the wood is clean, we use high-solids, stain-blocking primers. Shellac-based or solvent-based primers are non-negotiable for recovery work because they provide the chemical “bite” needed to seal the wood and prevent future tannin migration. For a deeper look at the steps involved in a successful turnaround, consult our Cabinet Refinishing Guide.
Questions to Ask Your Next Cabinet Painter
Vetting a contractor’s failure prevention protocol is the best way to avoid a repeat disaster. Don’t settle for vague promises of “good prep.” Ask these specific questions to ensure they understand the science of cabinet painting failure analysis:
- What specific degreaser and deglosser do you use? If they only use soap and water, they aren’t removing the skin oils and waxes that kill adhesion.
- Are you using architectural paint or industrial wood coatings? Demand KCMA-rated products like Benjamin Moore Advance or Sherwin-Williams Gallery Series rather than standard wall paint.
- What is your protocol for managing dust during the spraying phase? A professional should use HEPA-filtered vacuums and sealed plastic containment to prevent microscopic particles from ruining the film’s integrity.
The Cabinet Painting Denver Standard: Guaranteed Adhesion
At Cabinet Painting Denver, we approach every project as a scientific endeavor rather than a simple cosmetic upgrade. Our proprietary “Forensic Prep” system is built on the reality that 70% of a long-lasting finish is created before the first drop of paint ever touches the wood. While the national average for labor costs sits at 85% of the total project price, we allocate a significant portion of that time specifically to the foundation. This meticulous focus is why we can confidently offer a cabinet painting failure analysis that proves our finishes outlast standard field applications. We don’t just paint; we engineer a bond that withstands the unique pressures of a high-use kitchen.
A major differentiator in our standard is the exclusive use of KCMA-rated (Kitchen Cabinet Manufacturers Association) coatings. These aren’t just high-end house paints. They are industrial-grade finishes tested to survive 24 hours of exposure to vinegar, lemon juice, and orange juice without staining or softening. By utilizing products like the Sherwin-Williams Gallery Series or Benjamin Moore Advance, we ensure that your cabinets have the chemical resistance and block resistance required to prevent the “sticky door” syndrome that plagues so many low-bid projects. Denver homeowners often turn to us to fix failures from other “professionals” who used sub-standard materials that couldn’t handle the daily mechanical wear of a busy household.
Our Multi-Step Preparation Protocol
Our triple-cleaning process is designed to remove 100% of kitchen contaminants, including hidden grease and wax that standard cleaners miss. We follow this with precision sanding to create the perfect mechanical profile. We then apply high-performance bonding primers specifically chosen for your wood species to prevent tannin bleed or delamination. You can learn more about the specific steps we take in Cabinet Painting Denver’s Process. This level of detail ensures that the inter-coat adhesion remains rock-solid for years to come.
Denver’s Local Specialists
Colorado’s atmospheric conditions require a specialized touch. With humidity levels often dipping below 15% in the winter, we adapt our spray techniques and curing protocols to ensure the paint film doesn’t “skin over” too quickly and trap solvents. We utilize a specialized off-site spray booth for all doors and drawer fronts. This controlled environment eliminates the risk of dust contamination and allows for a factory-level cure that is impossible to achieve in a residential kitchen. Because we understand the local climate so well, we provide a local warranty that covers both adhesion and film integrity. Don’t settle for a finish that might fail in a year. Get your free failure-proof cabinet quote in Denver today and invest in a kitchen transformation that lasts.
Secure Your Kitchen Investment with Forensic Precision
Successful cabinet refinishing isn’t a matter of luck; it’s the result of mastering the chemistry between the wood and the coating. By understanding the cabinet painting failure analysis provided here, you’re now equipped to look past surface-level aesthetics and demand a foundation built for the long haul. Remember that 90% of finish failures are preventable in the first two hours of preparation. Whether it’s managing Denver’s low humidity or ensuring inter-coat adhesion, every detail counts toward a factory-quality result.
Our team has served as local Denver experts since 2026, delivering Red Dot-level finish quality through the exclusive use of KCMA-rated industrial coatings. We don’t just hide old wood; we transform it into a durable, easy-to-clean surface that withstands the rigors of daily life. If you’re ready to move past the frustration of sticky doors and peeling paint, it’s time for a professional approach. Request a Free Cabinet Inspection & Quote today to ensure your kitchen transformation is done right the first time. You deserve a kitchen that reflects your style without the worry of premature wear.
Frequently Asked Questions
Why is my cabinet paint still sticky after two weeks?
Sticky paint is usually the result of chemical interference from residual kitchen grease or wax that wasn’t fully removed. If the surface wasn’t cleaned with a professional-grade degreaser, these oils prevent the paint from ever reaching its full hardness. In Denver’s low-humidity climate, this can also happen if the coating was applied too thick, causing the surface to “skin over” while the bottom layers remain gummy and uncured.
Can I just sand down the peeling areas and repaint them?
Patching specific peeling spots is rarely a permanent solution because it doesn’t address the underlying bond failure. If one area is delaminating, it’s a strong indicator that the entire surface has a compromised foundation. A thorough cabinet painting failure analysis usually reveals that the only way to ensure a decade of durability is to strip the failing layers back to a stable substrate and start the preparation process over.
Does the type of wood affect how likely the paint is to fail?
Wood species significantly impacts finish longevity, particularly with high-tannin woods like oak, which 15% of 2026 homeowners chose for their kitchens. These open-grain woods require shellac-based primers to prevent natural oils from seeping through and ruining the finish. Without specialized primers, the natural acids in the wood will eventually push the paint off the surface, leading to premature flaking.
Is it normal for cabinet paint to chip around the knobs and handles?
Chipping around handles is a sign of chemical breakdown caused by constant contact with skin oils. Human hands carry acids that soften standard architectural paints over time, leading to a gummy texture that eventually chips away. Industrial-grade coatings are engineered to resist these oils, ensuring the finish remains intact even with the 50 or more daily touches a typical kitchen cabinet receives.
Why are my white cabinets turning yellow near the stove?
Yellowing near heat sources is typically caused by heat-accelerated oxidation or tannin migration. While white cabinets remain a top choice for 28% of renovating homeowners, older oil-based coatings naturally amber as they age. High heat from a stovetop speeds up this chemical reaction. Modern waterborne alkyd paints, however, are designed to remain color-stable and resist this yellowing even in high-heat environments.
What is the difference between cabinet paint and regular wall paint?
The primary difference lies in resin hardness and block resistance. Wall paint is designed to be flexible to hide drywall imperfections, but this flexibility makes it too soft for cabinets. Cabinet-specific coatings meet KCMA standards, meaning they create a rigid, durable film that won’t stick to the frames when doors are closed. Wall paint lacks this “block resistance,” which is why it often peels when you open a door.
How long should a professional cabinet paint job actually last?
A professional cabinet finish should last between 8 and 10 years with normal use and maintenance. While we define a technical failure as any damage occurring within the first 24 months, a factory-quality application provides a decade of service. This lifespan is achieved by using industrial sprayers and high-solids coatings that are significantly more durable than the products available at local big-box hardware stores.
Can I fix a failed cabinet paint job myself, or do I need a pro?
Fixing a failed job is significantly more difficult than the initial application and almost always requires professional equipment. A cabinet painting failure analysis often shows that recovery involves chemical strippers and specialized HVLP sprayers to achieve a smooth finish. Attempting a manual DIY fix on a failed job often results in uneven textures and recurring adhesion issues that can’t be solved with a simple brush and roller.

