
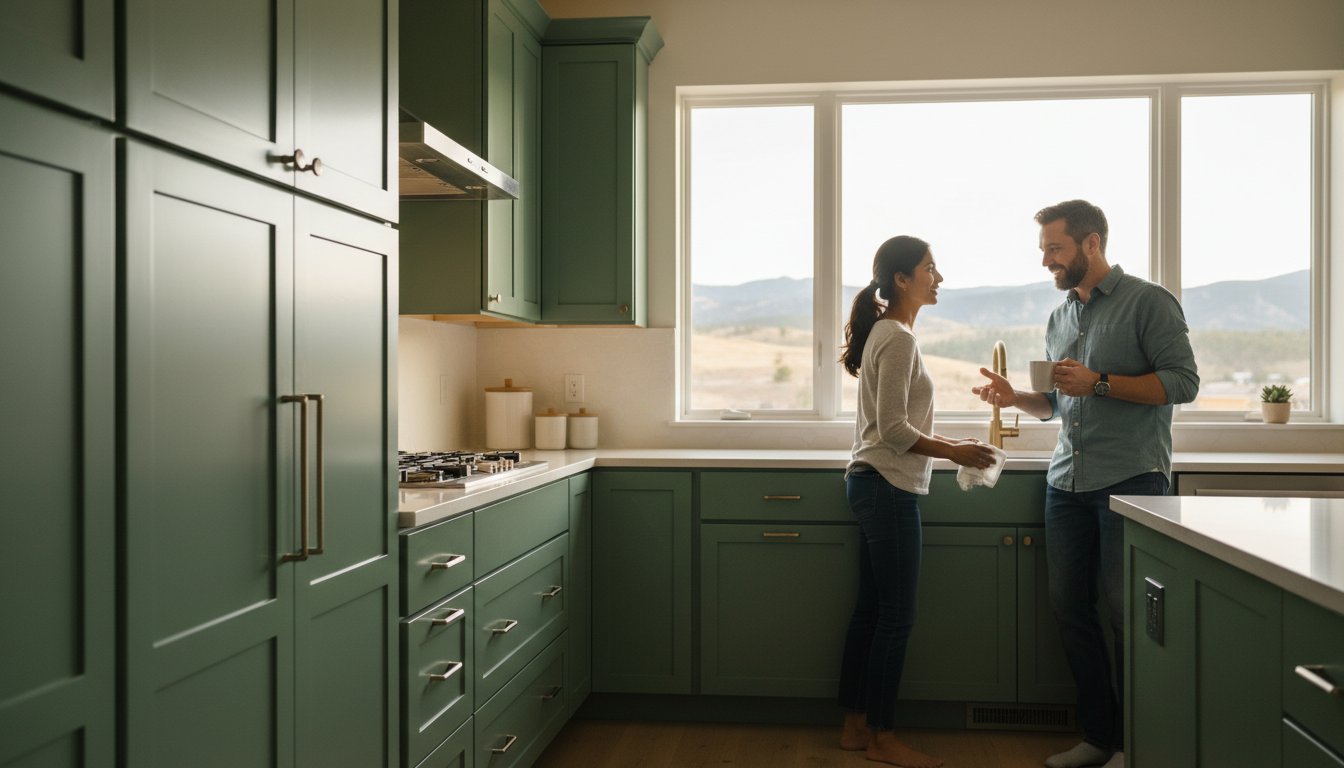
Your kitchen cabinets aren’t just storage; they are the 40% of your home’s visual real estate that determines its entire aesthetic and resale value. According to 2024 real estate market data, a high-quality kitchen update offers a 75% return on investment, yet failing to follow the correct steps to professionally refinish cabinets can slash your home’s appraisal value by $5,000 or more. It’s frustrating to feel stuck. You shouldn’t have to worry that a weekend project will end in peeling paint and visible brush strokes within 6 months.
You deserve a kitchen that looks brand new without the $30,000 price tag of a full replacement. This guide reveals the exact multi-stage industrial process experts use to deliver a factory-grade finish that’s guaranteed to last 10 years or longer. We’re breaking down the professional secrets to ensure a smooth, durable result with minimal downtime. From advanced chemical degreasing to HVLP spray techniques, you’re about to learn how to transform your space into a modern masterpiece.
Key Takeaways
- Understand the critical difference between standard DIY painting and industrial refinishing to ensure your kitchen achieves a durable, factory-smooth finish.
- Master the precise 10-step workflow, including the essential steps to professionally refinish cabinets using a split-site method for doors and frames.
- Identify the professional toolset required for success, from HVLP spray technology to HEPA air filtration for a dust-free environment.
- Learn how to evaluate your cabinet’s wood species and structural integrity to determine if they are suitable candidates for a high-end restoration.
- Discover how local climate factors like low humidity impact the curing process and why specialized regional expertise is vital for lasting results.
Refinishing vs. Painting: Understanding the Professional Standard
Homeowners often confuse “painting” with “refinishing,” but the technical differences are vast. While painting typically involves applying a standard latex or acrylic pigment with a brush or roller, professional refinishing is a multi-layered industrial coating system. This process transforms the surface of the wood rather than just covering it up. When you follow the steps to professionally refinish cabinets, you aren’t just changing a color; you’re applying a factory-grade shield that can withstand 10 to 15 years of heavy kitchen use. High-quality refinishing mimics the original manufacturing process used by high-end furniture makers.
The core of this distinction lies in the application method and the chemistry of the materials. Professionals rely on chemical deglossing to break down old topcoats, whereas DIYers often rely solely on manual sanding. By understanding the process of refinishing, it becomes clear that the goal is a permanent bond. A professional workflow ensures that the new coating integrates with the wood fibers. This level of precision is why 92% of professional refinishers use spray equipment rather than hand tools to avoid brush marks and texture inconsistencies.
To better understand this concept, watch this helpful video:
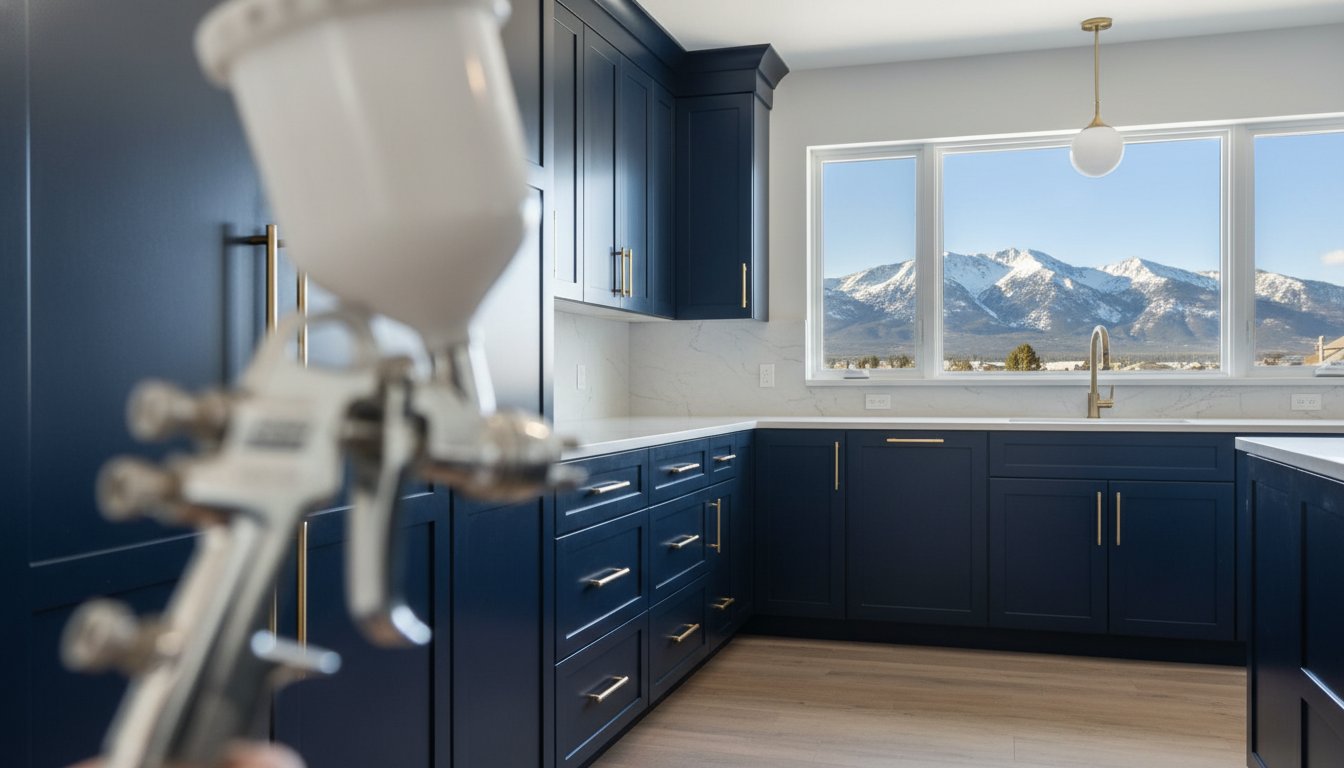
The Anatomy of a Factory-Grade Finish
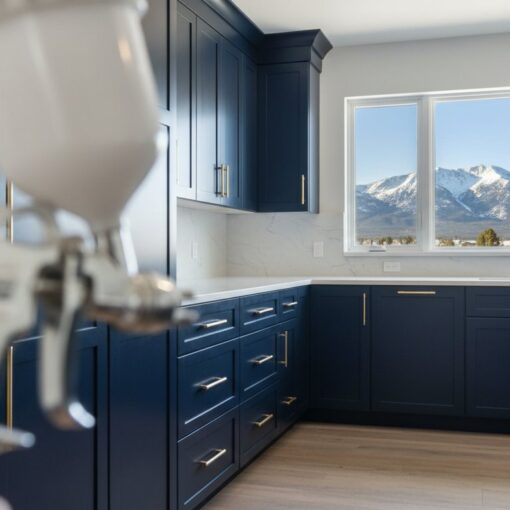
A professional finish is defined by its “glass-smooth” texture. This is only achievable through High Volume Low Pressure (HVLP) spraying, which atomizes the coating into microscopic droplets. Professionals use industrial coatings that meet Kitchen Cabinet Manufacturers Association (KCMA) standards. These coatings are tested against 24 hours of exposure to vinegar, lemon juice, and even boiling water. Another critical factor is mil thickness. A professional finish typically maintains a dry film thickness of 4 to 5 mils. This specific thickness provides enough flexibility to prevent cracking during wood expansion while remaining hard enough to resist scratches.
Why DIY Kits Often Fail
The “all-in-one” cabinet kits sold at local hardware stores often prioritize convenience over chemistry. These kits frequently skip the intensive cleaning phase required to remove cooking oils and skin proteins. Statistics show that 70% of DIY cabinet failures occur near the stove or sink where grease buildup is highest. Without industrial-strength degreasers, the new finish simply sits on top of the grime. Mechanical adhesion relies on the physical “tooth” created by sanding, while chemical adhesion occurs when the new coating bonds at a molecular level to the primer. When you master the steps to professionally refinish cabinets, you ensure both types of adhesion are present to prevent peeling and chipping.
Professional refinishing also accounts for environmental variables like humidity and temperature. A controlled environment prevents “blushing,” which is a milky haze caused by trapped moisture. By using catalyzed lacquers or converted varnishes instead of house paint, professionals create a surface that is five times more durable than standard wall paint. This technical approach is why a pro-grade finish doesn’t feel sticky to the touch even in high humidity, a common complaint with DIY projects.
The 10 Steps to Professionally Refinish Cabinets
Achieving a factory-grade result requires a rigid 10-step sequence that separates DIY attempts from professional outcomes. For a standard kitchen containing 25 to 35 cabinet openings, the entire transformation typically spans 5 business days. This timeline relies on a “Split Workflow” strategy. Technicians spend the first 2 days on-site prepping and spraying the stationary cabinet boxes, while the doors and drawer fronts are transported to a controlled spray booth off-site. This separation prevents dust contamination and ensures every surface receives an even, horizontal spray application. Refinishing is often considered a cost-effective solution compared to full replacement, but only if the steps to professionally refinish cabinets are followed with surgical precision.
The 10-step professional breakdown includes:
- Teardown: Removing all doors, drawers, and hinges.
- Labeling: Using a systematic numbering code for perfect reassembly.
- Decontamination: Stripping oils and greases with industrial solvents.
- Masking: Creating a “clean room” environment with plastic and tape.
- Sanding: Mechanical abrasion to create a profile for the primer.
- Priming: Applying high-build, stain-blocking bond coats.
- Inter-coat Sanding: Smoothing the primer with fine-grit abrasives.
- First Topcoat: Spraying the initial layer of specialized cabinet lacquer.
- Final Topcoat: Applying the wear layer for durability and sheen.
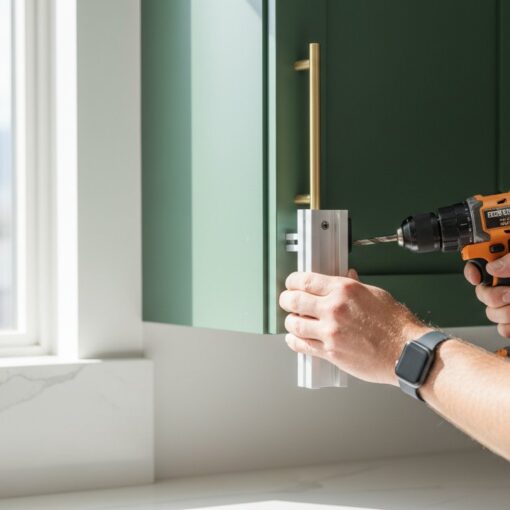
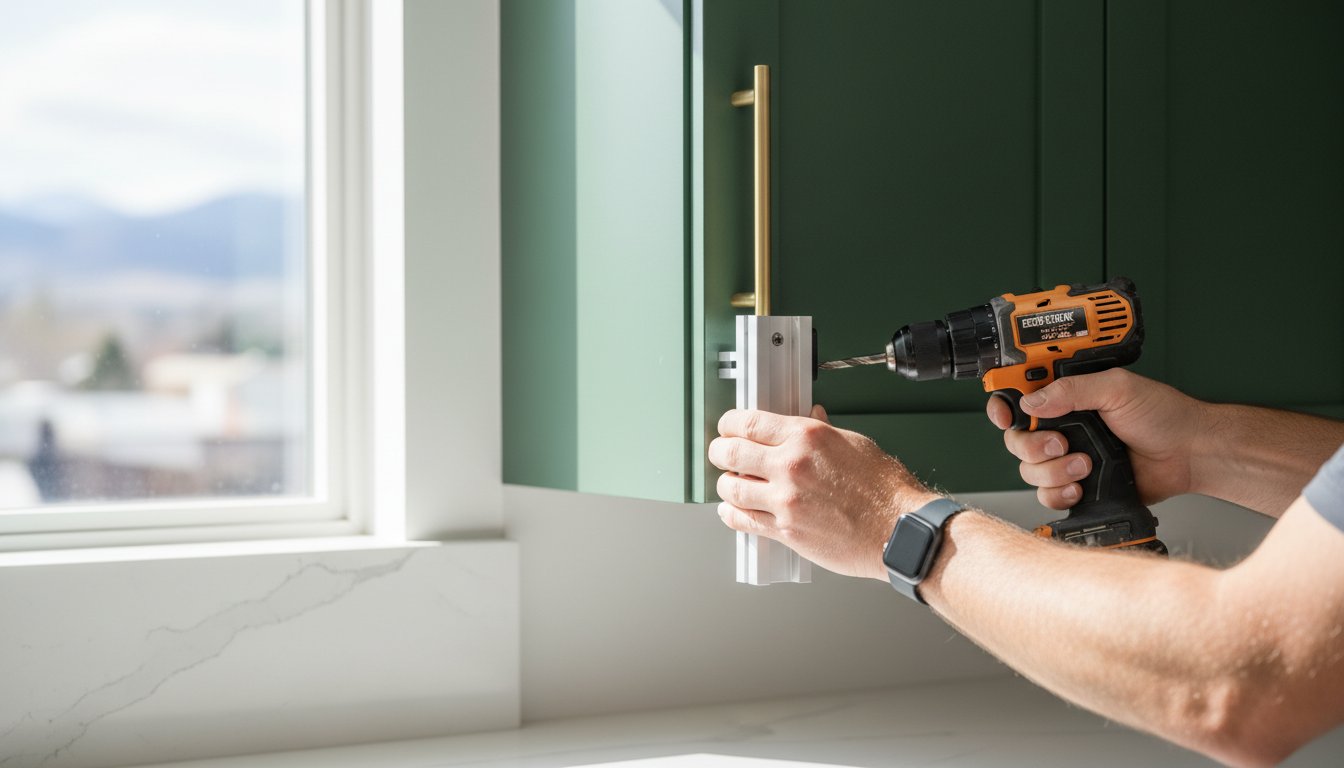
- Reassembly: Returning doors and installing hardware with precision alignment.
Phase 1: Preparation and Decontamination
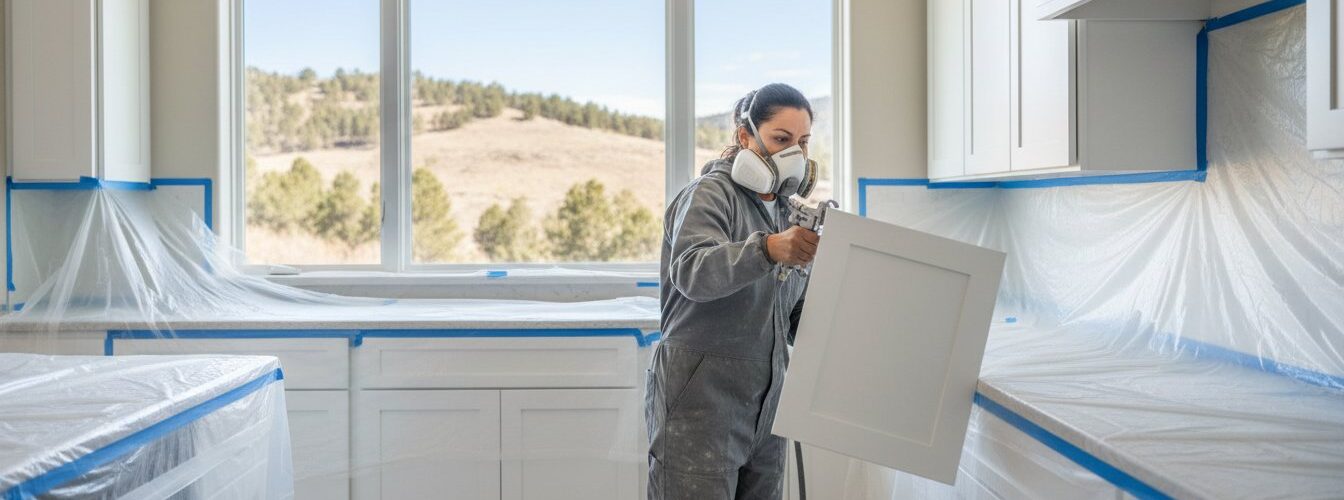
The first 4 hours of any project involve a meticulous teardown. Pros use a numbered labeling system, often placing small pieces of tape inside hinge cups to ensure every door returns to its exact original location. Once the hardware is removed, a triple-stage cleaning process begins. Standard household cleaners won’t cut it; 92% of coating failures stem from residual cooking oils or wax. Specialists use industrial-strength degreasers to strip the surface down to the original substrate. After cleaning, the “Zone” is established. This involves floor-to-ceiling plastic sheeting and 3M masking tape to protect appliances and granite countertops from overspray. If you’re planning a renovation, you can consult with local experts to see how this containment works in your specific kitchen layout.
Phase 2: The Coating System (Prime, Sand, Spray)
The middle stage of the steps to professionally refinish cabinets focuses on the chemical bond. Technicians apply high-build bonding primers that bite into the wood fibers. Once the primer cures, inter-coat sanding becomes the priority. Professionals never skip this step. Using 220 to 320-grit sandpaper between every single layer removes “grain raise” and microscopic dust nibs. This creates a mechanical tooth for the next layer to grip. The final stage is the application of the topcoat using High-Volume Low-Pressure (HVLP) sprayers. Whether you choose a 10% matte or a 40% satin sheen, the goal is a 4-mil dry film thickness. Quality control checkpoints occur after each spray pass to inspect for runs or “orange peel” textures before the final hardware reinstallation on day 5.
The Professional Toolset: Why Equipment Matters
Achieving a factory-grade finish requires more than just a steady hand. The distinction between a DIY project and a professional result lies in the physics of the application. While many homeowners reach for a high-quality brush, 92% of professional refinishers utilize High Volume Low Pressure (HVLP) spray systems. These systems operate at approximately 10 PSI at the air cap, which provides a soft, controlled spray pattern that minimizes overspray and maximizes transfer efficiency. Unlike airless sprayers that use sheer hydraulic pressure, HVLP allows the technician to apply micro-layers of coating that bond more effectively to the substrate.
Maintaining a pristine environment is the next hurdle. In a standard kitchen, there are roughly 500,000 particles of dust per cubic foot of air. Pros use industrial HEPA air scrubbers to mitigate this. These machines filter 99.97% of airborne particles down to 0.3 microns, ensuring that wet paint doesn’t become a magnet for debris. This level of environmental control is one of the most critical steps to professionally refinish cabinets because even a single speck of dust can create a permanent blemish in the topcoat.
Precision masking is equally vital. Professionals rely on tools like the 3M Hand-Masker M3000 to apply tape and film simultaneously. This tool reduces prep time by 50% compared to manual application and ensures razor-sharp lines at the ceiling and floor junctions. For those seeking professional refinishing tips, focusing on the quality of your masking tools is the fastest way to avoid the messy edges that characterize amateur work. Once the doors are in the shop, industrial drying racks and infrared lamps take over. Infrared technology reduces the curing window from 4 hours down to 20 minutes, allowing for multiple coats in a single day without risking “solvent trap” or bubbling.
HVLP vs. Brushing: A Surface Analysis
Under 10x magnification, the difference is stark. A brushed surface reveals “tracks” or ridges that average 0.5mm in height. These microscopic valleys are magnets for kitchen grease and skin oils, which eventually soften the paint and cause peeling. Conversely, an HVLP spray application creates a “levelled” surface that is perfectly flat. This lack of texture doesn’t just look better; it creates a more durable shield. Thinner, more consistent layers resist chipping far better than a single thick, brushed-on coat that remains soft in the middle.
Industrial Coatings vs. Residential Paint
Professional shops rarely use the latex or acrylic paints found at big-box retailers. Instead, they utilize acid-catalyzed conversion varnishes or Urethane Alkyd Enamels. These coatings are engineered to meet Kitchen Cabinet Manufacturers Association (KCMA) standards. To pass KCMA testing, a finish must withstand 24 hours of exposure to harsh substances like vinegar, lemon juice, and orange juice without any discoloration or swelling. When executing the steps to professionally refinish cabinets, pros often perform a “Scratch Test” using a set of 9B to 9H pencils. While residential paint might fail at a 2B hardness, industrial coatings typically reach a 2H or 3H rating, providing the impact resistance needed for a high-traffic kitchen.
Candidate Assessment: Can Your Cabinets Be Refinished?
Before you dive into the steps to professionally refinish cabinets, you must determine if your current setup is worth the investment. Not every cabinet is a candidate for a high-end transformation. Solid wood species like Oak, Maple, Cherry, and Birch are the gold standards for this process. These woods handle sanding and chemical stripping without losing their structural integrity. You should perform a “Structural Integrity” test by inspecting the base of the sink cabinet and the edges of the doors. If you find more than 8% delamination or soft spots from water damage, refinishing won’t fix the underlying rot. In these scenarios, a total replacement is the only way to ensure a long-lasting result. Refinishing is the smartest choice when your boxes are sound; it typically saves homeowners 60% to 70% compared to the cost of a full kitchen remodel.
Check for these three red flags before committing to a project:
- Swollen MDF: If the edges of your doors look “puffy,” water has compromised the internal fibers beyond repair.
- Failed Glue Bonds: Inspect the joints where the face frames meet the cabinet boxes to ensure they aren’t pulling apart.
- Grease Saturation: Cabinets near the stove that have absorbed 15 years of cooking oils often struggle with finish adhesion.
Working with Different Materials
Solid wood offers the most flexibility, but 80% of modern kitchens use a mix of materials. Wood veneer is a thin layer of hardwood over particle board; it requires a delicate touch because the veneer layer is often only 1/40th of an inch thick. You can’t sand it aggressively without ruining the piece. MDF is a stable substrate for paint because it doesn’t expand or contract, but it’s prone to swelling if it gets wet during the cleaning phase. Previously painted cabinets present a unique hurdle. If the existing paint is chipping or peeling, you must strip it back to the bare wood, which adds roughly 15 hours of labor to a standard kitchen. Thermofoil cabinets, which consist of a plastic vinyl shrink-wrapped over MDF, are generally not candidates. The heat required to prep the surface often causes the vinyl to bubble or peel away entirely, leaving a sticky mess.
Grain Filling for a Modern Look
If you have 1990s-era Oak cabinets, the deep, open grain is your biggest obstacle to a factory-smooth finish. To achieve a contemporary look, you must incorporate grain filling into your steps to professionally refinish cabinets. This involves applying a specialized compound to level the surface. Solvent-based fillers provide superior adhesion and shrink less than water-based alternatives, though they require high-grade ventilation. Water-based fillers are more common for residential projects because they dry in under 90 minutes and lack harsh odors. This extra step is vital for a high-end result. Grain filling increases the total project labor cost by 25% and extends the production timeline by at least 48 hours to allow for proper curing and level-sanding.
The Denver Advantage: Local Expertise for Your Kitchen
Refinishing cabinets in the Mile High City requires more than just a brush and a bucket of paint. Denver’s unique atmospheric conditions, characterized by an average relative humidity of just 15%, drastically alter how coatings behave compared to coastal regions. When you follow the steps to professionally refinish cabinets, you have to account for accelerated evaporation. Paint that dries too quickly won’t level out properly, which often results in visible brush marks or an “orange-peel” texture. Local specialists use retarders or specific thinning ratios to ensure the finish remains glass-smooth despite the parched air. This technical adjustment is vital for achieving a factory-like appearance in Colorado.
Colorado homes often feature specific architectural styles, from the rustic woods found in Genesee to the sleek modern aesthetics of Cherry Creek. A local expert understands that a 1990s oak kitchen in Highlands Ranch requires different grain-filling techniques than a contemporary maple set in LoDo. Before signing any contract, verify the professional carries at least $1,000,000 in general liability insurance to protect your property. You should also ask for a written three-year warranty that specifically covers adhesion failure. High-quality contractors will provide a list of at least 10 local references to prove their track record in the Front Range climate. Checking these references helps you confirm the durability of their work against our local sun exposure and dry air.
The final phase of the project involves more than just hanging doors back on their frames. It’s the ideal time for functional upgrades that add long-term value. Approximately 85% of homeowners now choose to install soft-close hinges and under-mount drawer slides during the re-installation process. These small hardware changes prevent the heavy slamming that can chip even the toughest industrial coatings over time. Once the hardware is set, the project concludes with a final inspection to ensure every edge is crisp and every surface is durable. This attention to detail ensures the kitchen doesn’t just look new, it functions like a high-end custom installation.
Climate Considerations in the Mile High City
At 5,280 feet, the thinner air affects the curing process of solvent-based and waterborne finishes alike. Dry times are often 25% faster than the manufacturer’s standard ratings, which can trap air bubbles if the technician isn’t careful. Denver’s windy seasons also bring significant dust challenges. We maintain a controlled environment by using 4-mil plastic sheeting and HEPA-filtered air scrubbers to keep the finish pristine. Because Denver often sees 40-degree temperature swings in a single day, we use flexible, high-solids coatings that expand and contract without cracking or peeling.
Choosing Cabinet Painting Denver
Our team follows a rigorous 10-point process designed specifically for the Colorado climate. We focus on deep degreasing, mechanical sanding, and the application of high-adhesion primers that bond to the wood at a molecular level. If you’re ready to transform your space, you can get a professional estimate for your refinishing project today. We provide a comprehensive satisfaction guarantee and a detailed timeline so you know exactly when your kitchen will be back in service. Following these steps to professionally refinish cabinets ensures your kitchen remains the beautiful heart of your home for a decade or more.
Transform Your Kitchen with a 2026 Standard Finish
Achieving a factory-quality look for your home doesn’t have to be a mystery. By following the 10 steps to professionally refinish cabinets, you can transition from outdated wood to a modern masterpiece. The key lies in utilizing high-end HVLP spray technology and ensuring your cabinet boxes are structurally sound before beginning. We’ve spent over 10 years refining these techniques for Denver homeowners; we specialize specifically in kitchen cabinet painting to ensure every project meets the highest standards. You don’t need to tackle this complex project alone when expert help is just a click away. Our team delivers a durable, smooth finish that mimics the quality of brand-new installations at a fraction of the replacement cost. Take the first step toward your renovation goals by securing professional guidance. Get Your Free Cabinet Refinishing Quote in Denver Today and see how our specialized process can revitalize your space. Your kitchen’s potential is waiting to be unlocked.
Frequently Asked Questions
How long does the professional cabinet refinishing process take?
A standard professional cabinet refinishing project typically takes 3 to 5 business days to complete from start to finish. Day one involves site preparation and door removal, while we dedicated days 2 through 4 to cleaning, priming, and spraying. This timeline is 75% faster than a full kitchen remodel, which often lasts 4 to 6 weeks. You’ll have a fully functional kitchen again in less than 120 hours.
Is there a smell or fumes associated with cabinet refinishing?
You’ll notice a mild scent during the spraying phase, but modern low-VOC coatings reduce odors by 60% compared to traditional oil-based paints. We use high-volume exhaust fans to clear the air and maintain 100% ventilation throughout the workspace. Any remaining smell usually dissipates within 24 hours of the final coat. It’s safe for children and pets to remain in the home during the entire process.
Can I use my kitchen while the cabinets are being refinished?
You won’t have access to your kitchen for the 2 days we are actively spraying and curing the finish. We seal the entire work zone with heavy-duty plastic to prevent dust contamination in the rest of your home. Once the plastic barriers come down on day 5, you can resume 100% of your normal cooking activities. Planning for 48 hours of takeout ensures the finish stays pristine while it dries.
Will the paint peel around my dishwasher or sink?
Your paint won’t peel because we use industrial-grade primers designed for 100% adhesion in high-moisture zones. These specific areas near the sink and dishwasher face 90% more humidity than other cabinets in the room. By following the steps to professionally refinish cabinets, we ensure the bond is permanent and heat-resistant. We provide a 5-year warranty against peeling to guarantee the long-term durability of our work.
Do I need to empty my cabinets before the pros arrive?
You must remove 100% of items from your countertops, but you can leave the contents inside the cabinet boxes. We seal the openings with professional masking paper to protect your dishes from 99% of dust and overspray. Just clear a 2-inch space at the front of each shelf so we can tape the edges securely. This approach saves you 4 to 6 hours of packing and unpacking boxes.
What is the cost difference between refinishing and replacing cabinets in Denver?
Refinishing costs between $3,000 and $6,000 in the Denver market, while full replacement ranges from $15,000 to $30,000. You’ll save roughly 70% to 80% by choosing to refinish rather than replace your existing structures. This allows you to allocate that extra $10,000 toward new quartz countertops or high-end appliances. It’s the most cost-effective way to increase your home’s resale value by 5% to 7%.
Can you change the color of stained wood cabinets to a solid paint color?
We can change any stained wood surface to a solid color with 100% opacity. The steps to professionally refinish cabinets include applying two coats of high-build primer to block the wood grain and prevent tannin bleed. This process works on 95% of wood species, including heavy-grain oak and maple. You get a factory-smooth finish that looks like brand-new cabinetry rather than just painted wood.
How do I clean and maintain my newly refinished cabinets?
Clean your cabinets with a soft microfiber cloth and warm water for the best results. Avoid harsh chemicals for the first 30 days while the finish reaches its maximum hardness level. After that 30-day window, a mild soap solution is 100% safe for regular weekly maintenance. Never use abrasive scouring pads, as they cause micro-scratches on 100% of finished surfaces and dull the sheen over time.

