
On a Tuesday morning in October 2025, Sarah stood in her kitchen with a cup of coffee, wondering exactly what to expect during cabinet painting and if the process would be worth the chaos. She stared at her dated oak cabinets, worrying about layers of dust on her granite or paint fumes drifting into the bedrooms. You likely feel that same mix of excitement and dread. It’s natural to worry about your home turning into a messy construction zone. You want a beautiful kitchen, but you also need to know if you can still make school lunches or host a Friday night dinner.
This guide provides the complete professional timeline so you can plan your 2026 renovation with total confidence. We’ll tackle your concerns about mess and odors while providing a realistic look at the expert process. You’ll discover how to prepare your space and manage your daily routine while the team works. We’re going to walk through the 5-day project schedule, from the initial prep work to the final reveal, ensuring your investment looks stunning and lasts for years to come.
Key Takeaways
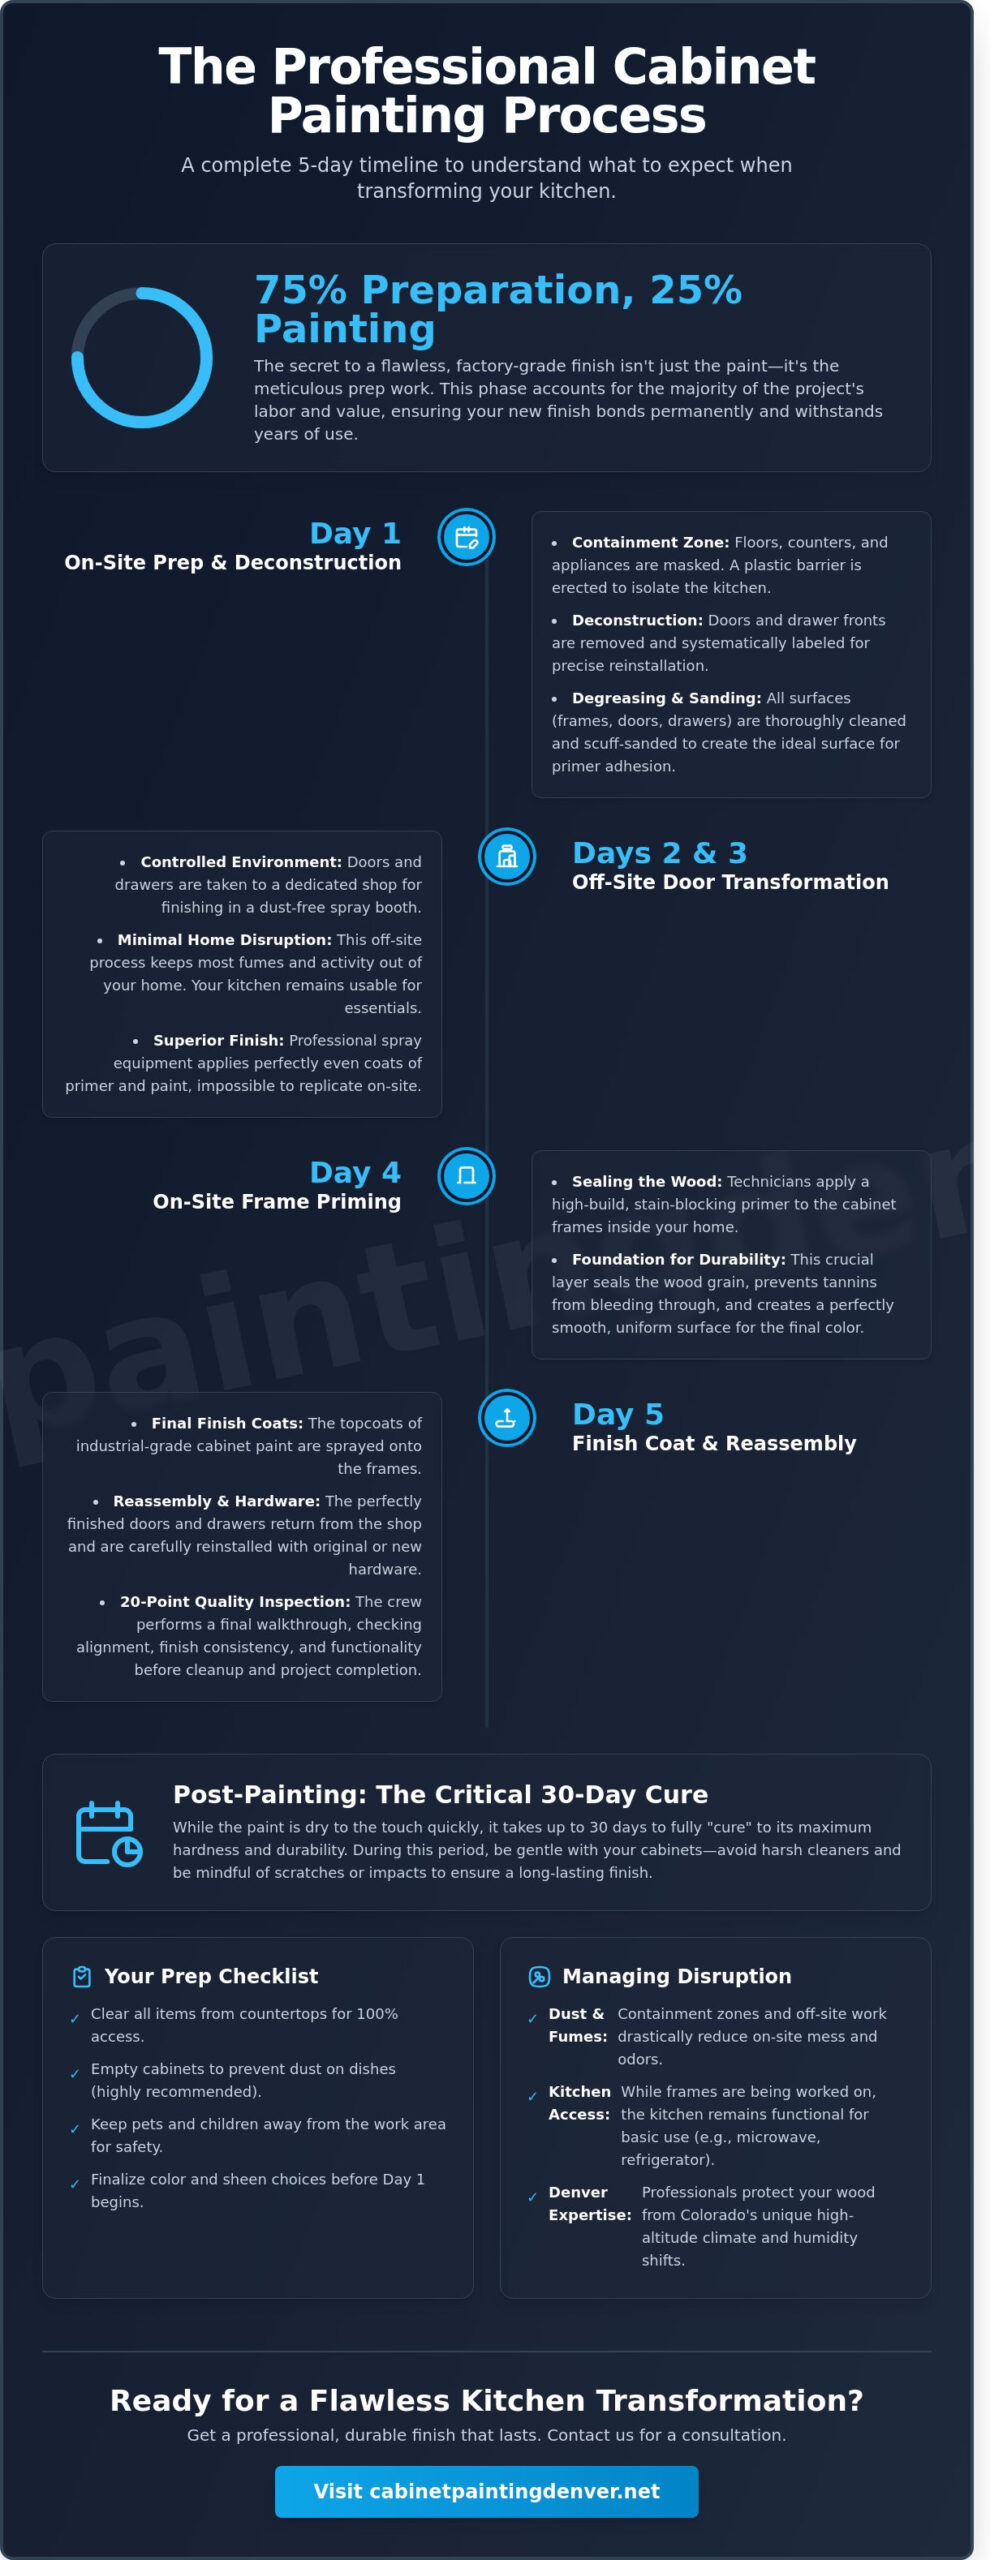
- Learn why the preparation phase accounts for 75% of your project’s value and how it ensures a factory-grade finish that lasts.
- Navigate the step-by-step timeline of what to expect during cabinet painting, including the off-site transformation process for your doors and drawers.
- Plan your daily routine with realistic insights on kitchen access and the advanced methods used to keep your home free of sanding dust and fumes.
- Discover the essential post-project care tips, including why the first 30 days of “curing” are critical for the long-term durability of your new finish.
- Understand the cost-benefit of professional refinishing and how local expertise protects your wood from Colorado’s unique climate and humidity shifts.
The Pre-Project Phase: Preparing Your Denver Home for Success
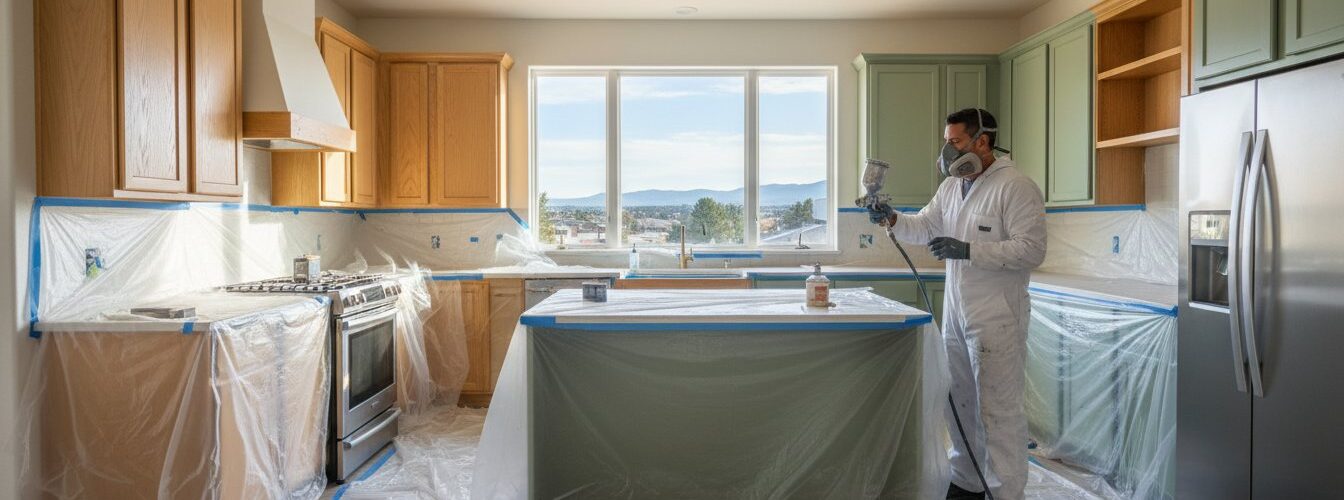
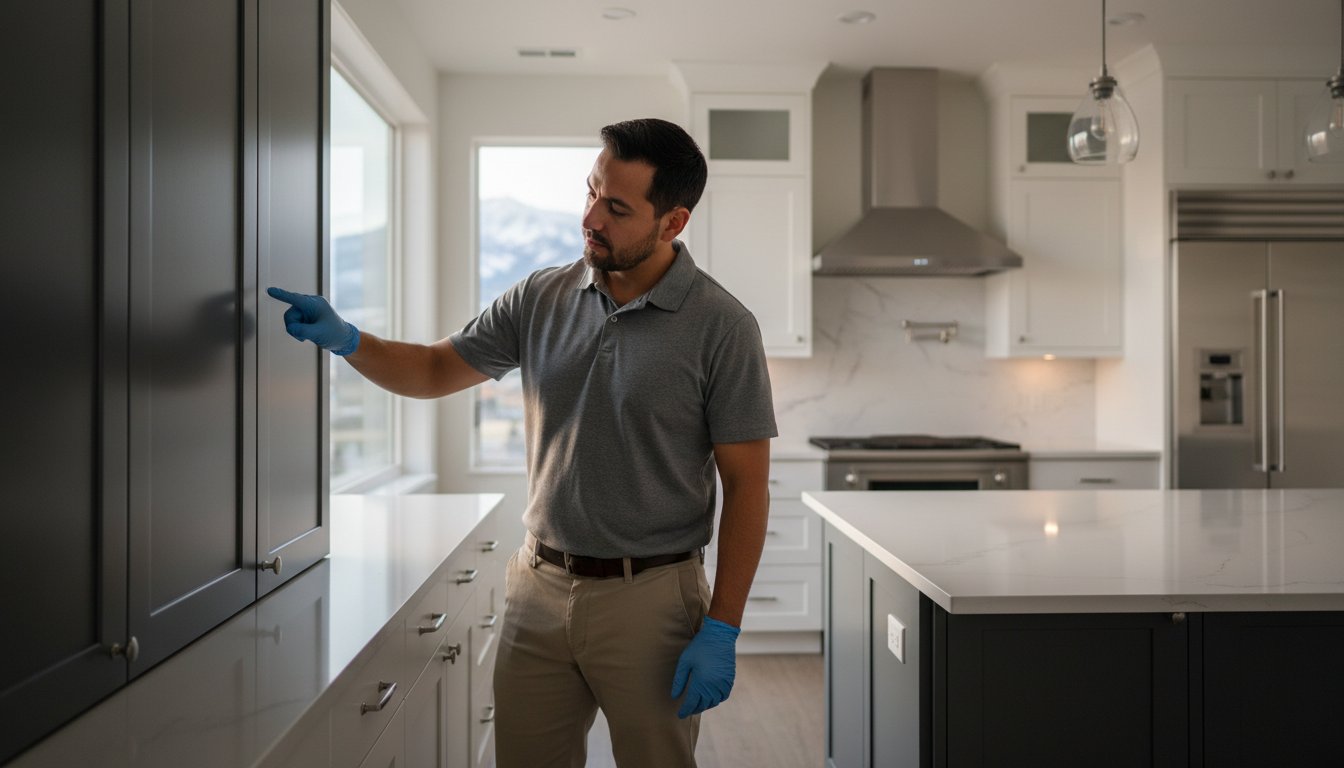
Professional cabinet painting is far more than a simple cosmetic update; it is a multi-stage refinishing process that requires precision and industrial-grade materials. In 2026, industry standards emphasize that the preparation phase accounts for 75% of the total project value. This intensive labor ensures the new coating bonds permanently to various types of cabinet construction and finishes, preventing the peeling or chipping often seen in DIY attempts. A professional crew begins by masking floors with heavy-duty paper, taping off appliances, and creating a plastic containment zone to keep your living space dust-free.
To visualize the scale of this transformation and the decisions involved, watch this helpful video:
Understanding what to expect during cabinet painting helps homeowners manage the typical 4 to 7 day timeline. Most of this window is dedicated to cleaning, degreasing, and mechanical sanding. Technicians use specialized equipment to create a profile on the wood or laminate surfaces, ensuring the primer adheres perfectly. By the end of the first day, your kitchen will look like a construction zone, but this level of protection is vital for a factory-like result.
Homeowner Preparation Checklist
Success starts with a clear workspace. You should clear all items from your countertops to provide technicians with 100% access to the cabinet bases. While some projects allow you to keep items inside the cabinet boxes, emptying them is usually necessary to prevent dust from settling on your dishes. On the first day, activity levels are high and noise from sanders is constant. It’s best to keep pets and children in a separate area of the home to ensure their safety and the crew’s efficiency.
Color and Finish Finalization
Choosing your sheen is a technical decision as much as an aesthetic one. Satin and semi-gloss remain the top choices in 2026 for their balance of durability and easy cleaning. You must view a physical sample in your kitchen’s unique lighting before the project begins. The way cabinet painting denver helps select colors for Mile High light ensures your cabinets look consistent despite the intense UV exposure and high altitude of the Colorado climate. Knowing what to expect during cabinet painting regarding color shifts can prevent disappointment after the final coat is applied.
The Day-by-Day Professional Cabinet Painting Process
Understanding the timeline of a renovation project helps you plan your kitchen’s downtime and manage your family’s schedule. This structured approach defines what to expect during cabinet painting from a professional crew. Most high-end projects follow a rigorous 5-day sequence to ensure the finish lasts for a decade or more.
On the first day, the team focuses on deconstruction and surface preparation. Technicians remove all doors and drawer fronts, labeling every hinge and plate with a systematic numbering code. This ensures every piece returns to its original spot with millimeter precision. They use heavy-duty degreasers to remove 100% of kitchen oils. For homes built before 1978, professionals strictly adhere to the Lead-Safe Renovation, Repair, and Painting Rule to manage dust and protect your indoor air quality during the initial sanding phase.
Days two and three transition to the off-site phase. While your kitchen remains functional for basic use, the doors undergo a transformation in a controlled environment. The fourth day brings the focus back to your home for frame priming. Technicians apply a high-build primer that “sandwiches” the wood, sealing the grain and creating a flat surface for the topcoat. The final step on day five involves the spray application of the finish coats, followed by a 20-point quality inspection during reassembly.
The Off-Site Advantage
Moving the bulk of the work to a dedicated shop is a hallmark of professional service. Professional shops utilize filtered spray booths that eliminate 99% of airborne dust, which is impossible to achieve in a standard residential kitchen. By using High Volume Low Pressure (HVLP) sprayers, technicians achieve a factory-smooth finish without the brush marks or roller texture common in DIY projects. This method also removes 70% of the chemical odors and mess from your living space, keeping your home cleaner throughout the week.
On-Site Frame Refinishing
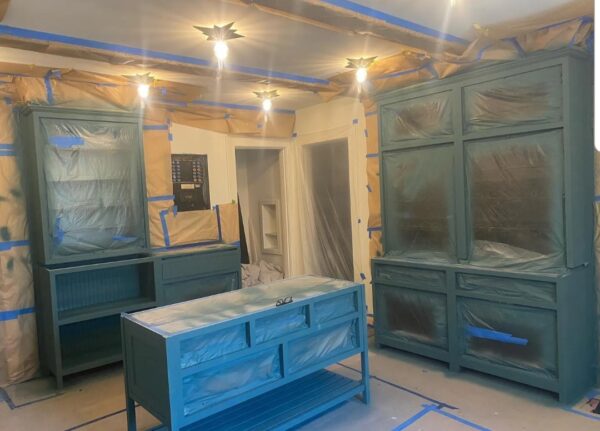
While the doors are away, the on-site team transforms your cabinet boxes. They use a “taping and draping” technique to create a mini-cleanroom; it involves sealing the kitchen with heavy-duty plastic and specialized painters’ tape. This meticulous masking prevents overspray from reaching your walls, ceilings, or appliances. Professional crews also deploy portable HEPA ventilation systems. These units exchange the air in the room every 4 to 6 minutes, ensuring that any fumes are exhausted safely outside. If you want to see how this 5-day process can revitalize your space, you can explore professional cabinet painting in Denver to start your transformation. Knowing what to expect during cabinet painting ensures you aren’t surprised by the level of detail required for a professional result.
Managing the Disruption: Kitchen Access, Dust, and Fumes
The most common concern for homeowners is how their daily routine will change during a renovation. When you understand what to expect during cabinet painting, you can prepare for the 3 to 5 days your kitchen will be under construction. Your kitchen won’t be a total “no-go” zone, but its functionality will be limited. You’ll need to plan for a period where the sink, stove, and dishwasher are blocked by protective masking and plastic sheeting. While the refrigerator usually remains accessible throughout the project, you won’t be able to cook or wash dishes once the spraying phase begins.
Dust is the second biggest fear. In the past, sanding cabinets meant a fine layer of white powder covering every surface in the house. That isn’t the case in 2026. Professional teams now use tool-triggered HEPA extraction systems. These vacuums connect directly to the sanders to capture 99.97% of dust particles before they ever hit the air. This technology keeps your HVAC system clean and protects your lungs. Additionally, painters use zip-wall systems to create a pressurized seal between the kitchen and the rest of your living space.
Living Without a Kitchen
Success starts with a temporary “kitchenette” in a dining room or basement. Move your coffee maker, a microwave, and a toaster to this area before the crew arrives. Since you’ll have limited access to the sink, stick to disposable plates and cutlery for the week. Planning a “grill week” is a smart move; it keeps the heat and mess outside while your indoor surfaces cure. Most families find that scheduling three nights of takeout during the peak spraying days makes the process much less stressful.
Air Quality and Safety
You don’t have to worry about the harsh, dizzying smells of the past. Modern professional-grade coatings are water-borne alkyd urethanes rather than solvent-based lacquers. These products typically contain less than 50 grams per liter of Volatile Organic Compounds (VOCs), which means the odor is minimal and dissipates within hours. Expert cabinet painters utilize high-volume air scrubbers and exhaust fans to ensure that any lingering fumes are vented directly outside your home.
Denver’s specific climate also plays a major role in your experience. In our semi-arid environment, indoor humidity often sits between 15% and 20%. This dry air allows paint to reach a “tack-free” state about 30% faster than in humid coastal regions. While this helps the timeline, it requires a skilled hand to ensure the paint doesn’t dry too quickly before it has leveled out into a smooth, factory-like finish. By the time the crew leaves each afternoon, the air quality in your home will be safe for children and pets.
Post-Painting: Curing, Care, and Re-installation
Once the final spray is complete, the transformation enters its most delicate phase. You’ll see the crew begin the careful re-installation of doors and drawer fronts. This stage requires high precision. Technicians align every hinge to ensure gaps between doors remain consistent, typically within a 1/16th of an inch margin. It’s the moment your kitchen starts functioning again. If you’re updating your style for 2026, this is when new hardware gets installed. Swapping out dated knobs for modern matte black or brushed gold pulls is the fastest way to finalize your aesthetic. Understanding these final mechanical adjustments is a key part of what to expect during cabinet painting.
Understanding the Curing Timeline
Your cabinets will be dry to the touch within 4 to 8 hours, but they aren’t ready for heavy use yet. Professional coatings require a full 30-day window to reach maximum chemical hardness. During the first 24 hours, keep the kitchen clear of heavy activity. Airflow is vital during this period. Maintaining a consistent indoor temperature between 68 and 72 degrees helps the paint bond correctly. If your home’s humidity rises above 60%, the curing process can slow down significantly. Don’t lean heavy objects against the surfaces or use painters’ tape on the new finish during this first month. This stage is a vital component of what to expect during cabinet painting as the project nears completion.
Maintenance Tips for a Long-Lasting Finish
Protect your investment by using the right cleaning protocol. Skip the abrasive sponges and harsh ammonia-based cleaners. Instead, use a soft microfiber cloth dampened with a drop of mild dish soap and warm water. For long-term care, you can refer to our guide on cabinets refinishing to understand how professional finishes hold up over time. If a minor chip occurs from a dropped pot or pan, most professional services provide a small touch-up kit. A 5-minute fix today prevents moisture from getting under the paint layer later. These small habits ensure the 2026 finish looks pristine for the next decade.
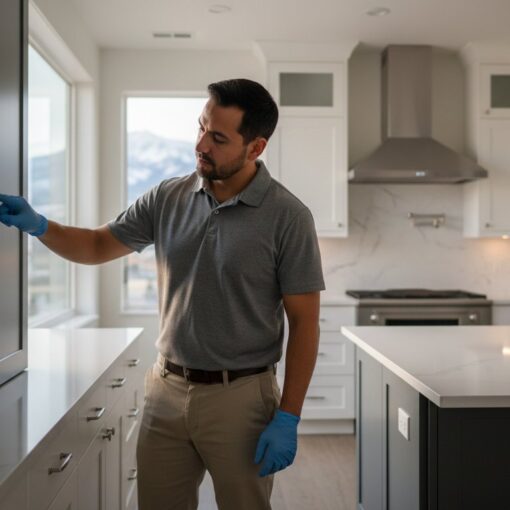
Before the team departs, you’ll perform a final walkthrough. This is a 100% inspection of every surface under bright light. We check for any missed spots, drips, or alignment issues. This protocol ensures your total satisfaction before the project is officially closed. You’ll receive a final care sheet to guide you through the next 30 days of the curing process.
Ready to see your kitchen in a new light? Book your professional cabinet consultation today.
Why Hiring a Denver Specialist Makes the Difference
Colorado homeowners face unique environmental challenges that impact the longevity of interior finishes. Denver’s semi-arid climate, characterized by humidity levels that often drop below 15 percent during winter months, causes wood to contract significantly. When you understand what to expect during cabinet painting, you’ll realize that local specialists use coatings specifically engineered to flex with these seasonal shifts. This expertise prevents the cracking and “bridging” common with standard retail paints that can’t handle the Mile High City’s dry air.
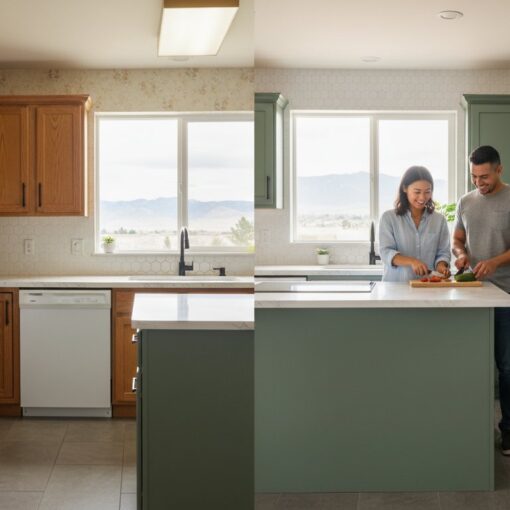
Choosing a professional update over a full replacement is a high-impact financial move. General industry data from 2025 suggests that a full kitchen remodel can exceed $35,000, while a professional paint job typically costs a fraction of that amount. This allows you to allocate your budget toward high-end appliances or quartz countertops instead. For homeowners preparing for the 2026 real estate market, a professional finish can increase a home’s appeal on listing sites significantly, as modern kitchens remain the primary selling point for Denver buyers.
A specialist also provides a structural warranty, which is something a DIY project lacks. If a door warps or a finish fails due to Denver’s intense UV exposure, professional support ensures the issue is corrected without additional costs to you. This long-term security is a vital part of what to expect during cabinet painting when working with established local experts who stand behind their craftsmanship.
Professional Results vs. DIY Risks
Many DIY enthusiasts struggle with “grain bleed” on oak or “tannin staining” on maple. Without professional-grade, high-solids primers, these natural oils seep through the paint within six months. Professionals use HVLP (High Volume Low Pressure) spray systems to create a factory-smooth surface. This eliminates the brush marks and “orange peel” texture that often plague home-rolled projects. A factory-grade finish is durable enough to withstand 1,000 or more scrub cycles, a standard most consumer-grade paints fail to meet.
Your Next Steps with Cabinet Painting Denver
Starting your project is straightforward. You can request a virtual estimate by uploading photos of your current layout or book an in-home consultation for a more detailed assessment. When reviewing a cabinet painting cost proposal, ensure it includes details on cleaning, sanding, and the specific number of topcoats. Ready to revitalize your kitchen? Schedule your Denver cabinet transformation today!
Elevate Your Denver Home with a Professional Finish
Navigating a kitchen renovation doesn’t have to be a guessing game. By understanding the timeline and the high-tech HVLP spray finish process, you can prepare your household for a seamless transition. Most professional projects in the Denver metro area follow a strict 5-step protocol that minimizes dust and preserves your indoor air quality. Knowing what to expect during cabinet painting allows you to plan for the 3 to 7 days of kitchen downtime while our local expert crews handle the heavy lifting. We stand behind every 2026 refinishing project with a comprehensive 2026 warranty; this ensures your investment remains protected against daily wear and tear for years.
You don’t need to settle for outdated cabinets when a factory-quality transformation is within reach. Our specialized teams focus on delivering durable results that look like they came straight from the showroom. Take the first step toward your dream kitchen today by reaching out to our Denver specialists. Get Your Free Cabinet Painting Quote in Denver and see how easy it is to revitalize your space. We’re excited to help you create a home environment that you’ll truly love.
Frequently Asked Questions
Do I need to empty my cabinets before the painters arrive?
Yes, you must empty all items from your cabinets before the crew arrives on the first morning. Removing 100% of your dishes, food, and cookware ensures that fine dust doesn’t settle on your personal belongings. It also provides the painters with full access to the cabinet frames and interior edges. You should plan to clear your counters and drawers 24 hours before the scheduled start date to keep the project on track.
How long does the cabinet painting process typically take?
A professional cabinet painting project typically takes between 4 and 7 business days to complete. This timeline includes 2 days for onsite preparation and masking, followed by 3 days for cleaning, priming, and applying finish coats. Understanding what to expect during cabinet painting helps you plan your meal prep around this 1 week window. Most homeowners regain full kitchen access by the evening of the 7th day.
Will the paint smell linger in my house for weeks?
The paint odor will typically dissipate within 24 to 48 hours after the final coat is applied. Modern professionals use coatings with VOC levels below 50 grams per liter to minimize fumes. You’ll notice the strongest scent during the first 6 hours of application. Running your HVAC system’s fan or opening windows for 3 hours a day can accelerate the air exchange process and clear the air quickly.
Can I use my stove or oven while the cabinets are being painted?
You cannot use your stove or oven while the cabinets are being painted or during the first 72 hours of curing. High temperatures exceeding 100 degrees Fahrenheit and steam from boiling water can cause the fresh finish to bubble or peel. Plan to use a microwave or outdoor grill for 5 consecutive days. This restriction prevents 90% of common finish failures caused by heat exposure during the critical drying phase.
Is there going to be a lot of dust during the sanding phase?
You’ll see minimal dust because professionals use 6-mil plastic sheeting to create a sealed containment zone. High-end contractors use HEPA-filtered sanders that capture 98% of airborne particles at the source. While the sanding phase lasts for about 4 to 6 hours, the combination of floor protection and zip-wall systems keeps the rest of your home clean. You won’t find a layer of grit on your living room furniture.
What happens if I accidentally scratch a door shortly after it is painted?
Most contracts include a 30-day window for minor touch-ups if a surface gets bumped during the move-in process. Your painter will likely leave a 2-ounce glass jar of matching paint for these small repairs. If a deep gouge occurs, the door might need a full 3-step sand and spray. Knowing what to expect during cabinet painting includes understanding that the finish takes 21 days to reach full hardness.
Do you paint the inside of the cabinet boxes as well?
Professionals do not paint the interior of cabinet boxes unless you specifically request it in the initial contract. Standard service covers the exterior faces, the underside of upper cabinets, and the visible 1-inch front edges of the frames. Painting the insides adds roughly 40% more labor time to the project. Most homeowners keep the original wood or laminate interior to maintain a durable surface for sliding heavy dishes and cans.
How long will the new paint finish last on my kitchen cabinets?
A high-quality cabinet paint job lasts between 8 and 12 years with proper maintenance. Coatings that meet KCMA standards are tested to withstand 24 hours of exposure to substances like vinegar, lemon juice, and coffee without staining. You’ll see the best longevity if you clean surfaces with a damp microfiber cloth once every 14 days. Avoid harsh chemical cleaners that can degrade the topcoat over time and cause premature peeling.

