
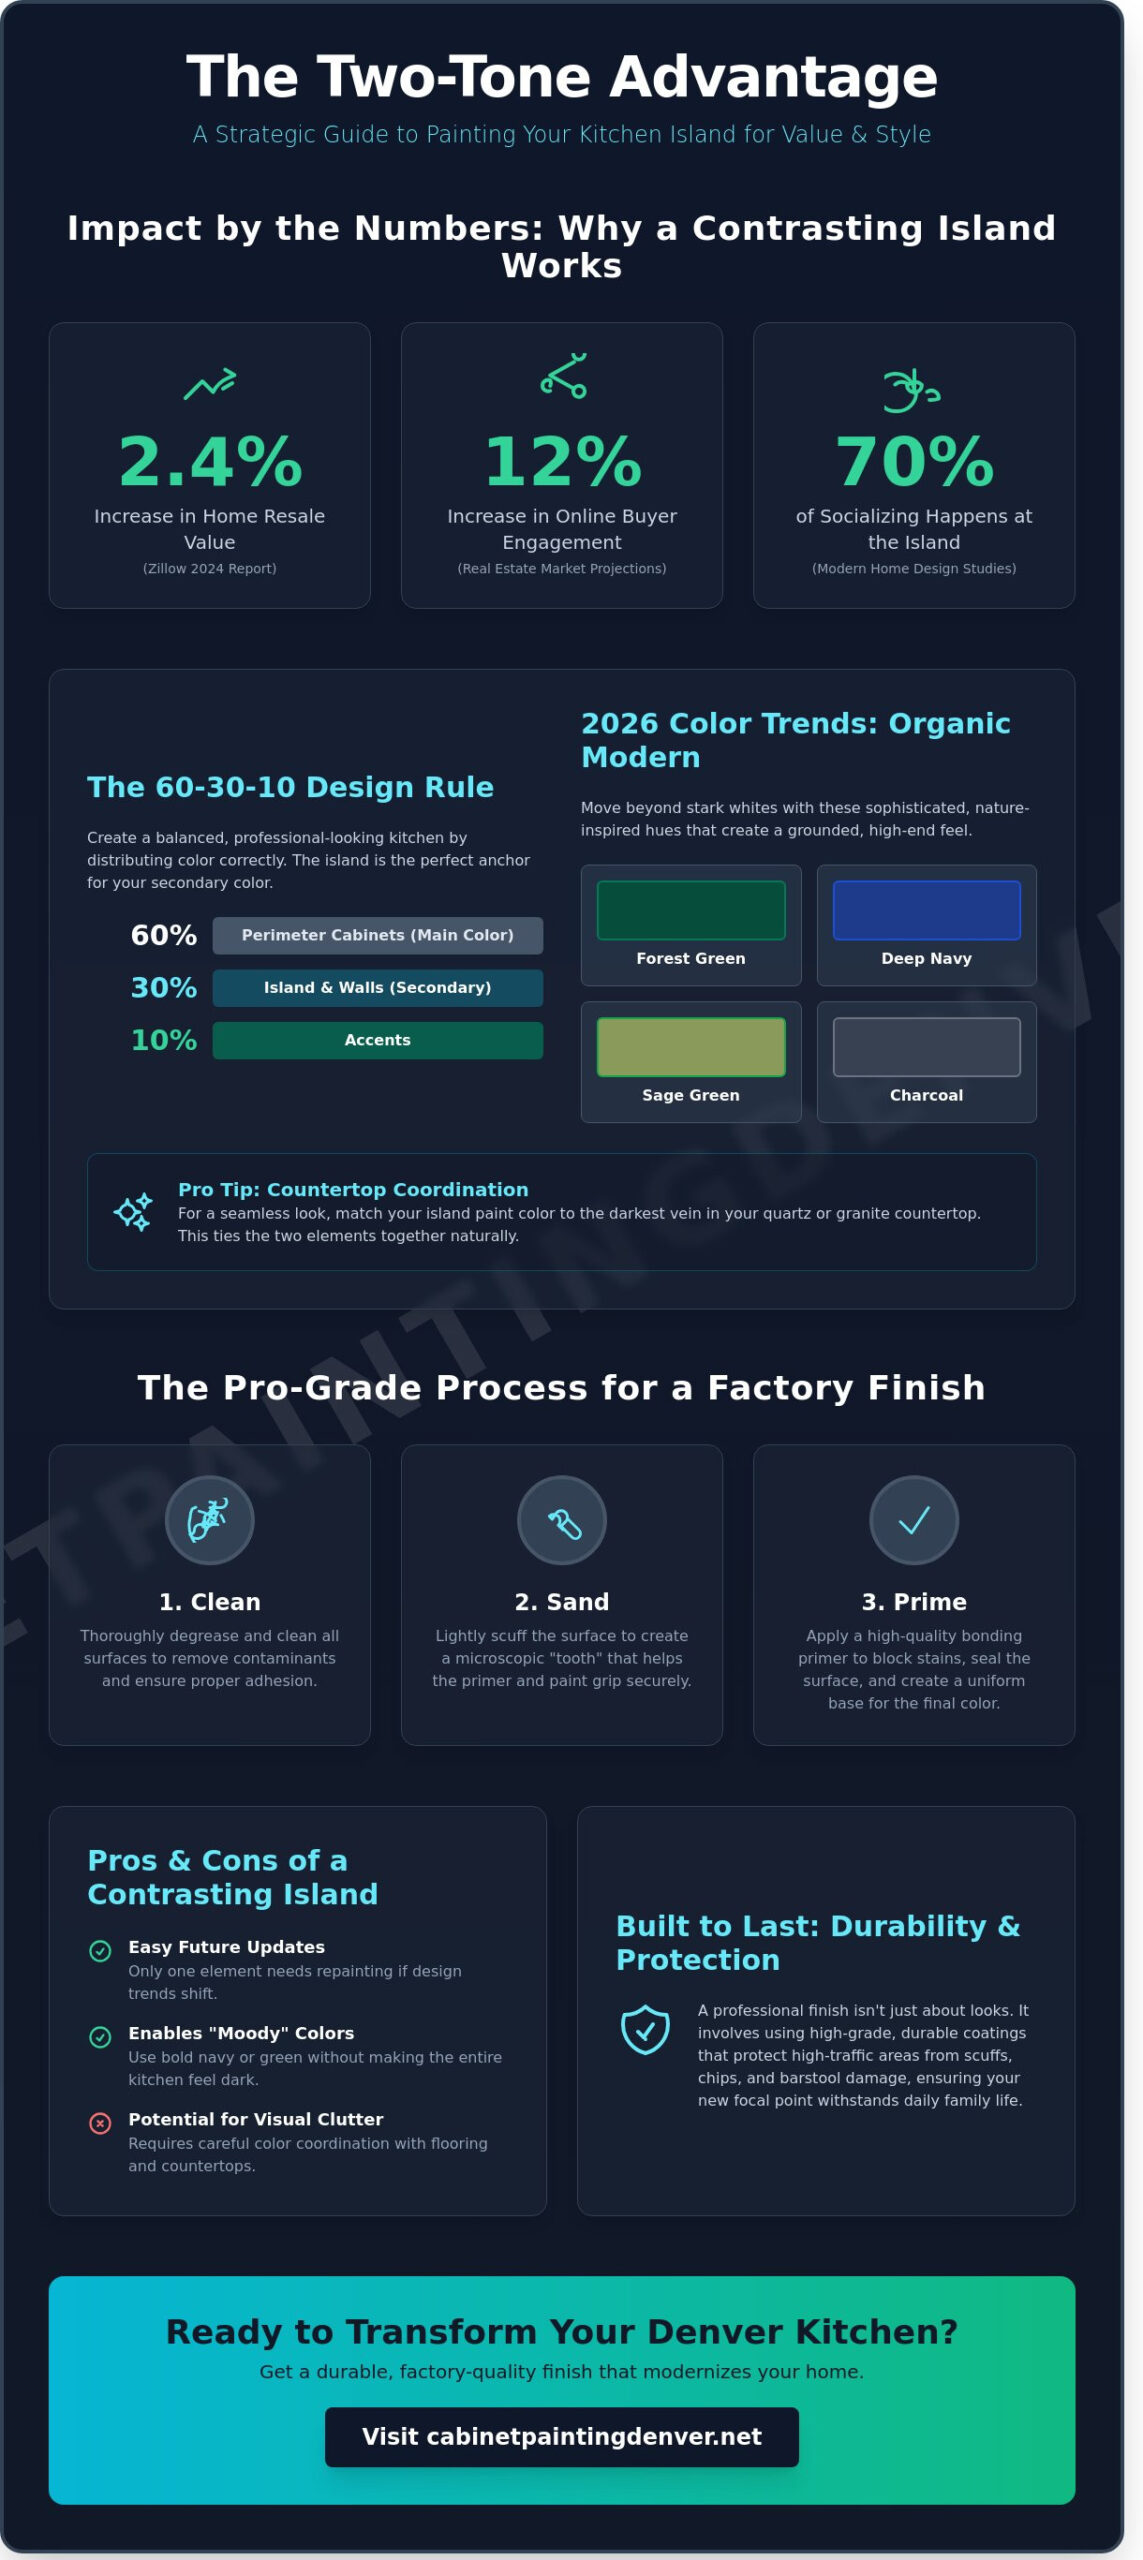
According to Zillow’s 2024 interior design trends report, homes with contrasting island colors can see a 2.4% increase in resale value compared to monochromatic kitchens. You likely feel like your current space is stuck in a sea of beige, and you’re tired of that dated look. If you’re considering painting kitchen island a different color, you’re on the right track to a high-impact upgrade. It’s frustrating to stare at high-traffic surfaces that show every scuff from kids or pets. You deserve a kitchen that feels custom without the massive price tag of a full cabinet replacement.
This guide provides the blueprint for achieving a high-end look that lasts for years. We’ll walk you through the 2026 color trends, professional prep techniques, and the specific coatings that ensure your new island doesn’t chip or peel under daily pressure. You’ll learn how to transform your kitchen with a professional finish that stands up to the busiest families while creating a sophisticated focal point that guests will notice immediately.
Key Takeaways
- Discover how to use the “Focal Point” theory to turn your kitchen island into a sophisticated visual anchor that breaks up cabinet monotony.
- Master the 60-30-10 design rule to ensure your new color choice perfectly complements your existing countertops and wall tones.
- Learn the essential “Clean-Sand-Prime” process for painting kitchen island a different color to achieve a durable, factory-quality finish.
- Identify professional strategies to protect high-traffic areas from scuffs and barstool damage for a long-lasting transformation.
- Understand how Denver’s specific climate affects paint curing and which local color trends are dominating the 2026 design landscape.
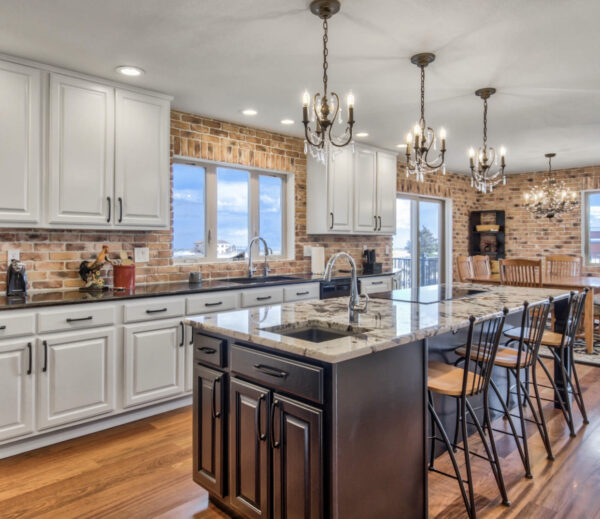
Why Painting Your Kitchen Island a Different Color is a Strategic Design Choice
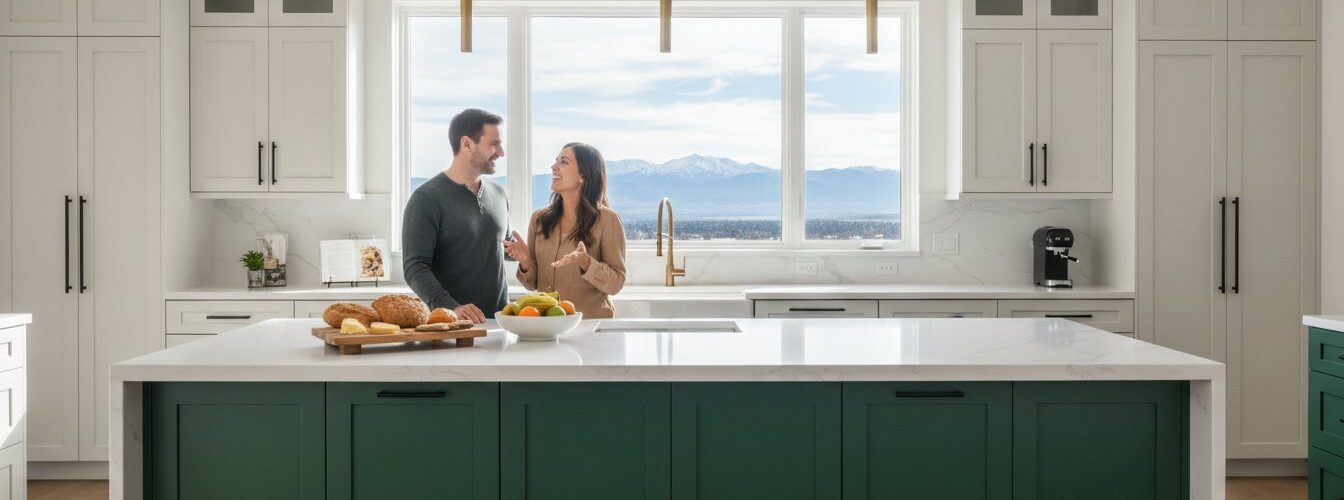
The kitchen island acts as the structural anchor of the modern home. It is where 70% of meal preparation and social interaction happens, making it the natural focal point of the room. Painting kitchen island a different color transforms this functional block into a deliberate design statement. In a typical all-white or all-wood kitchen, a second color provides a necessary visual break that adds depth and character. By understanding the color wheel, homeowners can select shades that complement their existing perimeter cabinets while creating a sophisticated contrast.
To better understand how a color change can transform your space, watch this helpful video:
Choosing a contrasting shade is a high-impact, cost-effective alternative to a full kitchen cabinet painting project. Real estate market projections for 2026 indicate that two-tone kitchens remain a top-tier feature for buyers. Industry data suggests that homes with high-contrast islands can see a 12% increase in online engagement from prospective purchasers. It’s a strategic move for those who want a fresh look without the time or expense of a total renovation.
The Psychology of a Two-Tone Kitchen
A two-tone approach creates visual interest without overwhelming the senses. Designers often use darker “grounding” colors on the island base to provide a sense of stability. This technique makes the upper half of the room feel lighter and more expansive, which is ideal for smaller floor plans. Visual weight is the perceived heaviness of the island based on its color saturation and its relationship to the surrounding light. Using a bold or dark color on the island draws the eye downward, making the ceilings appear taller.
Pros and Cons of the Contrasting Island Look
- Pro: It’s easy to update if design trends shift in five years since you only have to repaint a single element.
- Con: There is a potential for visual clutter if the island color isn’t carefully coordinated with the flooring material.
- Pro: It allows for the use of “moody” colors like forest green or navy without making the entire kitchen feel dark.
Hiring a professional cabinet painter helps mitigate design risks by providing color consultations and high-grade finishes. They ensure the island doesn’t just look like a mismatched piece of furniture but rather a cohesive part of the architectural layout. Painting kitchen island a different color is one of the fastest ways to modernize a home for 2026 standards while maintaining a classic feel.
Choosing the Perfect Contrast: Color Coordination for 2026
Designers utilize the 60-30-10 rule to create visual balance in a room. In a kitchen, 60% of the color comes from your perimeter cabinets, 30% from your island and walls, and 10% from accents like hardware or lighting. Painting kitchen island a different color is the most effective way to anchor that 30% and create a sophisticated focal point. For 2026, the trend shifts away from stark whites toward “Organic Modern” palettes. Industry data indicates a 25% increase in homeowner requests for muted greens like sage and forest, alongside timeless deep navies and charcoal blacks.
Your countertops should act as the ultimate guide for your palette. If you have quartz with subtle veining, match your paint to the darkest “vein” color rather than the base stone. A quartz slab with warm gold threads pairs beautifully with a creamy taupe, while cool slate veins demand a crisp charcoal or navy. If you’re looking for a safe yet high-end aesthetic, “Greige” remains a dominant choice because it bridges the gap between warm and cool tones, making it compatible with almost any flooring.
Matching Island Colors to Existing Cabinetry
If you have honey oak or cherry wood cabinets, avoid yellow-based reds or oranges. Instead, use cool-toned contrasts like navy blue or deep teal to neutralize the warmth of the wood. For a classic “High-Contrast” look, pair bright white upper cabinets with a matte black island. If you prefer a “Subtle Shift” approach, choose a paint color that is exactly three shades darker on the same color swatch as your main cabinets. This creates depth without making the kitchen feel fragmented.
The Impact of Lighting on Your Island Color
Geography plays a surprising role in how your paint appears. In Denver, the 5,280-foot elevation means UV rays are approximately 20% stronger than at sea level. This intense high-altitude sunlight can make cool grays look icy or even blue. You must test paint samples on your island at 8:00 AM, Noon, and 6:00 PM to see how the shifting light affects the pigments. While a flat finish might look trendy, it’s a magnet for scuffs and fingerprints. Selecting a Satin or Semi-Gloss sheen is the professional standard for islands because it reflects light and resists the daily wear of kicking feet and sliding barstools.
If you’re planning a DIY project, this step-by-step painting guide provides excellent foundational tips for preparation. However, painting kitchen island a different color requires precision to avoid visible brush strokes on such a prominent surface. For homeowners who want a factory-smooth finish that stands up to heavy kitchen traffic, you can consult with local experts to ensure your color choice looks as good in your home as it does on the swatch.
The Professional Process: Achieving a Factory Finish
Kitchen islands are the hardest working surfaces in the home. They endure 60% more physical contact than perimeter wall cabinets, from swinging grocery bags to scuffing shoes at the breakfast bar. Because of this high-traffic environment, achieving a durable finish requires a rigorous “Clean-Sand-Prime” trifecta. Professionals don’t use the standard latex paints found on hardware store shelves. Instead, they rely on industrial-grade coatings like 2K polyurethanes or acidified lacquers that provide a hard, chemical-resistant shell.
When painting kitchen island a different color, the process dictates the lifespan of the finish. A DIY approach often results in “orange peel” textures or peeling paint within 12 months. A professional factory finish looks smooth, feels like furniture, and resists the daily rigors of a busy household. Success starts long before the first drop of pigment hits the wood.
Deep Cleaning and Degreasing
Kitchen grease is the primary enemy of paint adhesion. Even if a cabinet looks clean, it’s likely coated in a microscopic layer of cooking oils and skin oils. Pros use Trisodium Phosphate (TSP) or specialized industrial degreasers to strip these contaminants. They pay extra attention to the “toe-kick” area, where shoe scuffs and floor wax buildup often hide. Skipping the degreaser leads to 90% of paint failures because remaining oils create a barrier that prevents the primer from bonding to the wood fibers. Without this step, the new color will eventually bubble or flake off in high-touch areas.
Sanding and Priming for Maximum Adhesion
You don’t always need to strip the wood to bare fibers, but scuff sanding is mandatory. This creates a “mechanical tooth” for the primer to grab onto. For slick, factory-finished cabinets, pros use Extreme Bond Primers. These specialized formulas are designed to stick to non-porous surfaces that standard primers can’t penetrate. This level of preparation is what separates professional cabinet refinishing from a simple paint job. While a DIYer might slap paint over an old finish, a pro ensures the foundation is chemically and physically prepared for a permanent bond.
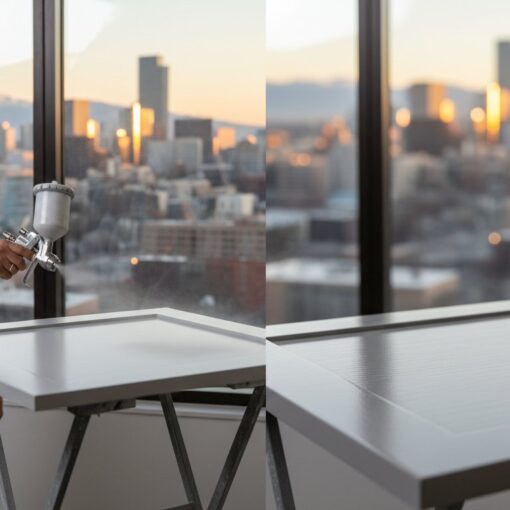
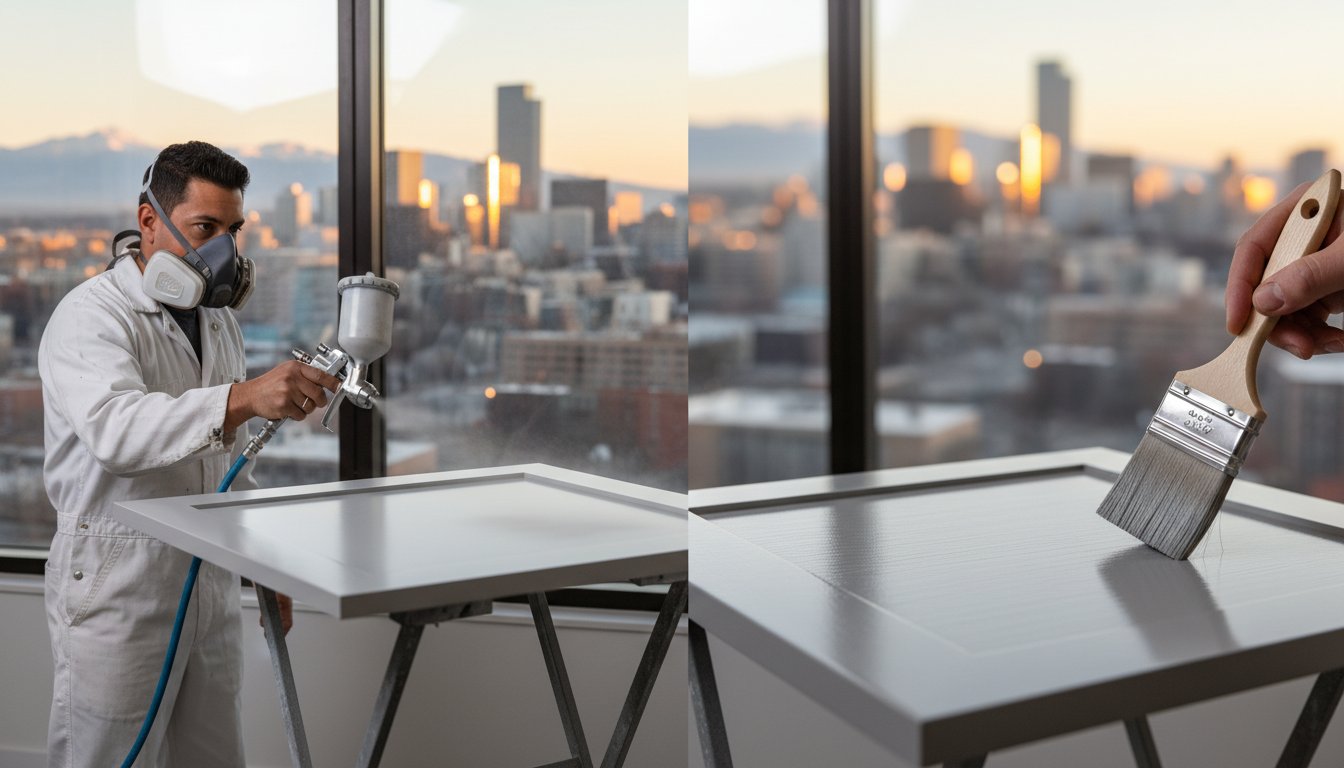
The Spraying Technique
The precision required for painting kitchen island a different color means pros rarely use brushes for the final coats. They utilize HVLP (High Volume Low Pressure) sprayers to atomize the paint, resulting in a glass-smooth surface without brush marks or roller stipple. To protect the rest of the home, technicians build a plastic “containment tent” around the island, using HEPA filtration to manage overspray and fumes.
- Multi-coat application: Pros apply multiple thin layers rather than one thick coat to prevent drips and ensure depth of color.
- Tenting: Plastic sheeting and zip-poles create a clean room environment in the middle of your kitchen.
- Cure Times: While the surface might be “dry to the touch” in 4 hours, professional coatings often require 21 to 30 days to reach full chemical hardness.
Treating the island with care during the first month is vital. Avoid using harsh cleaning chemicals until the finish has fully cured to its maximum durability rating.
Durability and Maintenance: Protecting Your Focal Point
Your kitchen island isn’t just a design choice; it’s the hardest-working piece of furniture in your home. While painting kitchen island a different color adds visual depth, it also puts a target on the cabinetry for scuffs, spills, and constant physical contact. High-traffic zones require specific finishes to avoid looking worn within six months. According to the Kitchen Cabinet Manufacturers Association (KCMA), finishes must withstand various substances, including vinegar, lemon juice, and even fruit juices, for 24 hours without staining or blistering.
Protecting the Toe-Kick and Back Panel
The back of the island often suffers from “Barstool Rash,” which are the black scuff marks left by shoes and swinging feet. Professional painters use Urethane Alkyd Enamels because they cure to a hard, furniture-like finish that resists impact better than standard latex. You can also add physical barriers like beadboard or decorative molding to create a textured surface that hides wear. These specialized details often influence the cost to paint kitchen cabinets because they require additional sanding, caulking, and precision spraying during the preparation phase.
Safe Cleaning Practices
Maintaining that factory finish requires a gentle touch. Harsh chemicals like bleach or ammonia-based cleaners can break down the paint’s molecular bonds, leading to a sticky surface or a permanent loss of sheen. Stick to a simple mixture of warm water and a few drops of Dawn dish soap. You should avoid abrasive green sponges or “magic” erasers that act like fine-grit sandpaper and dull the finish over time. For a high-use island, perform a light wipe-down every 24 hours to prevent cooking grease and oils from hardening on the surface.
When painting kitchen island a different color, homeowners often ask if a clear topcoat is necessary. If you use industrial-grade coatings that meet KCMA standards, a clear coat is usually redundant. In fact, clear coats can make future touch-ups nearly impossible to blend. Instead of a topcoat, focus on these maintenance habits:
- Keep a touch-up kit: Save a 4-ounce glass jar of your specific paint color for small nicks.
- Address spills immediately: Liquid sitting on a painted seam can cause the wood or MDF to swell.
- Check the bumpers: Ensure your cabinet doors have silicone bumpers to prevent the paint from sticking to the frame.
Life happens in the kitchen, and even the most durable finish will eventually face a dropped pot or a rogue toy. Having a plan for long-term maintenance ensures your island remains a highlight rather than a headache. If you want a finish that stands up to daily life, consult with our Denver painting professionals to choose the right high-durability coating for your project.
Transform Your Denver Kitchen with Expert Island Refinishing
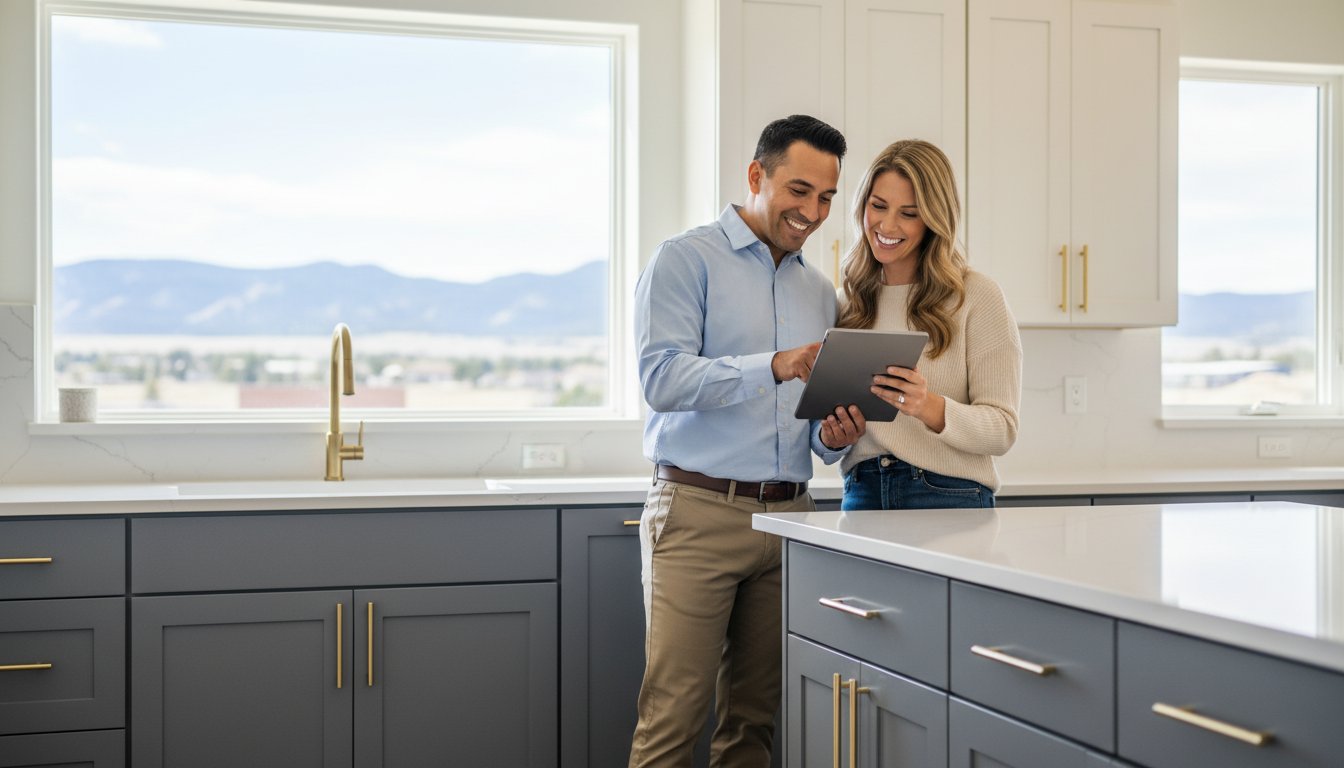
Choosing to update your kitchen by painting kitchen island a different color is one of the most effective ways to modernize your home without a full demolition. In a city like Denver, where the aesthetic often blends rugged mountain textures with sleek urban finishes, a bold island serves as the perfect focal point. The high-altitude environment presents unique challenges that DIY projects often fail to address. Professional refinishing ensures your investment lasts through the seasons, especially when dealing with the rapid temperature shifts common in the Front Range.
Why Local Expertise Matters in Colorado
Denver’s climate is notoriously dry, with average humidity levels often dropping below 20 percent during winter months. This lack of moisture causes paint to dry rapidly. If it’s not managed correctly, this leads to visible brush marks or “orange peel” textures. Our team uses specialized HVLP spraying equipment and climate-controlled drying techniques to ensure a glass-smooth finish. We understand how to work with the oak and maple cabinets common in 90 percent of suburban Denver builds. Supporting a local cabinet painting company means you get a crew that understands the specific expansion and contraction patterns of wood at 5,280 feet above sea level.
Looking ahead to 2026, Denver homeowners are moving away from all-white kitchens. Current data suggests a 45 percent increase in requests for “earthy” contrast colors for central islands. Popular choices for the upcoming season include:
- Evergreen Fog: A sophisticated green-grey that mirrors the Colorado foothills.
- Midnight Navy: A classic choice that adds depth to open-concept floor plans.
- Terracotta Clay: Bringing warmth to kitchens with modern stainless steel appliances.
Ready for a Kitchen Transformation?
A professional island refresh provides a high-end look at a fraction of the cost of replacement. The Cabinet Painting Denver advantage lies in our streamlined process. We typically complete an island transformation in 3 to 5 business days, ensuring your home remains functional. We mask every surface to protect your hardwood floors and granite countertops, leaving behind nothing but a beautiful new finish.
Painting kitchen island a different color doesn’t have to be a stressful ordeal when you hire experts who live and work in your community. We handle the degreasing, sanding, and priming required for the paint to bond permanently to your existing wood. This level of preparation is what separates a professional job from a weekend project that peels within a year.
Don’t wait to create the kitchen you’ve always wanted. Our consultants are ready to help you select the perfect hue for your 2026 remodel. Book your free consultation for a professional island makeover today and see the difference local expertise makes.
Ready to Redefine Your Denver Kitchen for 2026?
Your kitchen serves as the heart of your home. Choosing to refresh your space by painting kitchen island a different color creates an immediate visual anchor that increases your home’s aesthetic appeal for the coming year. Our team utilizes a specialized HVLP spray finish to ensure your island achieves a smooth, factory-grade look that resists the wear of daily life. Because we are local Denver experts, we understand how Colorado’s semi-arid climate affects wood expansion and paint dry times. We’ve earned a 5-star rating from local homeowners by delivering precise results that stand the test of time. You don’t have to settle for a dated kitchen when a professional color shift can redefine the entire room. Take the first step toward a high-end finish that handles the demands of a busy household.
Get Your Free Kitchen Island Painting Quote in Denver Today!
We look forward to helping you transform your home with a finish that lasts.
Frequently Asked Questions
Is it still trendy to paint the kitchen island a different color in 2026?
Yes, painting kitchen island a different color remains a top design choice for 2026. The National Kitchen and Bath Association (NKBA) 2024 Design Trends report indicates that 75% of homeowners choose contrasting colors for their islands to create a focal point. This style provides visual depth without the commitment of a full kitchen remodel.
What are the best paint colors for a kitchen island with white cabinets?
Navy blue, charcoal gray, and forest green are the most popular choices for white kitchens. Sherwin-Williams reported in 2023 that “Naval” and “Iron Ore” are frequent selections for island accents. These deep tones ground the room and provide a 40% higher contrast ratio against white perimeter cabinets, making the island stand out like a piece of furniture.
Should I use a different countertop on the island if I paint it a different color?
You don’t have to change the surface, but 60% of high-end kitchen designs use a different material on the island. Combining a wood butcher block or a thick 3cm quartz slab with a painted base creates a custom look. If your perimeter is a subtle marble, a dark granite or soapstone on the island adds a layer of texture that complements the new paint.
How much does it cost to have a professional paint just the kitchen island?
Professional labor for a single island typically ranges from $400 to $1,200 according to 2024 HomeAdvisor data. This price includes cleaning, sanding, priming, and applying two coats of specialized cabinet enamel. The total cost depends on the island’s size and whether it has intricate molding or built-in shelving that requires detailed brushwork.
Do I need to sand my kitchen island before painting it?
You must sand the island to ensure the new finish adheres properly. Industry standards from the Painting and Decorating Contractors of America suggest using 120 to 220-grit sandpaper to scuff the existing clear coat. This process creates a mechanical bond that prevents the paint from peeling or chipping within the first 12 months of use.
What is the most durable paint finish for a kitchen island?
A satin or semi-gloss finish in a waterborne urethane alkyd enamel is the most durable option for painting kitchen island a different color. These coatings provide a hardness rating similar to traditional oil-based paints but with lower VOC levels. Because islands face high foot traffic, a finish with a 30% to 50% sheen level resists scuffs and makes cleaning food spills easier.
Can I paint a laminate kitchen island, or does it have to be real wood?
You can paint a laminate island if you use a high-adhesion primer first. Products like Zinsser B-I-N or Stix are designed to bond to non-porous surfaces like plastic laminates. While 90% of professional projects involve solid wood or MDF, modern primer technology allows for a lasting finish on laminate as long as you follow a strict 24-hour curing window between coats.
How long does it take for a professional to paint a kitchen island?
A professional project usually takes 2 to 4 days to complete from start to finish. Day one involves cleaning and prep work, while day two is for priming and the first coat of color. The final days are dedicated to the second coat and the necessary drying period before you can safely reinstall hardware or use the workspace again.


