

Do you look at your kitchen and dream of a fresh, modern update, only to be stopped short by the staggering price tag of a full remodel? Perhaps you’ve considered a DIY approach, but the fear of peeling paint and a finish that screams “amateur” is holding you back. You’re not alone. Many homeowners feel trapped with a dated kitchen, overwhelmed by the cost of replacement and unsure how to achieve a high-end look without breaking the bank.
This is where the transformative power of professional kitchen cabinet painting comes in. It’s the secret to achieving a stunning, durable, factory-quality finish for a fraction of the cost. In this ultimate guide, we’ll demystify the entire process for you. We’ll break down the realistic costs, explore the incredible benefits, and give you the expert insights you need to decide if this is the right choice for your home. Get ready to finally create the kitchen you’ve always wanted.
Why Paint Kitchen Cabinets? The #1 Alternative to a Full Remodel
Is your kitchen feeling dated, dark, or simply not you anymore? Before you start budgeting for a full-gut renovation, consider the most impactful and cost-effective upgrade available: professional cabinet painting. If your cabinet boxes are structurally sound, which is often the case given the durability of modern Kitchen cabinet construction, a flawless new finish can completely revitalize your space. It’s the secret to achieving a high-end, custom look without the high-end price tag or disruption of a total remodel.
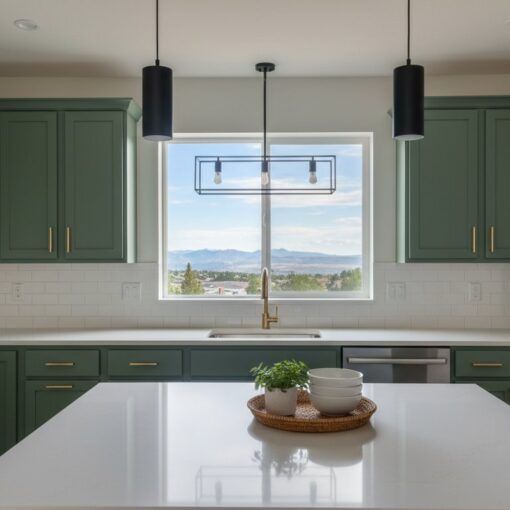
See for yourself how a professional paint job can completely transform a kitchen:
The Transformative Power of a New Color
Color has the power to reshape a room. A professional coat of paint can turn dark, heavy oak or cherry cabinets into a bright, airy focal point with a modern color like crisp white, sophisticated gray, or a bold navy. This single change can make a small kitchen feel larger, reflect more natural light, and create a clean, cohesive aesthetic. A freshly updated kitchen is also a major selling point, increasing your home’s appeal and potential resale value.
Cost vs. Replacement: The Smart Financial Choice
The financial benefits are one of the most compelling reasons to choose painting. A professional kitchen cabinet painting project delivers incredible ROI by avoiding the spiraling costs of a full replacement. Here’s a typical cost comparison:
- Professional Painting: Typically costs 1/3 to 1/2 the price of new cabinets.
- Cabinet Refacing: Often 70-80% the cost of a full replacement.
- Full Replacement: The most expensive option, which also requires additional costs for demolition, installation, new countertops, backsplash, and potentially plumbing or electrical work; for larger projects like these, you can discover Division One Plumbing for professional help.
Time & Disruption: A Faster Path to a New Kitchen
A full kitchen remodel can render your space unusable for weeks, or even months, filling your home with dust and debris. In contrast, a professional painting process is streamlined for minimal disruption. The project is typically completed in just a few days, and your kitchen remains functional for most of that time. You get to enjoy a stunning, factory-finish new look without the prolonged chaos of a construction zone.
The Professional Cabinet Painting Process: From Prep to Perfection
Ever wonder how professionals achieve that flawless, durable finish that looks like it came straight from the factory? The secret isn’t just in the paint-it’s in a systematic, multi-phase process where meticulous preparation accounts for 90% of the job. While brushing or rolling can be done, professional spraying delivers a smooth, even coating without brush marks. Understanding this process helps you know what to expect when transforming your kitchen.
Phase 1: Meticulous On-Site Preparation
The first step is to protect your home and prepare the cabinet boxes. Your kitchen is turned into a clean, controlled workspace. This critical phase involves:
- Systematic Disassembly: Every door, drawer front, and piece of hardware is carefully removed and labeled to ensure it returns to its exact original location.
- Deep Cleaning: Surfaces are thoroughly scrubbed with professional-grade de-greasers to eliminate years of accumulated oils, grime, and residues that would prevent paint adhesion.
- Total Protection: All surrounding surfaces-countertops, floors, backsplash, and appliances-are meticulously masked off with paper, plastic, and tape to protect them from dust and overspray.
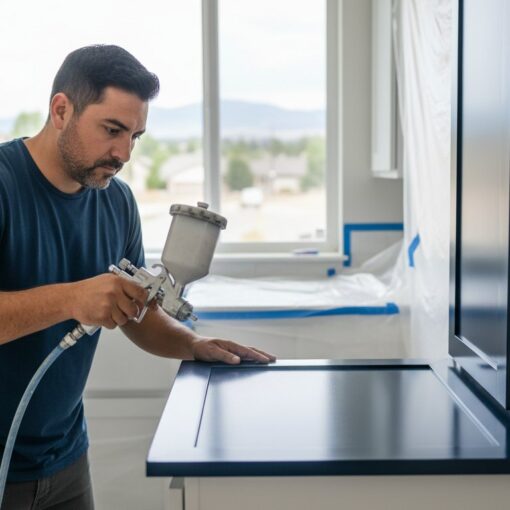
Phase 2: Off-Site Finishing for a Flawless Surface
For a truly professional finish, doors and drawer fronts are taken to an off-site facility. This controlled environment is essential for a perfect application, free from dust and debris. Here, the magic happens:
- Sanding: All surfaces are scuff-sanded to de-gloss the old finish and create a microscopic texture, or “tooth,” for the primer to grip onto securely.
- Priming: A high-adhesion bonding primer is applied. This crucial layer seals the wood, blocks stains, and provides the ideal foundation for the topcoat.
- Spraying: Multiple thin coats of premium, cabinet-grade paint are sprayed. This technique, central to quality kitchen cabinet painting, ensures a perfectly smooth, hard-wearing, and streak-free finish.
Phase 3: Reassembly and the Final Reveal
Once the paint has fully cured to a durable finish, the team returns to bring your new kitchen to life. This final phase is performed with precision and care to ensure a stunning result.
- Careful Reinstallation: Your newly finished doors and drawers are carefully transported back and reinstalled. Bumpers are added to protect the new finish.
- Hardware and Adjustments: Your original or new hardware is installed, and every door and drawer is adjusted for perfect alignment and smooth operation.
- Final Walkthrough: The team removes all masking materials, cleans the work area, and conducts a final walkthrough with you to ensure your complete satisfaction.
DIY vs. Hiring a Professional: An Honest Comparison
The idea of transforming your kitchen with a few coats of paint is tempting, and for some, a DIY approach can be rewarding. However, a successful kitchen cabinet painting project requires more than just a brush and a can-do attitude. It’s crucial to weigh the potential savings against the risks and true costs before you start.
The Allure of DIY: When It Might Make Sense
A DIY project might be the right choice if you have significant fine-finish painting experience, a high tolerance for disruption, and own or can rent professional-grade equipment. It’s best suited for smaller jobs, like a single bathroom vanity or a small set of laundry room cabinets, where mistakes are less costly and the learning curve is more manageable.
Common DIY Pitfalls and Hidden Costs
Unfortunately, many DIY kitchen cabinet painting jobs end in disappointment. The most common failure point is improper preparation. Without meticulous cleaning, sanding, and the right primer, paint will inevitably chip, peel, or suffer from tannin bleed-through, especially on oak or cherry cabinets. This leads to a finish that looks worn out within months.
Beyond the prep, achieving a smooth finish is a major challenge. Brush strokes and roller marks are tell-tale signs of a DIY job. The hidden costs also add up quickly:
- Specialized Primers & Paints: High-adhesion bonding primers and durable cabinet-specific enamels cost significantly more than standard wall paint.
- Essential Tools: Quality sandpaper, degreasers, masking materials, brushes, and rollers can easily total hundreds of dollars.
- Time & Disruption: A proper job takes days, not hours. Expect your kitchen to be unusable for a week or more as you wait for multiple coats to dry and cure.
Why a Pro Finish is Different (and Worth It)
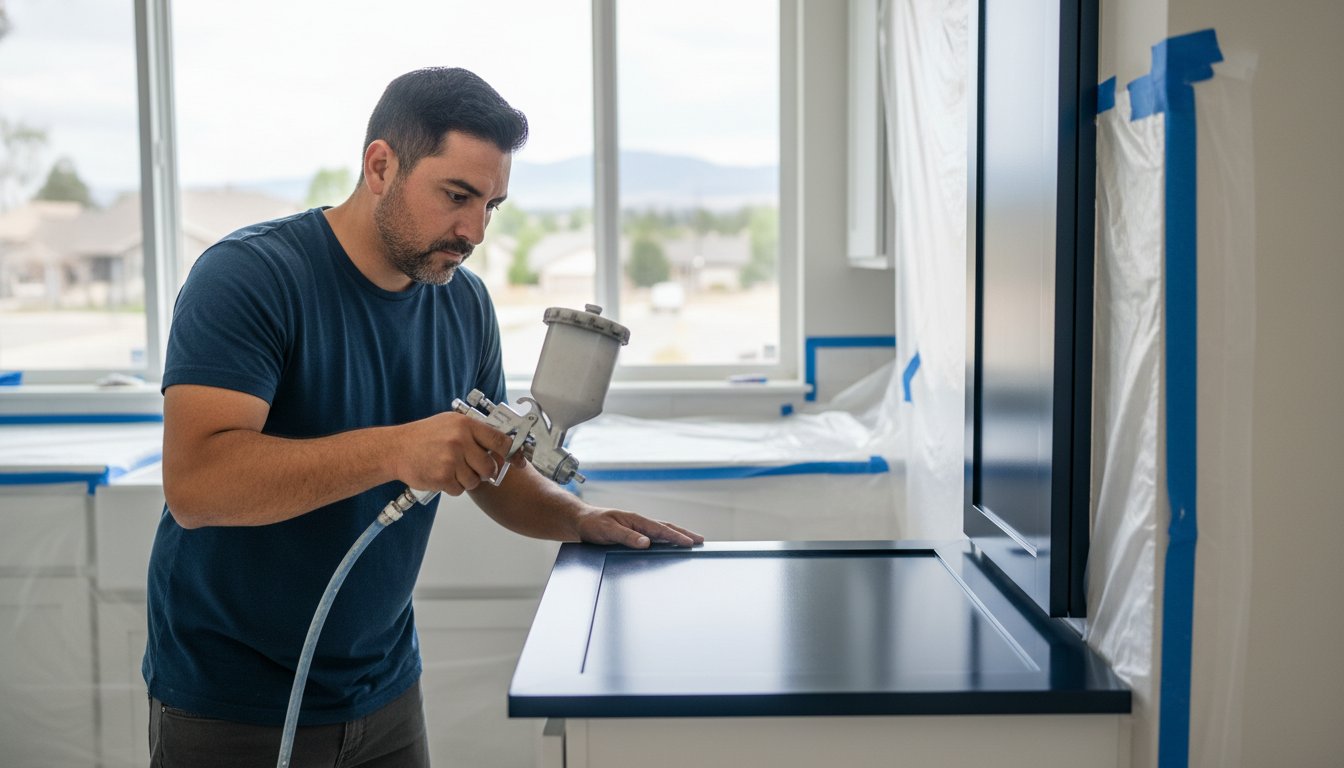
The difference between a DIY and a professional finish comes down to three key areas: materials, equipment, and expertise. Professionals use industrial-grade coatings-like two-component polyurethanes-that are far more durable than anything available at a retail store. These products resist chipping, yellowing, and daily wear and tear for years.
This superior coating is applied with professional HVLP (High Volume, Low Pressure) spray systems in a controlled environment. This technique creates a flawless, glass-smooth surface that looks and feels like it came directly from the factory. An experienced painter also knows how to adapt their process for different wood types and existing finishes, preventing problems before they start. The result isn’t just a color change; it’s a durable, long-lasting restoration. Get a no-obligation quote and see the professional difference.

Choosing the Right Paint, Finish, and Color
The success of your kitchen cabinet painting project hinges on more than just technique. The products you choose-from primer to the final topcoat-determine whether your cabinets look stunning for years or start chipping within months. Making the right selections in paint, sheen, and color is what separates an amateur job from a professional, long-lasting transformation.
The Science Behind Professional-Grade Cabinet Coatings
Your kitchen cabinets face daily assaults from grease, moisture, and constant handling. Standard latex wall paint isn’t engineered for this abuse; it remains too soft and will quickly peel or scuff. Professionals exclusively use advanced coatings like Alkyd Urethane Enamel. This hybrid paint combines the hardness of oil-based enamel with the low-odor, easy cleanup of water-based formulas. It cures to a hard, non-blocking, furniture-grade finish that resists chipping and stands up to scrubbing. This is always applied over a high-adhesion bonding primer, which creates an unshakeable foundation for the paint to grip.
Choosing a Sheen: From Matte to Semi-Gloss
The paint’s sheen impacts both aesthetics and practicality. For most kitchens, a satin or semi-gloss finish strikes the perfect balance. They offer a subtle luster that looks clean and sophisticated while being durable and incredibly easy to wipe down. While trendy matte finishes are excellent at hiding minor imperfections on older cabinets, they can be more susceptible to showing smudges. Conversely, a high-gloss finish provides maximum durability but will highlight every tiny flaw on your cabinet doors.
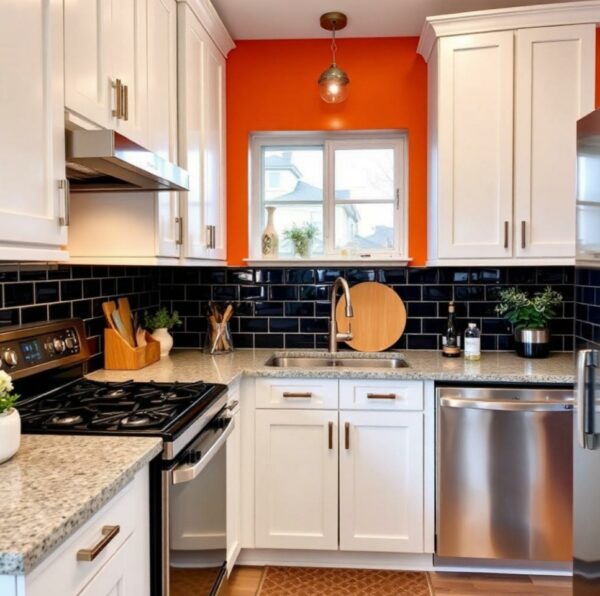
Timeless Kitchen Cabinet Color Trends
While personal taste is paramount, certain color families offer timeless appeal and broad versatility. These trends have proven staying power:
- Classic Whites and Off-Whites: Bright, clean, and always in style. Colors like Sherwin-Williams’ Alabaster or Benjamin Moore’s White Dove create an airy feel that makes any kitchen feel larger.
- Sophisticated Grays and Greiges: Modern yet classic, versatile neutrals like Agreeable Gray (SW) or Revere Pewter (BM) provide a perfect backdrop that complements almost any countertop and backsplash.
- Bold Choices: For a dramatic statement, consider a deep navy like Hale Navy (BM) or a rich, earthy green. These work wonderfully on an island or as a two-tone look with a lighter upper cabinet color.
Finally, don’t forget the finishing touch! New hardware is like jewelry for your cabinets. Swapping dated knobs for sleek, modern pulls in brass, matte black, or nickel can completely elevate the final look. For expert advice on the best products and colors for your home, our team is always ready to help.
How to Hire the Best Kitchen Cabinet Painter
Choosing the right professional is the most critical step in your kitchen transformation. A skilled painter delivers a durable, factory-like finish, while an inexperienced one can leave you with a costly mess. Vetting potential contractors thoroughly ensures your investment in kitchen cabinet painting pays off for years to come. Use this guide to identify a true professional.
Key Questions to Ask Every Potential Contractor
Before you commit, arm yourself with questions that reveal a contractor’s expertise and process. A true professional will have confident, detailed answers. Be sure to ask:
- What is your exact preparation and painting process? Look for specifics like degreasing, sanding, caulking, and priming.
- What specific type of primer and paint do you use? They should name high-quality, industrial-strength products like conversion varnish or urethane acrylics, not just standard house paint.
- Do you spray the doors and drawers off-site? Taking them to a controlled spray booth is the industry standard for a flawless, durable finish.
- Can you provide recent references and a portfolio of your work? A confident pro will be eager to show you their completed projects.
Decoding the Quote: What Should Be Included?
A professional quote is a detailed project blueprint, not just a price tag. It protects both you and the contractor by setting clear expectations. Your estimate should always include:
- A detailed scope of work, listing every step from prep to cleanup.
- The specific brand and type of primer, paint, and topcoat being used.
- A clear timeline, including start and estimated completion dates.
- Proof of liability insurance and information on any workmanship guarantees.
The Importance of a Portfolio and Local Reviews
Don’t just take a contractor’s word for it-verify their reputation. A strong portfolio should feature high-resolution photos of various completed projects, showcasing clean lines and a smooth finish. Beyond their website, check for consistent positive feedback on third-party sites like Google, Yelp, or Houzz. This confirms they are an established and trusted company in your community.
Ready to work with a professional team that checks all these boxes? Contact us for a detailed, transparent quote today.
Your Dream Kitchen is Just a Coat of Paint Away
As we’ve explored, you don’t need a costly, disruptive remodel to completely revitalize the heart of your home. The right kitchen cabinet painting project offers a stunning transformation for a fraction of the price and time. The key to a durable, beautiful result lies in meticulous preparation and professional application, ensuring a finish that elevates your entire space, boosts your home’s value, and brings you joy for years to come.
For homeowners in the Denver metro area, our trusted team specializes in delivering that flawless, factory-quality sprayed finish you deserve. We invite you to see our portfolio of stunning kitchen makeovers and imagine the possibilities. When you’re ready to stop dreaming and start planning, we’re here to provide an expert consultation and a clear path forward.
Ready for a kitchen transformation? Get your free, no-obligation estimate today!
Frequently Asked Questions
How long does kitchen cabinet painting last?
A professional cabinet paint job can last 8 to 15 years, often rivaling the durability of a factory finish. The longevity depends heavily on the quality of the preparation, the professional-grade materials used, and your household’s daily wear and tear. With proper care and cleaning, a high-quality finish applied by experienced painters will maintain its beauty for many years, making it a fantastic long-term investment for your home.
Can you paint any type of cabinet, like laminate or thermofoil?
Yes, virtually any cabinet material can be successfully painted, including difficult surfaces like laminate, thermofoil, and melamine. The key is meticulous, professional preparation. This involves a thorough cleaning and degreasing process, followed by scuff-sanding and the application of a specialized bonding primer. This creates a strong foundation that ensures the topcoat adheres perfectly for a smooth, durable finish that resists chipping and peeling.
How much does it cost to have kitchen cabinets professionally painted?
The cost for professional kitchen cabinet painting for an average-sized kitchen typically ranges from $3,000 to $8,000. The final price is influenced by factors such as the total number of cabinet doors and drawers, the current condition of the surfaces, the complexity of the kitchen layout, and the type of finish selected. Obtaining a detailed estimate from a professional is the best way to get an accurate cost for your specific project.
How long will I be without a functioning kitchen during the process?
You will have access to your kitchen for most of the project. While the cabinet doors and drawer fronts are taken off-site for spraying, your countertops, sink, and appliances remain usable. The on-site work of prepping and painting the cabinet boxes typically takes only 2-3 days within a total project timeline of about one week. We focus on minimizing disruption so you can continue with your daily routine as much as possible.
Is professional cabinet painting a messy process?
When done by professionals, it is a very clean and contained process. We take extensive precautions to protect your home. Your kitchen is thoroughly masked off with plastic and paper to cover floors, countertops, backsplashes, and appliances. We use dust extraction systems during sanding and proper ventilation to manage paint fumes, ensuring your home remains clean and safe. Our goal is to leave nothing behind but a beautiful, transformed kitchen.
What is the best way to clean painted kitchen cabinets?
For routine cleaning, use a soft, microfiber cloth dampened with a simple solution of mild dish soap and warm water. Gently wipe down the cabinet surfaces and then dry them immediately with a separate clean, dry cloth to prevent water spots. Avoid using abrasive scrubbers, harsh chemical cleaners, or products containing bleach or ammonia, as these can dull or damage the protective topcoat and compromise the finish over time.

