
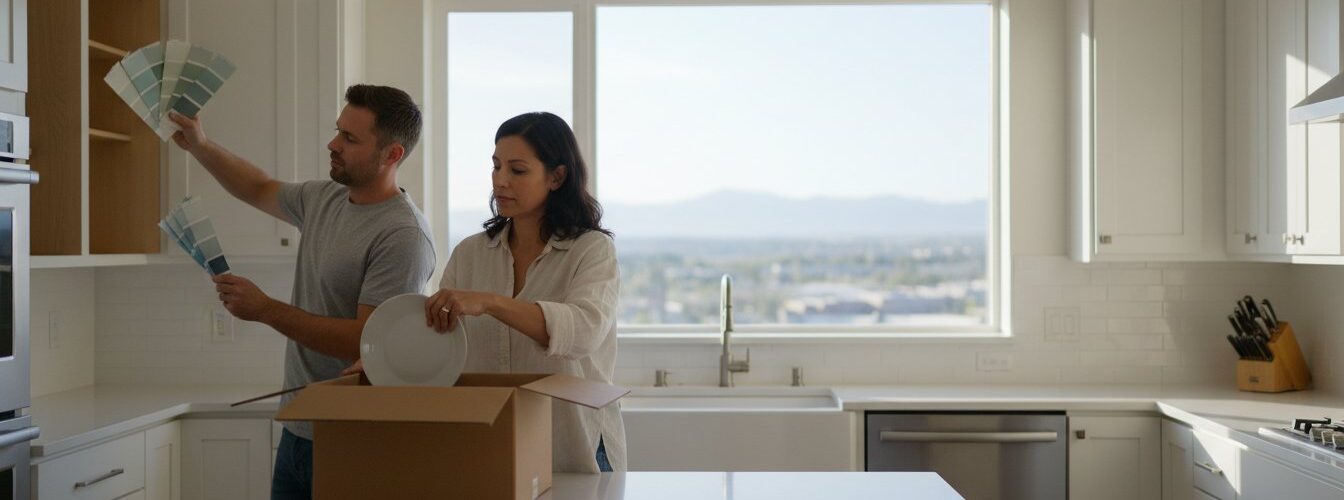
Last Tuesday, a homeowner named Sarah stood in her kitchen staring at 42 cabinet doors, wondering if she actually needed to pack her entire pantry into cardboard boxes before the crew arrived. It’s a common source of stress. You probably feel that same anxiety about your kitchen being out of commission for 5 days or how dust might affect your toddlers and pets. You want the beauty of a renovation without the lingering chaos of a construction zone. Learning exactly how to prepare for professional cabinet painters is the only way to guarantee a seamless, factory-quality transformation while keeping your sanity intact.
We promise that by following this 2026 guide, you’ll minimize project downtime and protect your home from stray particles. You don’t have to guess which items stay and which ones go. This article provides a clear, actionable 7 point checklist that covers everything from clearing countertops to setting up pet-safe zones. We’re going to show you how to streamline the process so your painters can focus on delivering a flawless finish while you enjoy a quiet, organized home.
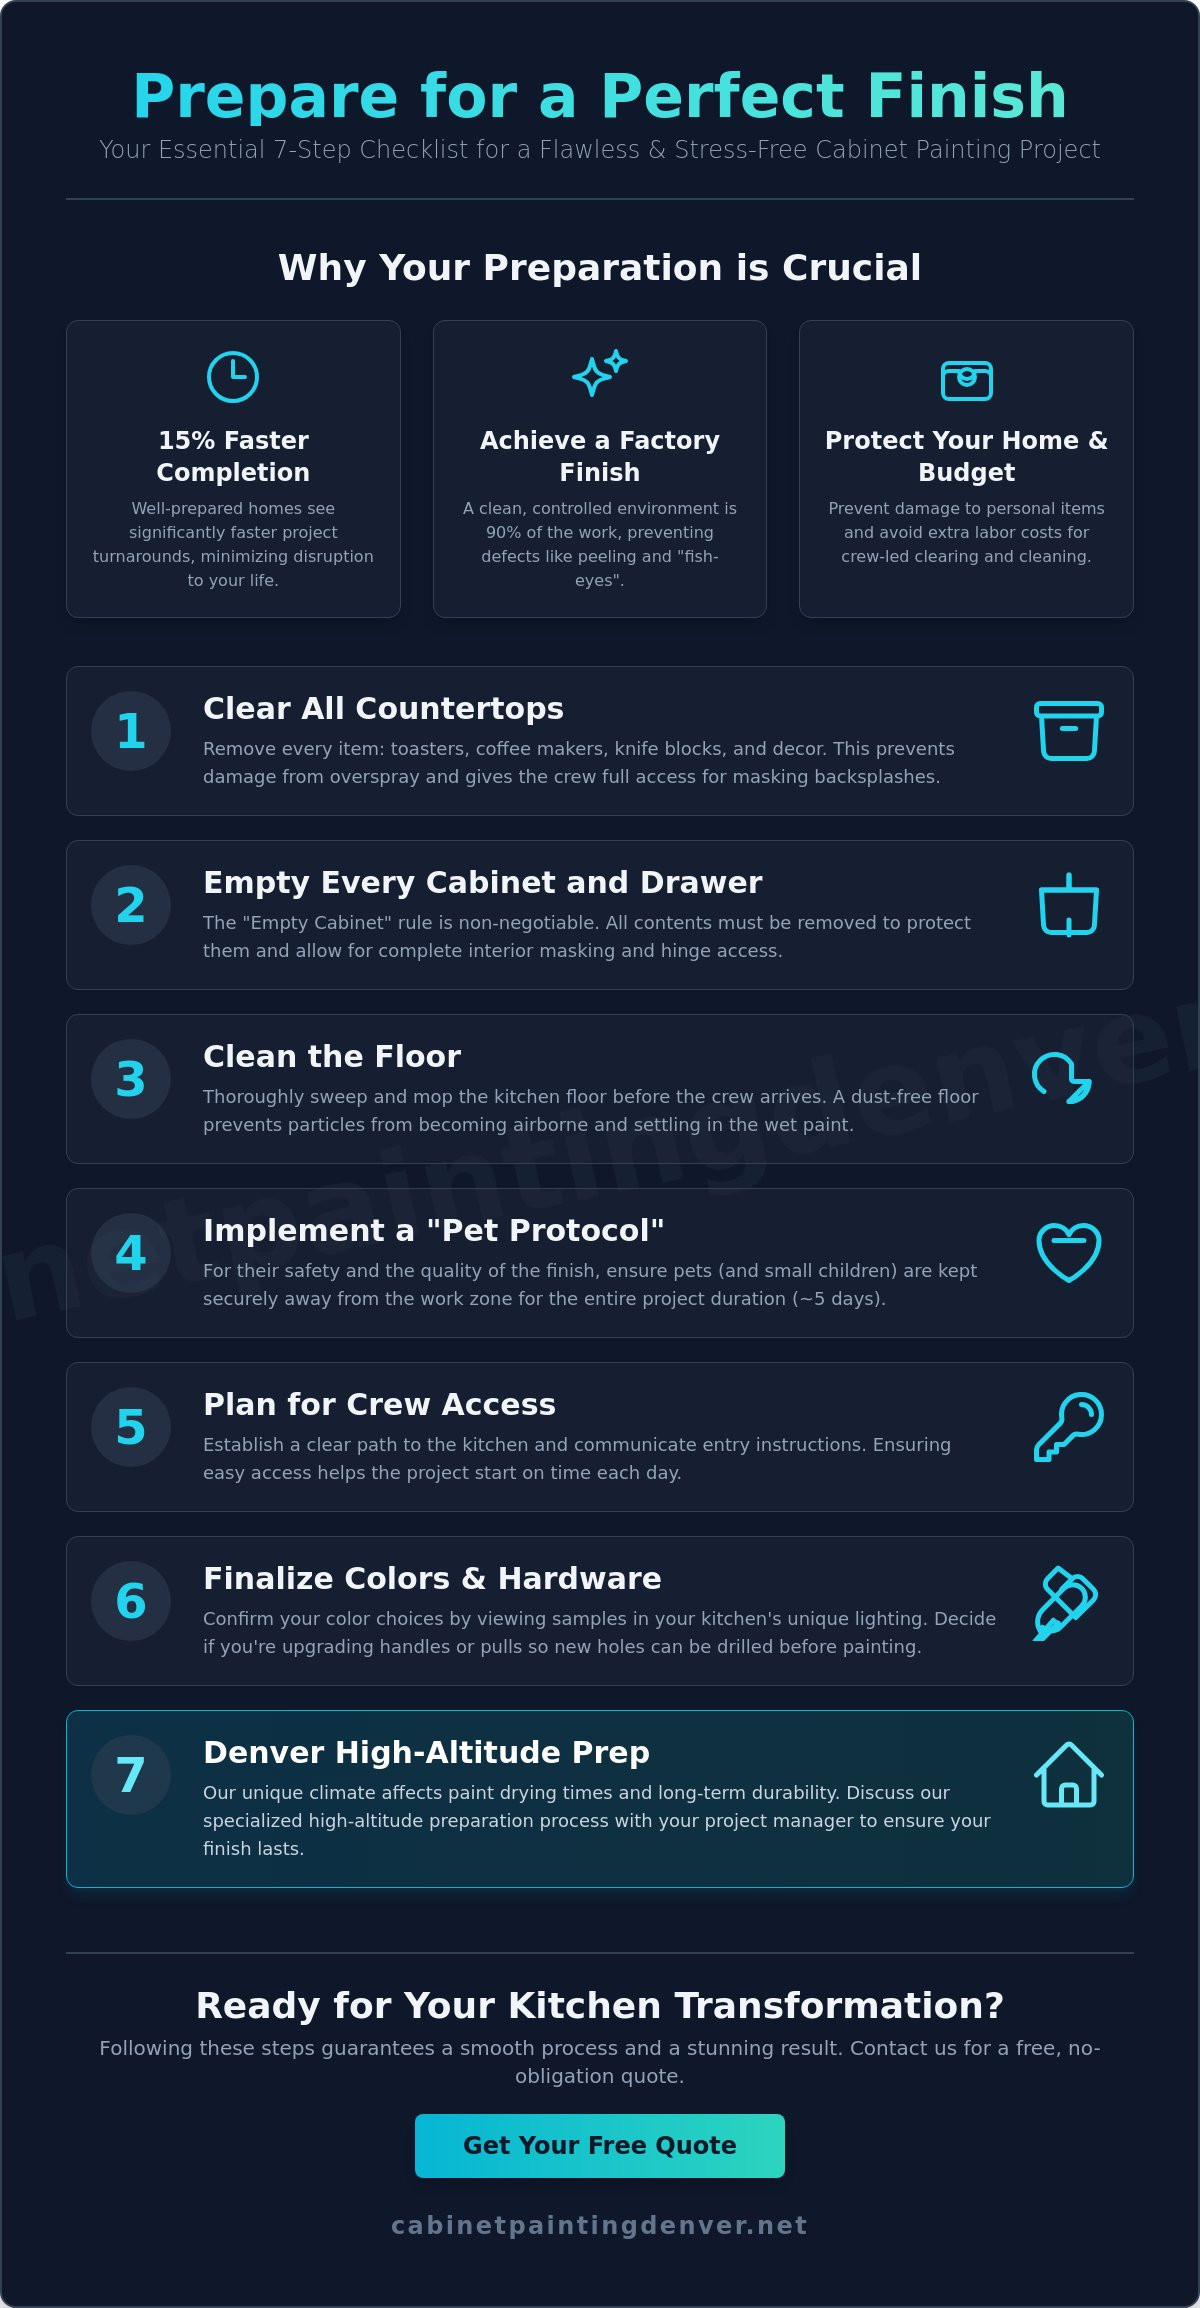
Key Takeaways
- Learn exactly how to prepare for professional cabinet painters by clearing your workspace to reduce labor hours and ensure a flawless, factory-quality finish.
- Master the “Empty Cabinet” rule to protect your belongings and allow for comprehensive masking of your kitchen’s backsplash and walls.
- Establish a seamless project workflow by coordinating crew access and implementing a “Pet Protocol” to keep your home safe and the paint pristine.
- Discover how to finalize your color choices under shifting light conditions and decide whether a hardware upgrade is right for your cabinet transformation.
- Understand how Denver’s unique high-altitude climate impacts drying times and color longevity, requiring specific prep for long-term success.
Why Proper Homeowner Preparation is Crucial for a Factory-Grade Finish
Achieving a flawless, durable surface on your cabinetry requires more than just a skilled hand with a spray gun. It starts long before the first drop of paint arrives at your door. Understanding how to prepare for professional cabinet painters ensures that the transition from a dated kitchen to a modern masterpiece is seamless. When you handle the logistical groundwork, you allow the specialists to focus on the high-level technical tasks that define a premium result. A factory-grade finish is 90% preparation and 10% application. If the environment isn’t controlled, even the most expensive coatings will fail.
To better understand this concept, watch this helpful video:
The Difference Between DIY Prep and Pro Prep
Professional crews focus on technical precision, including masking surfaces and applying a high-quality preparatory coating to ensure long-term adhesion. Homeowners often underestimate how residual kitchen grease can ruin a finish. This grease can accumulate at a rate of several millimeters per year near cooking surfaces. If this isn’t cleared away from the surrounding environment, it can lead to peeling or “fish-eyes” in the final product. Homeowner prep is the logistical foundation for professional execution. By clearing out the contents of your drawers and cabinets, you provide the crew with immediate access to every hinge and corner. This allows the painters to focus on degreasing and sanding rather than moving your dishes.
Protecting Your Investment from the Start
Efficiency is a major factor in the final cost to paint kitchen cabinets. When a crew spends the first three hours of a job moving your small appliances or clearing crumbs from drawers, those labor hours add up quickly. A clean, empty workspace reduces the risk of accidental damage to your personal items during the heavy masking phase. It also creates a psychological advantage. A crew that walks into a ready-to-work job site feels respected and can maintain a higher level of focus on the details. This preparation sets the stage for a stress-free kitchen cabinet painting experience that avoids the dust and delays common in disorganized projects. Recent 2025 industry data suggests that well-prepared homes see a 15% faster project completion rate than those where the crew must handle basic clearing. By following a clear guide on how to prepare for professional cabinet painters, you protect your home and your budget simultaneously.
- Clear the counters: Remove all appliances, decor, and knife blocks.
- Empty the cabinets: Every item must be removed to allow for interior masking.
- Clean the floor: A dust-free floor prevents particles from kicking up into the wet paint.
- Plan for pets: Ensure animals are kept away from the workspace to maintain a sterile environment.
The Emptying Checklist: What Stays and What Goes?
Clearing your kitchen is the most labor-intensive part of the process, but it’s vital for a high-quality finish. Professional painters need a completely clear workspace to apply masking tape and protective plastic. Understanding how to prepare for professional cabinet painters starts with a total clear-out of the work zone to prevent damage to your personal belongings.
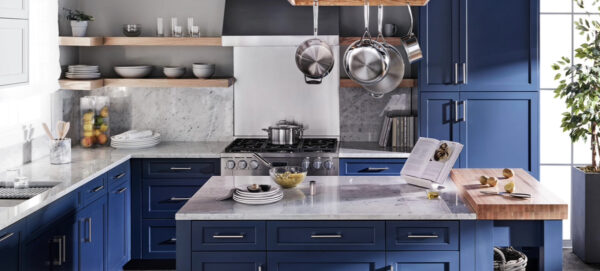
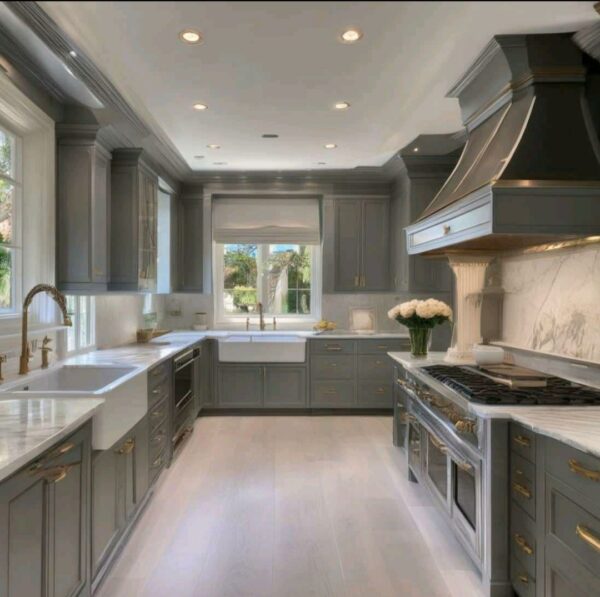
Countertops and Backsplashes
You must remove every item from your countertops, including small appliances like toasters, coffee makers, and knife blocks. These items should move to another room entirely. Anything left within three feet of the cabinets is at risk for overspray, which is a fine mist of paint that can settle on surfaces even with protective barriers in place. If your kitchen features a heavy 400-pound refrigerator or a slide-in range, consult with your team. Most pros will either slide these out to paint the cabinet sides or mask them off completely using heavy-duty plastic sheeting. Clearing the backsplash area is also necessary because painters must run a clean line of tape along the edge where the cabinet meets the wall.
Inside the Cabinets and Drawers
The “Empty Cabinet” rule is non-negotiable if your painters are spraying the cabinet boxes. High-volume, low-pressure (HVLP) sprayers create a fog of paint particles that can find their way into small gaps. Even if you’ve opted for a brush-and-roll method, you should still clear the interiors. Sanding equipment creates significant vibration that can cause fragile glassware or porcelain to shift and break.
Dust management is another major factor. For homes built before 1978, following lead-safe work practices is a legal and safety requirement to prevent the spread of toxic dust. Even in newer homes, fine wood dust from sanding will coat any plates or food items left inside. If your project involves removing the actual shelves, use a piece of painter’s tape to label each one (e.g., “Upper Left 1”). This small step saves hours of frustration during the reinstallation phase. Emptying every drawer is a vital step in how to prepare for professional cabinet painters to ensure a factory-like finish without sawdust contamination in your silverware.
Don’t forget the small details on the exterior of your cabinets. Remove all magnets, decorative towels, and hanging plants before the crew arrives. If you want a seamless experience, you can find expert help through cabinet painting in Denver to handle the technical details of the transformation. Taking the time to strip the room down to the essentials ensures the painters can focus on the finish rather than moving your spice rack.
Managing Your Home Environment During the Painting Project
Success requires more than just picking a color. You need a plan to keep your household running while the kitchen is under construction. Knowing how to prepare for professional cabinet painters involves managing the daily flow of your home to avoid project delays. Start by setting up a temporary kitchen station in a separate room like the dining area or a finished basement. Include a microwave, coffee maker, and disposable plates to reduce the need for dishwashing. Since your primary sink will likely be within the “wet zone,” this setup keeps your morning routine intact while the crew works.
Pet safety is a top priority during any renovation. Most professional coatings used in 2026 are low-VOC, but wet paint remains a hazard for curious paws and wagging tails. Keep pets in a crate or a separate wing of the house for the duration of the project. You must also manage your HVAC system carefully. Turn off the air conditioning or heat during the actual spraying process. This prevents the intake vents from pulling in fine paint mist, which can clog your filters and spread particles into other rooms. Learning how to prepare for professional cabinet painters also means coordinating these small environmental shifts to protect your home’s air quality.
Safety and Access Logistics
Establish a clear entry point for the crew, usually through a garage or a side door. This limits the amount of dust tracked through your main living areas. Ensure the team has a designated parking spot close to the entrance. Professional spray rigs and ventilation fans can weigh over 150 pounds, so clear parking is essential for heavy spray equipment transport and safe unloading. If possible, provide access to a utility sink or an outdoor spigot where the team can clean their tools without using your primary bathroom or kitchen sinks.
Air Quality and Dust Containment
Expect your kitchen to look like a laboratory for a few days. Professional teams use zip-wall systems and 6-mil plastic sheeting to create airtight “tents” around the cabinets. These barriers contain roughly 98 percent of sanding dust. Prepare your family for the noise levels associated with modern prep work. Electric sanders and high-volume low-pressure (HVLP) sprayers generate sounds between 80 and 90 decibels. If you have young children, it’s best to schedule their nap times or playdates away from the house during active work hours. While 2026 paint technology has significantly reduced odors, some specialized primers still have a distinct scent. Keeping windows cracked in adjacent rooms helps maintain fresh air flow without compromising the temperature in the work zone.
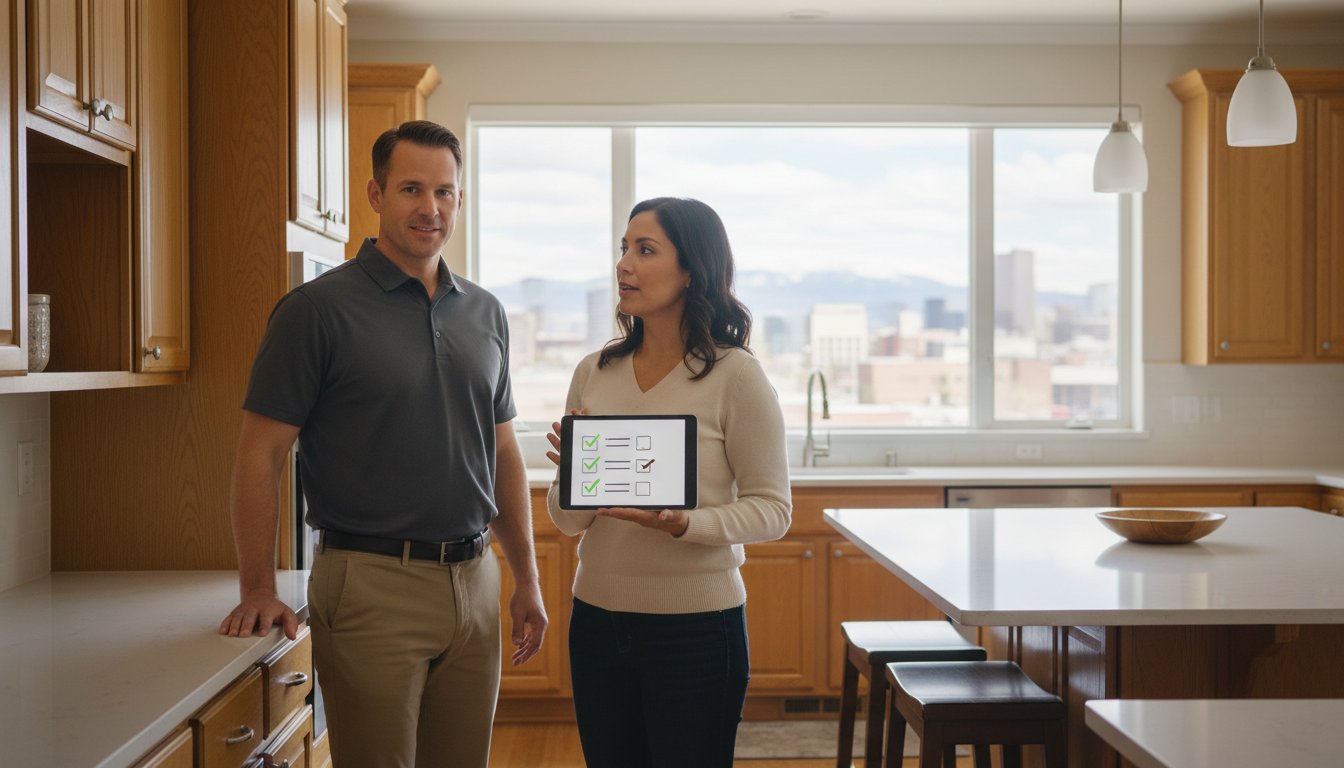
The Final Walkthrough: Hardware, Colors, and Last-Minute Decisions
The 48-hour window before your project begins is the most critical time for quality control. This is when you’ll perform a detailed inspection of every drawer and door face to ensure they’re ready for the primer. You must scrub away any sticky residue, cooking oils, or hand lotions that have accumulated near handles. A 2024 industry report from the Painting Contractors Association suggests that 85% of finish failures are caused by these invisible surface contaminants. Identifying “problem areas” now prevents delays later. Use a piece of low-tack painter’s tape to mark deep scratches or areas where water damage has caused the wood to swell. This step is a vital part of how to prepare for professional cabinet painters because it allows the crew to bring the right fillers and high-solids primers for your specific wood type.
Hardware and Hinge Logistics
Pros follow a strict “New Hardware” rule. If you’re upgrading to new pulls or knobs, they must be on-site by the first morning of the project. Changing hole patterns requires the crew to fill old drill sites with specialized wood filler before the painting process starts. This is especially important if you’re moving from a single-knob setup to a 5-inch handle, a transition seen in 75% of 2026 kitchen modernizations. Many homeowners are also choosing to upgrade to soft-close hinges during this phase. You don’t want to realize on Day 3 that your new hinges don’t fit the existing mortise. Additionally, you should remove or securely cover under-cabinet lighting strips. These fixtures often collect dust that can blow into a wet finish, and protecting them ensures the LED components remain paint-free.
Color and Finish Confirmation
Light behaves differently throughout the day, a phenomenon known as metamerism. You should check your final sample swatch at 9:00 AM and again at 7:00 PM to ensure the undertones don’t shift toward an unwanted green or purple hue. You’ll also need to confirm the sheen level with your chosen cabinet painter. While semi-gloss was the historical standard, satin finishes now represent 60% of 2026 kitchen renovations due to their ability to hide fingerprints and minor surface imperfections. Conduct a pre-masking walkthrough with the project manager to verify the exact “stop and start” points of the paint. This prevents confusion regarding the inside of the cabinets or the undersides of the upper boxes. Finalizing these details now ensures your how to prepare for professional cabinet painters efforts result in a factory-grade finish.
Ready to start your kitchen transformation with the experts? Contact our team today to schedule your professional color consultation and walkthrough.
Why Cabinet Painting Denver Requires Specific Prep for High-Altitude Success
Painting cabinets in the Mile High City involves more than just picking a trendy color. Denver’s 5,280-foot elevation creates a unique environment where paint cures differently than at sea level. When you are learning how to prepare for professional cabinet painters, you must account for the 15% average humidity levels that often occur in the afternoon. This dry air causes finishes to dry rapidly, which can lead to visible brush marks or “orange peel” textures if the environment isn’t controlled. Professional crews in Colorado use specific retardants to slow down this drying process, ensuring a smooth, factory-like finish despite the thin air.
Temperature swings are another staple of the Front Range. It is common for Denver to experience a 40-degree temperature drop within a single 12-hour period. These fluctuations can cause wood cabinets to expand or contract, potentially stressing a fresh coat of paint. Local expertise is vital here. We utilize high-bond, moisture-resistant primers that act as a flexible bridge between the wood and the topcoat. This specific prep prevents the cracking often seen in DIY projects that use standard big-box store products.
The Denver Climate Factor
Dry Colorado air is a magnet for static electricity. This static attracts fine dust particles to your cabinet doors right as the paint is applied. To mitigate this, we recommend running a humidifier 24 hours before the project begins to reach a stable 30% to 40% humidity level. You should also adjust your HVAC settings. Keep your home between 68 and 72 degrees Fahrenheit. Avoid turning on ceiling fans near the kitchen, as the rapid air movement in our dry climate can cause the paint to skin over before it has properly leveled out.
UV exposure is also significantly higher at our altitude. UV rays are roughly 20% stronger in Denver than they are at sea level. This intense light can shift the appearance of your chosen white or gray cabinets by mid-afternoon. When you determine how to prepare for professional cabinet painters, spend a full day observing how the sun hits your kitchen. We often suggest UV-stable pigments that won’t yellow or fade under the intense Colorado sun.
Ready for Your Transformation?
The 24-hour countdown is your final opportunity to ensure a seamless experience. Clear every item off your countertops and empty all drawers and cupboards. If you leave items inside, dust from the sanding process will find its way into your dishes. Ensure all pets are secured in a separate area of the house to prevent hair from drifting into the wet finish. Following these “Golden Rules” of prep guarantees that when the first tarp hits the floor, the crew can focus entirely on the craftsmanship of your finish.
If you are ready to upgrade your kitchen with a durable, high-altitude finish, reach out to us at cabinetpaintingdenver.net for a pre-project consultation. Our team understands the specific needs of Denver Metro homes. You can also view our local gallery for inspiration and see how we have transformed kitchens across the Front Range.
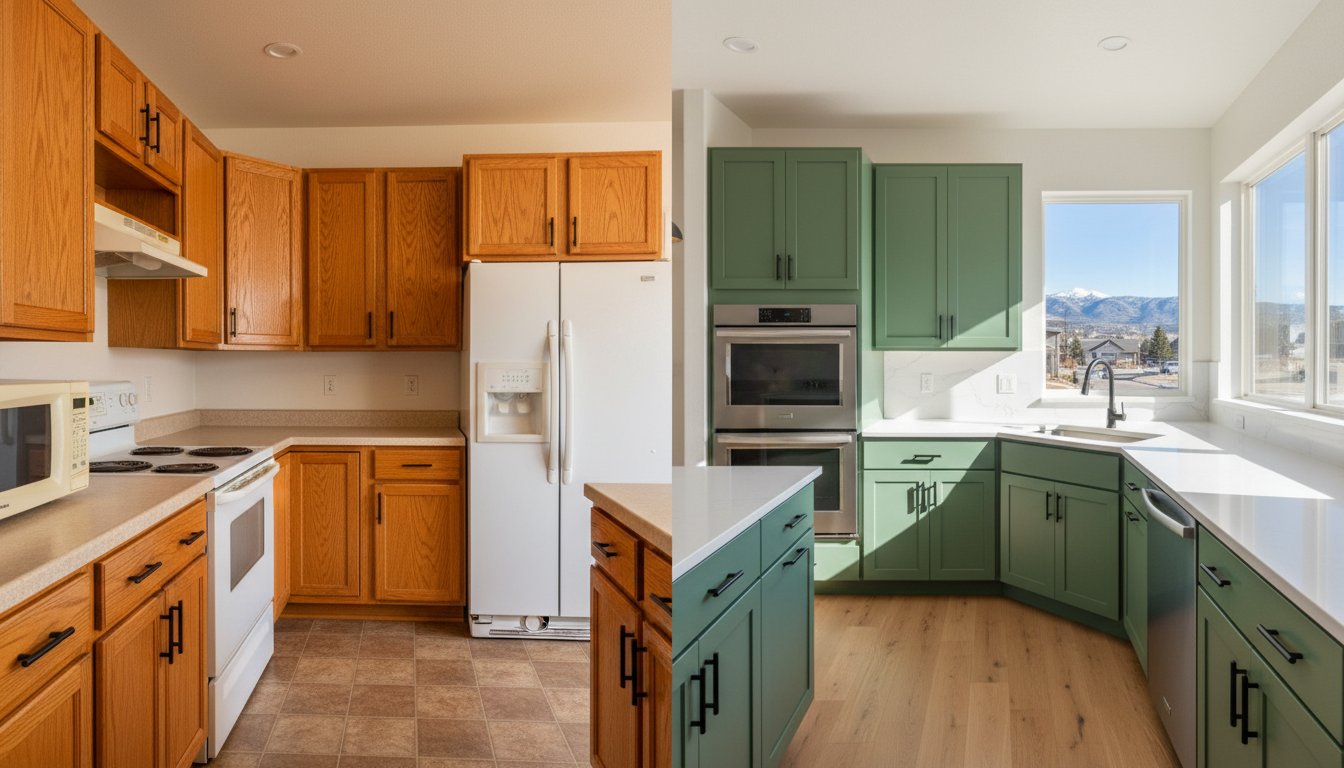
Ready Your Home for a 2026 Kitchen Transformation
Your kitchen renovation starts long before the first drop of paint hits the wood. By following our 10-step preparation process, you’re setting the stage for a factory-smooth finish that stands the test of time. Remember to clear your counters and empty every cabinet to give our team full access to all surfaces. This meticulous attention to detail is especially vital in Denver’s dry, high-altitude climate where paint cures differently than at sea level.
Understanding exactly how to prepare for professional cabinet painters saves time and protects your investment. Our locally owned Denver team uses a specialized HVLP spray finish to deliver a durable, flawless look without the brush strokes of traditional methods. We’ve refined our system over years of service in Colorado to ensure your home environment remains clean while we work.
Ready to elevate your space? Get Your Free Cabinet Painting Quote in Denver Today and see why local homeowners trust our proven results. You’re just one step away from the kitchen you’ve always wanted.
Frequently Asked Questions
Do I really need to empty my kitchen cabinets before they are painted?
Yes, you must completely empty your cabinets before the crew arrives. Professional painters require 100 percent clear access to the interior frames and shelving to ensure a uniform finish. Removing items prevents overspray damage and protects your dishes from the fine dust generated during the preparation phase. Most homeowners find that packing items into 12 by 18 inch plastic bins keeps the kitchen organized and mobile while the work progresses.
How long does a professional cabinet painting project usually take?
A standard kitchen project typically takes 3 to 5 business days from start to finish. This timeline includes 1 day for masking, 1 to 2 days for cleaning and sanding, and 2 days for the actual spraying and curing process. Learning how to prepare for professional cabinet painters helps keep this schedule on track. If your kitchen has more than 40 openings, expect the process to lean toward the 5 day mark.
Can I stay in my house while the cabinets are being sprayed?
You can remain in your home, but you must stay out of the work zone for at least 4 to 6 hours during the spraying phase. While many modern coatings meet the 50 grams per liter VOC limit set by environmental standards, the fumes can still be strong for sensitive individuals. We recommend staying in a different part of the house or leaving for the afternoon while the exhaust fans are running.
Should I clean my cabinets with soap and water before the painters arrive?
You don’t need to scrub your cabinets with soap and water because the crew uses specialized industrial degreasers. Standard household cleaners often leave a 1 percent residue that can interfere with paint adhesion. The professionals will spend approximately 2 to 4 hours using TSP or denatured alcohol to strip away oils. This ensures the new finish bonds perfectly to the wood surface without peeling after the 30 day curing period.
What happens if I forget to move my appliances?
Forgetting to move appliances like your refrigerator can cause a 24 hour delay in the production schedule. Painters cannot reach the side panels or trim pieces if a 36 inch wide fridge is blocking the path. If an appliance is too heavy to move, the crew will mask it off using 1.5 mil plastic sheeting. However, this often leaves a 0.25 inch gap of unpainted wood behind the unit that remains visible.
Do I need to remove the cabinet doors myself?
You aren’t responsible for removing the doors or drawer fronts. The painting team will handle 100 percent of the disassembly, including the removal of hinges and handles. They typically use a numbering system where each door receives a specific 1 or 2 digit code hidden in the hinge cup. This system ensures that every piece returns to its exact original location once the 3 coat finishing process is complete.
Will there be a lot of dust in my house during the sanding process?
Dust is kept to a minimum because professional crews use HEPA filtered vacuum sanders. These tools capture 99.7 percent of airborne particles at the source before they can settle on your furniture. Knowing how to prepare for professional cabinet painters involves trusting these containment systems. Painters also seal the kitchen with 3 mil plastic zip walls to create a pressurized environment that keeps the rest of your home clean during the sanding phase.
Can I use my kitchen at night after the painters leave for the day?
You will have 0 percent access to your stove or oven while the kitchen is masked off for the week. The plastic sheeting and tape used to protect your countertops and floors are flammable and easily damaged. You can usually access your microwave or a portable coffee maker if they are moved to a separate room. Plan to eat out or use a slow cooker in the dining room for all 5 days.


