

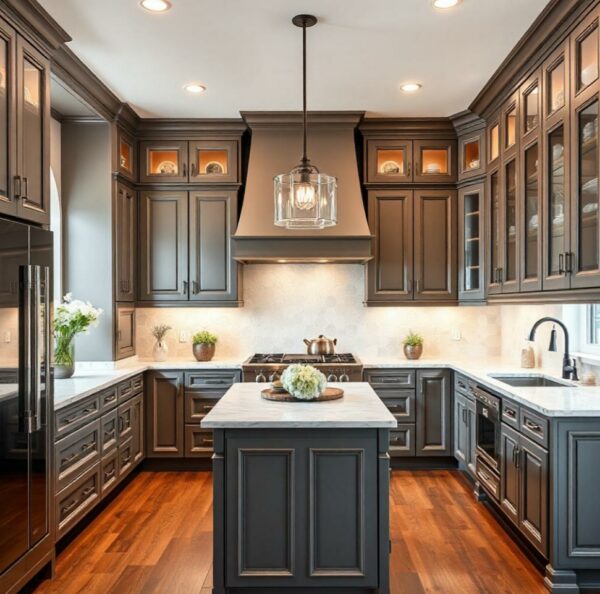
You picture it perfectly: your kitchen, completely transformed with cabinets that have a smooth, flawless finish. But a nagging fear holds you back-the horror stories of peeling paint, visible brush marks, and DIY projects gone terribly wrong. The line between a stunning remodel and a costly mistake is thin, and it all hinges on finding the right professional cabinet painter. So, how can you be sure you’re hiring a true expert and not just a general painter with a brush and a promise?
That’s exactly why we created this ultimate 2026 guide. We’re pulling back the curtain on the cabinet painting industry to give you the insider knowledge you need. You’ll learn how to spot a master craftsman, what questions to ask, and how to understand quotes to ensure you’re getting lasting value. By the end of this article, you’ll have the confidence to hire a professional who can deliver that durable, factory-like finish that will make you fall in love with your kitchen all over again.
Why Hire a Professional Cabinet Painter Instead of DIY?
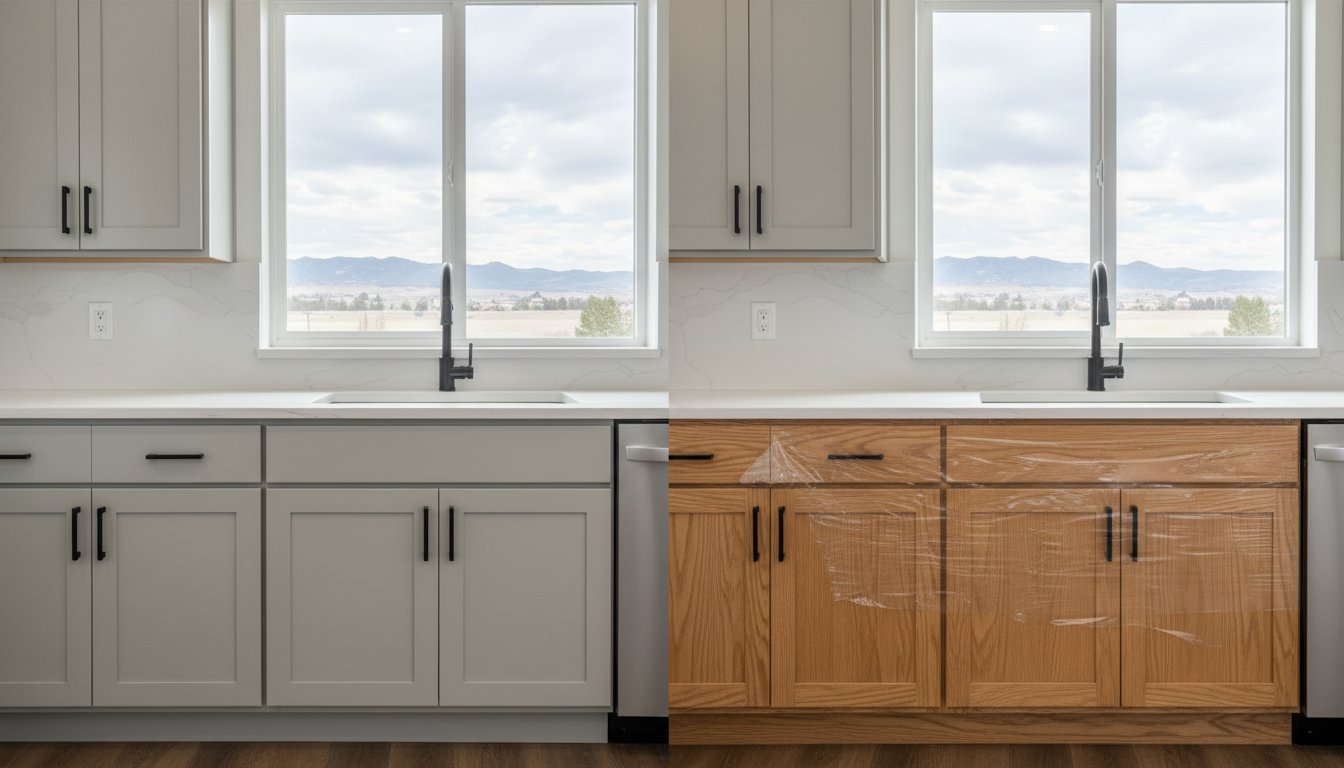
It’s the first question every homeowner asks: “Can I just paint my kitchen cabinets myself?” While the ambition is admirable, the reality is that a DIY cabinet painting project rarely achieves the flawless, durable finish you see in magazines. The difference between a weekend project and a professional result is stark, often revealing itself in visible brush strokes, an uneven sheen, and a finish that starts chipping in months, not years.
To see the meticulous process required for a lasting finish, watch this helpful guide:
The Factory-Finish Difference: Spraying vs. Rolling
A professional cabinet painter doesn’t use brushes or rollers on your cabinet doors. Instead, they use specialized High Volume, Low Pressure (HVLP) sprayers in a controlled environment. This technique atomizes the coating, allowing it to lay down perfectly flat and self-level. The result is a seamless, glass-smooth surface with no texture, drips, or imperfections-a true factory-quality finish that is impossible to replicate with traditional DIY methods.
Durability and Longevity: The Right Prep & Products
A beautiful finish is only as good as the preparation beneath it. Professionals follow a rigorous multi-step process that includes meticulous cleaning with industrial degreasers, scuff sanding to create adhesion, and applying high-performance bonding primers. Understanding your specific Kitchen cabinet construction is vital, as materials like oak, MDF, or thermofoil require unique prep. Furthermore, pros use industrial-grade coatings-not house paint-designed to withstand the high-touch, high-moisture environment of a kitchen for years to come.
Avoiding the Hidden Costs of a DIY Failure
A DIY attempt can quickly become more expensive than hiring a pro. The “hidden costs” of a project gone wrong add up fast and often include:
- The expense of renting or buying specialized tools like a paint sprayer and sander.
- The high cost of premium primers and cabinet coatings.
- The immense labor and expense required to strip a failed paint job.
- The priceless value of your own time-a pro job takes days, while a DIY project can disrupt your home for weeks.
Ultimately, hiring a professional is an investment in a guaranteed, lasting result that enhances your home’s beauty and value without the risk and stress.
What Does a Cabinet Painter Actually Do? The Professional Process
Hiring a professional cabinet painter is not just about changing a color; it’s about investing in a factory-grade finish that revitalizes your entire kitchen. This is a meticulous, multi-day manufacturing process performed in your home, far removed from a simple weekend DIY project. Understanding the detailed steps involved helps clarify the value and expertise you receive.
Step 1: Meticulous On-Site Preparation
The process begins with an uncompromising focus on protecting your home. Your kitchen is methodically transformed into a controlled work environment. This critical first phase includes:
- Total Containment: Masking paper and plastic are used to shield countertops, floors, appliances, backsplashes, and adjacent walls from any dust or overspray.
- Creating a Spray Booth: The cabinet boxes are enclosed in a temporary, sealed plastic structure, often with ventilation, to ensure a flawless on-site spray application.
- Systematic Disassembly: Every door, drawer front, and piece of hardware is carefully removed and labeled to guarantee perfect reassembly.
- Intensive Cleaning: Years of grease, wax, and grime are stripped away from all surfaces with powerful degreasers. This step is non-negotiable for proper paint adhesion. For homes built before 1978, a true professional will also follow specific lead-safe work practices as required by law.
Step 2: Off-Site Finishing for Doors & Drawers
To achieve a perfectly smooth, hard-wearing finish, your cabinet doors and drawer fronts are transported to a dedicated workshop. This controlled, dust-free environment is where the real magic happens. Here, each piece is sanded, primed with a high-adhesion bonding primer, and receives multiple coats of industrial-grade lacquer or enamel using professional HVLP sprayers. Crucially, proper curing time is allowed between each coat, creating a durable finish that resists chipping and wear.
Step 3: Flawless On-Site Painting and Reassembly
While your doors cure off-site, the on-site team meticulously sprays the cabinet boxes and frames inside the protected spray booth. Once all components are fully cured, the reassembly process begins. The expert cabinet painter will carefully transport and reinstall each door and drawer front, install your new or existing hardware, and perform precise adjustments to ensure perfect alignment and smooth operation. The project concludes with a full cleanup and a detailed final walkthrough with you to ensure absolute satisfaction.
How to Spot a True Cabinet Painting Specialist
Not all painters are created equal. While a general house painter is perfect for walls and trim, cabinet refinishing is a completely different craft. It requires a unique combination of woodworking knowledge, specialized equipment, and finishing expertise. Hiring a generalist for this detailed work is one of the most common and costly mistakes a homeowner can make. Use this checklist to identify a true cabinet painting specialist who will deliver a factory-finish result that lasts.
They Have a Specialized Portfolio
A specialist’s portfolio is their resume. Don’t just look for pretty pictures; look for proof of expertise. Their gallery should be overwhelmingly focused on cabinet projects, not a random assortment of interior and exterior jobs. Scrutinize their work for:
- High-Quality Close-Ups: Look for photos that show the details-smooth surfaces, clean lines, and a flawless sheen. Can you see wood grain? Was it meant to be visible or filled?
- Transformative Before-and-Afters: The best portfolios demonstrate the ability to completely transform a kitchen, showcasing their process and results.
- Local References: A reputable professional will be happy to provide contact information for recent, local clients who can vouch for their craftsmanship and professionalism.
They Use Professional-Grade Materials
The single biggest difference between an amateur and a professional cabinet painter is the product they use. Standard latex wall paint is not designed to withstand the high-touch, high-moisture environment of a kitchen. A specialist understands the chemistry behind a durable finish. Ask them directly: “What specific primer and topcoat will you use?” They should name industrial-grade products like conversion varnish, 2K polyurethanes, or high-solid acrylics-not something you can buy at a big-box hardware store.
They Provide a Detailed, Written Estimate
A vague, one-line quote is a major red flag. A professional’s estimate is a transparent project roadmap that protects both you and the contractor. It should clearly outline every step, from removing and labeling doors to the final re-installation. This document should specify the exact prep work, the brands and types of products being used, and the total cost. The process is meticulous; for an overview of what’s involved, this expert guide to painting kitchen cabinets from Forbes details the necessary steps a pro’s quote should cover. A trustworthy cabinet painter provides clarity and confidence from the very beginning.
Wondering what a comprehensive, professional quote looks like? We provide detailed, no-obligation estimates that outline our entire factory-finish process. Get your free estimate today!

Key Questions to Ask Before You Hire a Cabinet Painter
Once you’ve narrowed down your list of potential contractors, it’s time to conduct a final interview. Asking the right questions is the single best way to protect your investment and ensure you receive a durable, factory-quality finish. A professional cabinet painter will have clear, confident answers to the following questions.
Process and Materials Questions
These questions reveal the quality of the contractor’s work and the durability of their finish.
- What is your full process for preparing my cabinets for paint?
A good answer: They should describe a multi-step process including degreasing, cleaning, scuff sanding, and masking the kitchen. A vague answer like “we sand them” is a major red flag. - Do you spray the doors and drawer fronts? Where is this done?
A good answer: The best practice is spraying doors and fronts off-site in a dedicated, dust-free spray booth for a flawless, smooth finish. - What specific primer and topcoat product will you use and why?
A good answer: They should name a high-quality, industrial-strength product like a 2K polyurethane or a conversion varnish, explaining that it provides superior hardness and chemical resistance compared to standard house paint. - How long do you let the paint cure before reassembly?
A good answer: They will explain the difference between “dry to the touch” and “fully cured.” A proper cure time, often 3-7 days depending on the product, is essential for maximum durability before doors are handled and reinstalled.
Logistics and Business Questions
These questions confirm their professionalism, reliability, and commitment to customer satisfaction.
- How long will the project take from start to finish?
A good answer: A detailed timeline of 5-10 business days is typical. They should be able to outline what happens each day, from prep to final installation. - Are you and your team fully insured? Can you provide proof?
A good answer: This should be an immediate “Yes.” They must be able to provide a Certificate of Insurance (COI) that lists both general liability and workers’ compensation coverage. - What kind of warranty or guarantee do you offer on your work?
A good answer: Look for a clear, written warranty that covers workmanship defects like chipping or peeling for a minimum of 2-5 years. - Can you provide me with 3 recent, local references?
A good answer: A confident contractor will happily provide contact information for recent clients. Speaking to past customers is one of the best ways to verify quality and service.
Your Path to Flawless Cabinets Starts Here
As we’ve explored, transforming your kitchen cabinets is a project where professional expertise truly shines. Opting for a pro over a DIY approach guarantees a durable, long-lasting result, and knowing the right questions to ask separates the amateurs from the true specialists. The key to a stunning transformation lies in a meticulous preparation and application process that only a seasoned expert can provide.
Choosing the right cabinet painter is the most critical decision you’ll make in this process. Here in the Denver Metro Area, we specialize in creating those coveted, sprayed factory-quality finishes that completely rejuvenate your space. Our detailed and transparent quoting process ensures you understand every step, with no surprises.
Why wait to bring your vision to life? If you’re ready for a kitchen that looks and feels brand new, take the next step. Ready for a flawless finish? Get your free cabinet painting quote in Denver! A beautiful, professionally finished kitchen is closer than you think.
Frequently Asked Questions About Professional Cabinet Painting
How long does it take a professional to paint kitchen cabinets?
For an average-sized kitchen, the entire process typically takes between 3 to 5 days. This timeline allows for proper preparation, which includes cleaning, sanding, and priming the surfaces. It also accounts for applying multiple coats of professional-grade paint with adequate drying time between each coat. The final day is often dedicated to reassembling doors and hardware, ensuring a flawless, factory-like finish. Rushing these crucial steps can compromise the durability and appearance of the final product.
Do I need to empty my cabinets before the painters arrive?
Yes, it is essential to completely empty your cabinets and drawers before the painting team begins their work. This protects your dishes, food, and other belongings from dust and paint overspray. It also gives the painters unrestricted access to all interior and exterior surfaces, ensuring a thorough and high-quality preparation and painting job. We recommend packing items in labeled boxes and storing them in another room to make the process smoother and more organized for everyone.
What is the most durable and easy-to-clean paint finish for cabinets?
The most recommended finish for kitchen cabinets is a high-quality satin or semi-gloss. These finishes offer the perfect balance of durability and cleanability without excessive shine that can highlight imperfections. A satin finish provides a subtle sheen and is excellent at resisting scuffs, while a semi-gloss finish offers slightly more durability and is even easier to wipe clean. Professional painters often use industrial-strength acrylic urethane enamels in these sheens for maximum hardness and longevity.
Can you paint older wood, laminate, or thermofoil cabinets?
Absolutely. A skilled professional cabinet painter has the tools and expertise to properly prepare and paint various surfaces. Solid wood cabinets are ideal for painting after thorough sanding and priming. For laminate or thermofoil cabinets, the key is meticulous prep. This involves scuff-sanding the glossy surface and using a specialized bonding primer to ensure the paint adheres properly and won’t peel or chip over time, effectively revitalizing an outdated kitchen without a full replacement.
Is there a best time of year to have my cabinets professionally painted?
While cabinet painting can be done year-round, the ideal conditions are during periods of low humidity, such as in the spring or fall. Drier air allows the primer and paint to cure faster and more evenly, leading to a harder, more durable finish. However, a professional crew will use ventilation systems and control the climate within the work area to ensure optimal results regardless of the season, so you can schedule your project whenever it is most convenient for you.
How do I care for my newly painted cabinets to ensure they last?
To maintain your beautiful new finish, be gentle for the first 30 days while the paint fully cures. For routine cleaning, use a soft, damp microfiber cloth with a drop of mild dish soap. Avoid using abrasive sponges, harsh chemical cleaners, or products containing ammonia or bleach, as they can dull or damage the paint. Promptly wipe away any spills, especially those from oil or acidic foods, to prevent staining and protect the long-term integrity of the finish.


