Achieving a factory-grade result on deep-grained wood is a mechanical leveling process rather than a simple painting task. Many homeowners assume that high-quality paint alone will hide heavy texture, but without the right preparation, those cavernous pores will always show through the final coat. If you want to achieve a smooth finish on oak cabinets, you must look beyond the brush and focus on the technical science of surface leveling and grain suppression.
Cabinet Painting Service Areas in Denver & Surrounding Cities, Cabinet Refinishing in Denver County, Boulder CO,
Arvada, CO, Wheat Ridge, CO,
and Castle Pines CO. Englewood CO. Castle Rock CO, Centennial CO.
Cabinet Painting in Arapahoe County, CO
Including Centennial, CO, Greenwood Village, CO,
Cherry Hills Village, CO,
and Aurora, CO.
It’s frustrating to invest days of labor into a kitchen refresh only to see unsightly grain patterns and yellow tannin bleed ruin the aesthetic. You deserve a kitchen that looks brand new without the $12,000 price tag of a full cabinet replacement. This professional 2026 guide provides the exact procedural steps required to hide deep textures and create a durable, chip-resistant surface that mirrors a high-end factory finish.
We will examine the essential materials required for success, including high-solids grain fillers and shellac-based primers. You’ll also learn why professional off-site spraying is the critical factor in eliminating the DIY look and achieving the modern, streamlined appearance your home requires.
Key Takeaways
- To achieve a smooth finish on oak cabinets, you must focus on mechanically leveling the wood’s deep pores rather than simply applying thicker coats of paint.
- Detailed preparation, including professional-grade degreasing and de-glossing, is the only way to prevent peeling and ensure a long-lasting bond.
- Shellac-based primers serve as the industry gold standard for blocking yellow tannins and creating a high-build foundation for a level surface.
- Off-site spraying is the essential technical requirement for eliminating brush tracks and delivering a factory-quality, modern appearance.
- Using a specialized grain filler allows you to transform dated oak into a smooth, contemporary masterpiece at a fraction of the cost of cabinet replacement.
Why Oak Grain is the #1 Challenge for a Smooth Cabinet Finish
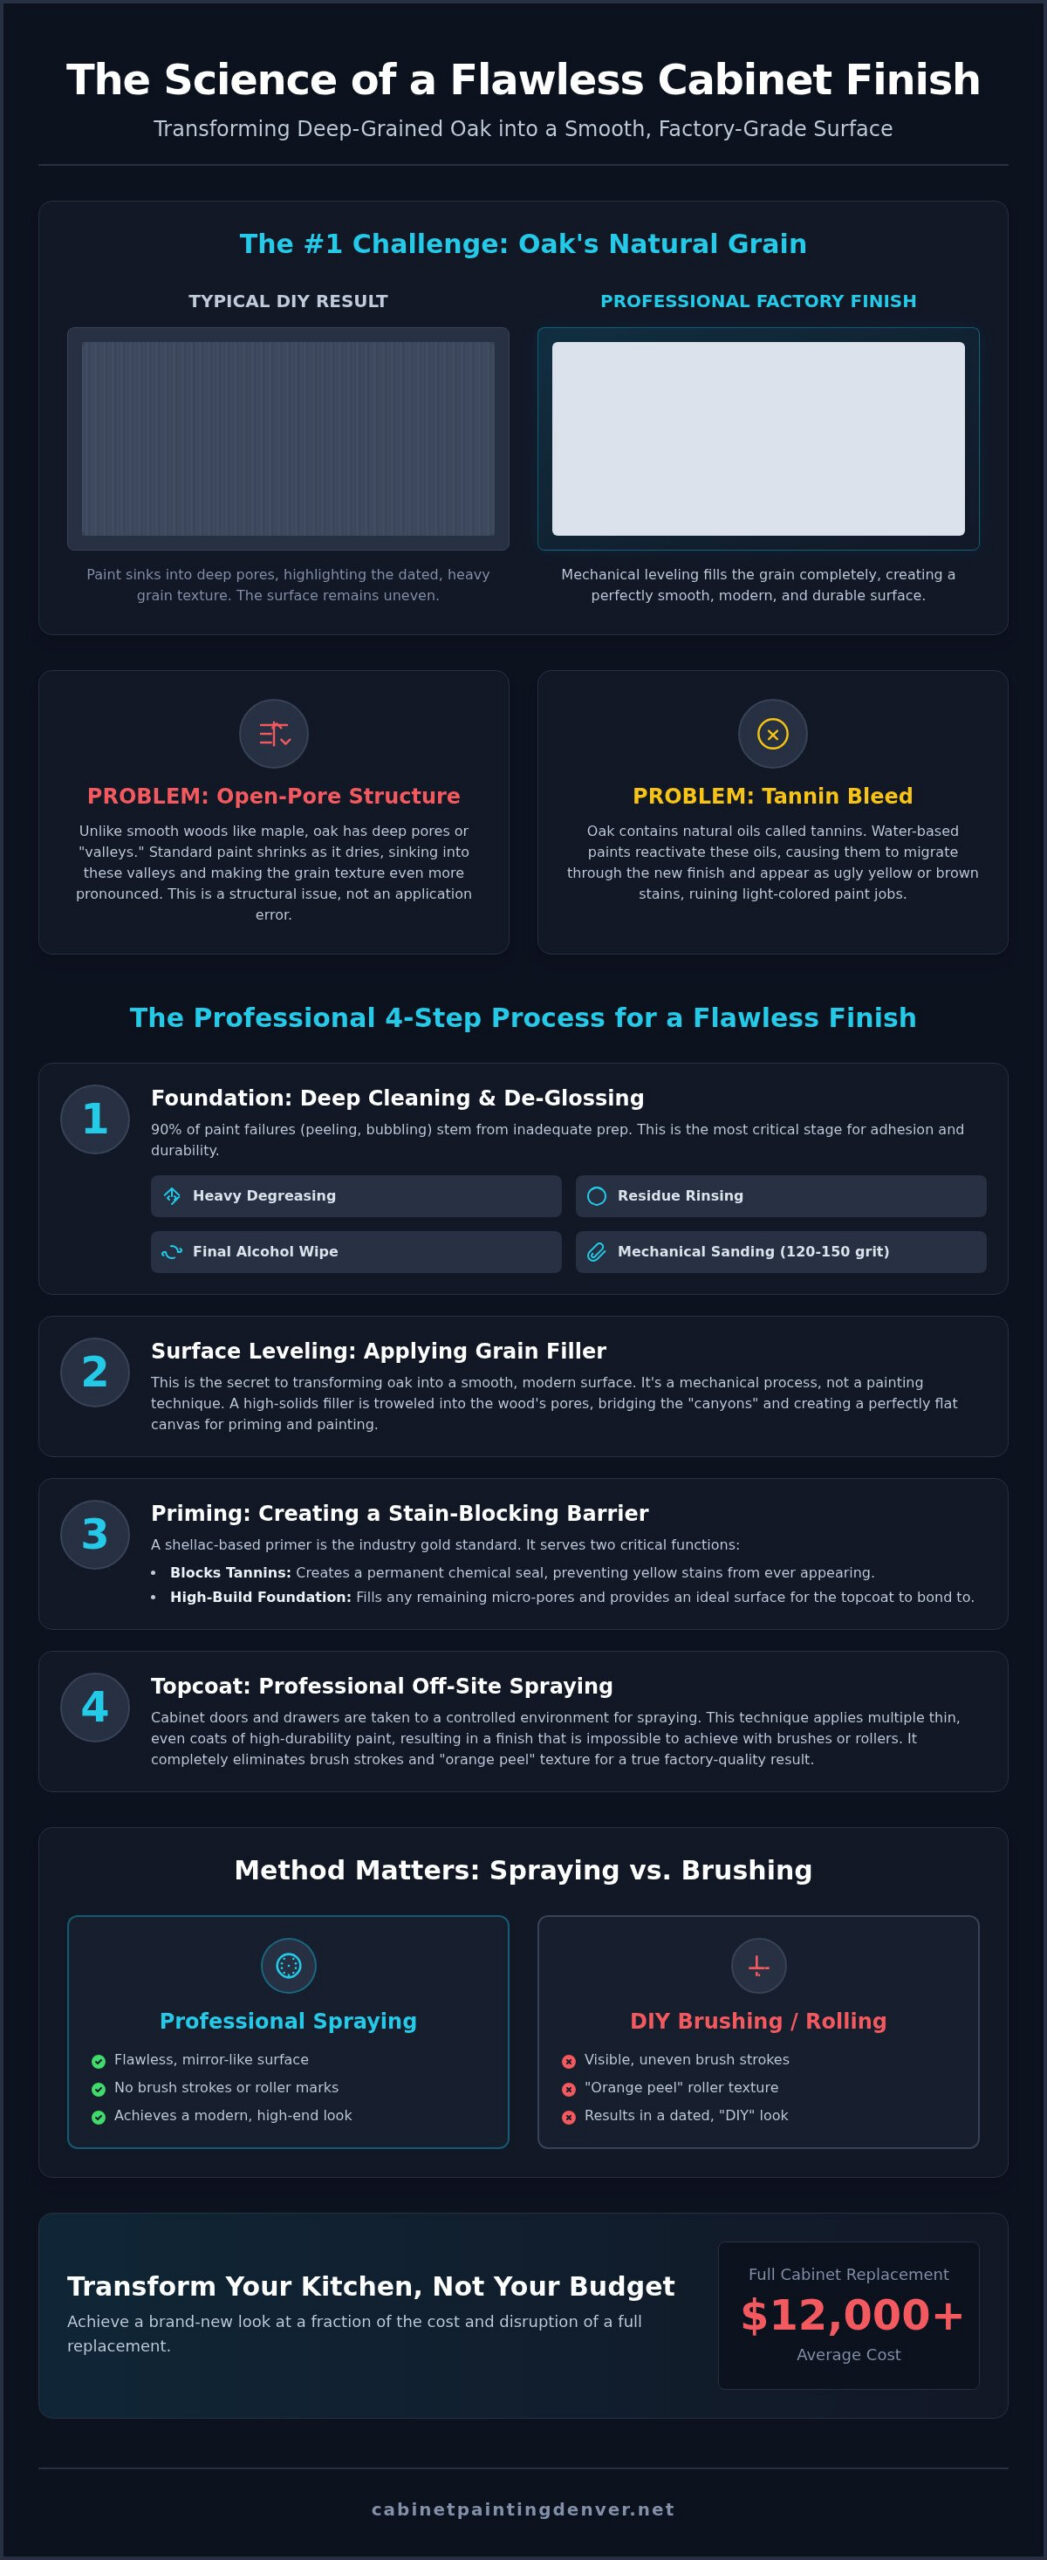
Oak has been a staple of kitchen design for decades due to its durability and distinct aesthetic. However, its biological structure presents significant hurdles for modern refinishing. To achieve a smooth finish on oak cabinets, you must first address the wood’s open-grain nature. Unlike closed-grain woods such as maple or cherry, oak is characterized by deep, porous "valleys" that run across the surface. These pores don’t disappear just because a layer of paint is applied. In fact, standard latex paint often makes the problem worse. As the paint dries, it shrinks and settles into these microscopic pits, causing the grain to look even more pronounced than it did on the bare wood.
Many homeowners confuse the "orange peel" texture created by low-quality rollers with the natural "oak grain" effect. While orange peel is a result of poor application technique, the oak grain effect is a structural issue. Even if you use the most expensive brush on the market, the deep ridges of the wood will remain visible. This creates a dated, DIY appearance that lacks the sleek, reflective quality of a professional factory finish. Resolving this requires a mechanical leveling strategy rather than a simple color change.
The Open-Pore Structure of Oak Wood
The difficulty lies in how oak grows. It produces two types of wood each year: springwood and summerwood. Springwood has large, open vascular structures that appear as deep pits, while summerwood is much denser. This creates an uneven surface density across every door and drawer. When you apply paint, the liquid naturally "sinks" into the less dense springwood pores. Visualizing the difference is easy: maple looks like a smooth sheet of glass, while oak looks like a series of tiny, interconnected canyons. Without a specialized filler to bridge these canyons, the final surface will never be truly level.
Tannin Bleed: The Invisible Enemy
Tannins are natural organic compounds found in oak that act as a defense mechanism for the tree. While they are harmless to the wood, they are a nightmare for white or light-colored finishes. These oils are water-soluble, meaning they reactivate when they come into contact with water-based primers and paints. If you don’t establish a chemical barrier, these tannins will migrate through the paint film, resulting in yellow or brown splotches that ruin the finish. To achieve a smooth finish on oak cabinets that lasts, you must use a stain-blocking primer that creates a permanent seal between the wood’s chemistry and your new topcoat.
The Foundation: Deep Cleaning and De-Glossing Oak Surfaces
Preparation is the mechanical foundation of any high-end refinishing project. While some online guides suggest a simple wipe-down with soap and water, this is insufficient for a professional result. Approximately 90% of cabinet painting failures, such as peeling or bubbling, originate from poor degreasing. Kitchen cabinets are subject to years of polymerized cooking oils, steam, and skin oils that create a microscopic film. To achieve a smooth finish on oak cabinets, you must strip this layer away completely to ensure the new coating bonds to the wood rather than the grime.
The Triple-Clean Method for Kitchen Cabinets
A professional cleaning process requires a multi-stage approach to neutralize all contaminants. Standard household cleaners cannot break down the chemical bonds of aged grease. Follow this sequence for the best results:
- Heavy-Duty Degreaser: Use a TSP substitute or a dedicated cabinet cleaner to dissolve grease and wax. Scrub the surfaces thoroughly, paying close attention to areas near the stove and handles.
- Rinse: Wipe the surfaces with warm, clean water. This step is vital to remove chemical residues that can interfere with primer adhesion.
- Denatured Alcohol: Perform a final wipe-down with denatured alcohol. This solvent evaporates quickly and removes any remaining trace elements, leaving the oak bone-dry and ready for mechanical bonding.
Mechanical Sanding: Creating the ‘Tooth’
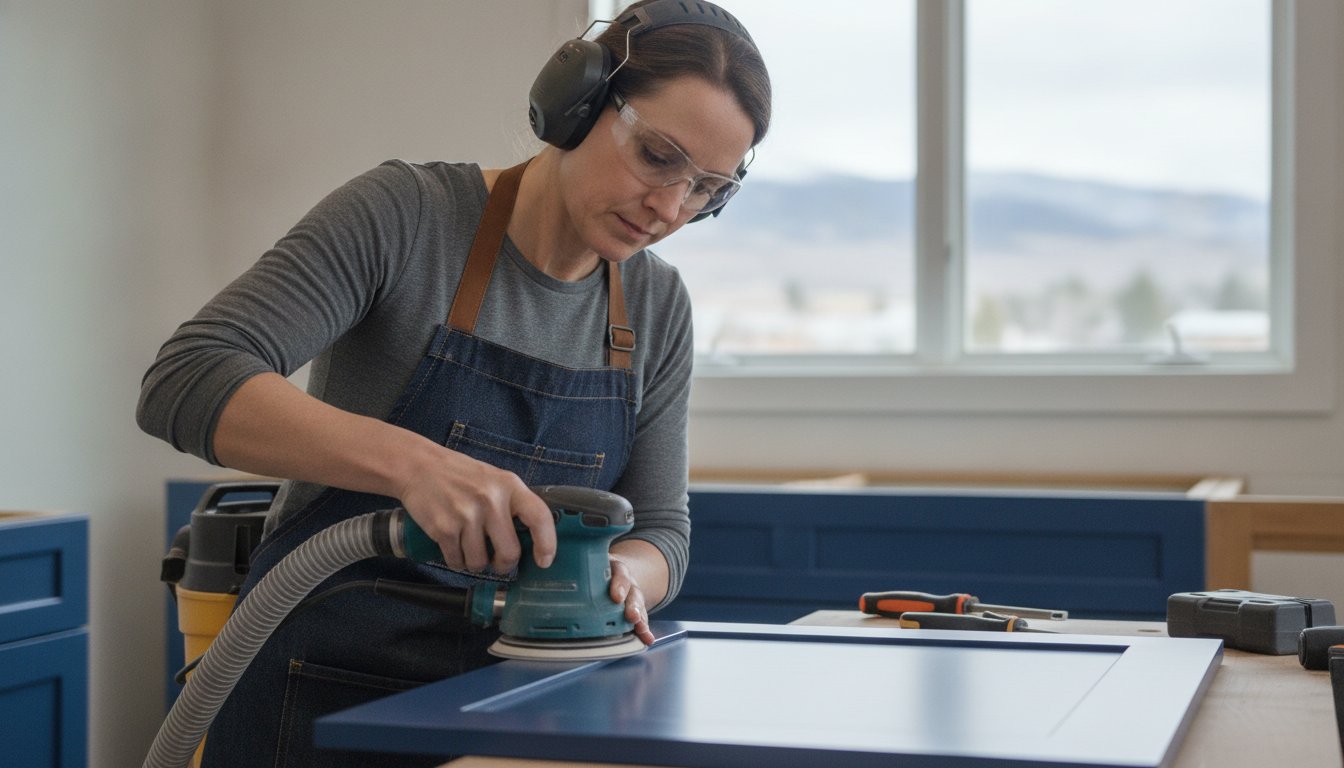
Sanding is not about removing the wood; it is about removing the existing factory clear coat and creating "tooth." You need a surface that the primer can grab onto. Use 120 to 150 grit sandpaper for this initial phase. The goal is to de-gloss the finish until it looks dull and uniform. Avoid using lower grits, as they can leave deep scratches in the oak that are difficult to fill later.
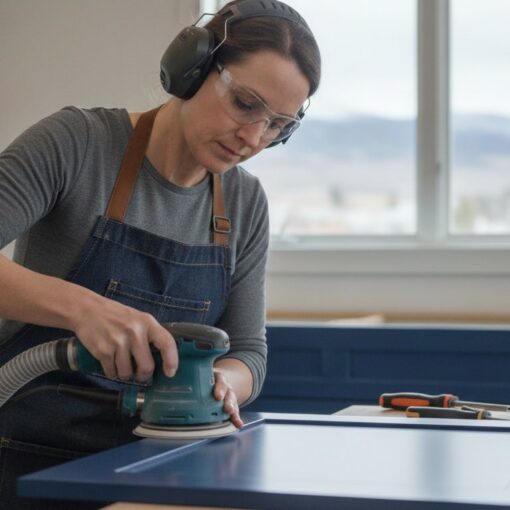
Dust management is critical during this phase. If fine dust remains in the grain, it will create a gritty texture in your final topcoat. Using a vacuum-attached random orbital sander is the most effective way to keep the workspace clean and ensure the grain is open and receptive to the filler. Professional kitchen cabinet painting processes rely on this meticulous level of detail to prevent the "DIY look."
Be careful not to over-sand. Oak is a hardwood, but aggressive sanding on the edges or decorative details can create "dips" or round off the sharp, clean lines of your cabinetry. To achieve a smooth finish on oak cabinets, the surface must remain perfectly flat. Once the finish is dull and the dust is cleared, the wood is ready for the leveling stage.
Leveling the Surface: Choosing and Applying Grain Fillers
Mechanical leveling is the most critical stage in the refinishing process. While some sources claim oak grain is permanent, using high-performance fillers allows you to transform the surface into a flat substrate. To achieve a smooth finish on oak cabinets, you must fill the structural "valleys" identified in the previous sections. Without this step, even the highest quality paint will reveal the underlying texture as it cures and shrinks. This is a technical correction of the wood’s anatomy rather than a cosmetic cover-up.
Water-Based Grain Fillers vs. Wood Putty
Choosing the right material depends on your desired timeline and durability requirements. Water-based slurries, such as high-performance clear fillers from brands like Aqua Coat, are popular for their ease of use and low odor. These products have high solids content, which helps minimize the natural shrinkage that occurs during drying. In contrast, solvent-based putties or wood muds offer superior hardness but require more intensive sanding. Regardless of the material, use a raking light held at a low angle to the cabinet surface. This side-lighting reveals missed spots and shallow areas that would otherwise remain invisible until the priming stage.
The Application Process for a Level Surface
The goal of applying filler is not to add a thick layer to the entire door. Instead, you are forcing material into the open pores. Use a flexible plastic spreader or a putty knife to work the filler against the grain. This diagonal motion ensures the material reaches the bottom of every pore. Once applied, immediately scrape away the excess filler from the surface. This minimizes the labor required during the sanding phase and prevents the buildup of unnecessary material on the wood’s surface.
- Two Thin Coats: Applying two thin layers is more effective than one thick coat. Thin layers dry more uniformly and exhibit less shrinkage over time.
- Sanding Back: Use 220-grit sandpaper once the filler is dry. You should aim to remove approximately 95% of the material. The only filler remaining should be inside the grain "valleys," leaving the rest of the wood surface bare.
- Inspection: Run your hand across the surface. It should feel like a single, continuous sheet of glass.
Achieving a level surface at this stage ensures that your primer can perform its secondary role as a high-build leveler. If the wood still feels textured after the second coat of filler, repeat the process. It’s much easier to fix texture issues now than after the final topcoat is applied. Skipping this mechanical step makes it impossible to achieve a smooth finish on oak cabinets later in the project.
Priming and Sanding: The Secret to a Professional Finish
Priming is the chemical bridge between your mechanical leveling and the final topcoat. While some DIY products claim to be all-in-one, skipping a dedicated primer on oak is a recipe for failure. To achieve a smooth finish on oak cabinets, you must use a primer that acts as both a sealant and a secondary leveler. This stage ensures that the deep tannins and residual textures from the wood grain don’t compromise the final aesthetic. It’s the most important step for ensuring long-term durability and color purity.
The First Coat: The Tannin Barrier
Shellac-based primers, such as Zinsser BIN, are the industry gold standard for a reason. Oak is rich in water-soluble tannins that bleed through standard latex or water-based primers, causing yellow or brown splotches. Shellac creates a permanent, non-porous barrier that locks these oils inside the wood. When the first coat is applied, it often causes "grain raise," where the wood fibers swell and stand up. This is a normal reaction. You must sand this layer back with 220-grit sandpaper to knock down those fibers before proceeding to the next layer.
The Second Coat: Building the Foundation
The second coat focuses on creating a high-build foundation. This layer fills any microscopic pores that the grain filler might have missed during the initial leveling. A high-build primer has a higher solids content, which allows it to sit on top of the surface rather than soaking into the wood. Once this coat is dry, switch to 320-grit sandpaper for a finer finish. This is where the surface begins to feel like a high-end factory product.
Removing dust is non-negotiable at this stage. Use a tack cloth to pick up every microscopic particle. Even a few grains of sanding dust will create a gritty texture under the final paint. If you want a flawless result without the stress of managing these chemical barriers, consider hiring a professional for kitchen cabinet painting.
The Final Verification
Before moving to the topcoat, perform two critical tests. First, the "Touch Test": run your fingertips across the entire surface. It should feel as smooth as a polished stone with zero detectable grain ridges. Second, the "Light Test": use a bright LED light held at a low angle to check for any remaining pits or sanding scratches. If the surface isn’t perfect now, it won’t be perfect after painting. Taking the time to achieve a smooth finish on oak cabinets during the priming phase is what separates a professional transformation from a basic paint job.
Professional Spraying vs. Brushing: Which Delivers the Smoothest Result?
The application method is the final variable in the leveling equation. Even with perfect cleaning, grain filling, and priming, a low-quality application can ruin the surface. Brushes and rollers rely on physical contact, which creates friction and surface tension. As the paint leaves the bristles, it leaves behind "tracks" or "stipple" that the paint must then level out. Because oak is naturally textured, these marks often settle into the remaining micro-valleys of the wood. To truly achieve a smooth finish on oak cabinets, you must remove the element of physical contact through professional spraying.
HVLP (High Volume Low Pressure) spraying is the industry standard for high-end cabinetry. This technology atomizes the paint into a fine mist, allowing it to land softly on the surface and flow together without the interference of brush fibers. In Denver’s unique climate, environmental control is a specific challenge. The low humidity and high altitude cause paint to dry much faster than in coastal regions. If the paint dries too quickly, it cannot level properly. Professional spraying allows for precise control over the "wet edge," ensuring the coating remains fluid long enough to settle into a glass-like sheet.
Choosing the right topcoat is equally vital. Modern urethane alkyd enamels are the preferred choice for oak. These coatings offer the durability of an oil-based paint with the easy cleanup of water-based products. They are designed with superior "flow and leveling" properties, meaning the paint continues to flatten itself as it cures, further helping to achieve a smooth finish on oak cabinets.
Why We Recommend Professional Spraying for Oak
Professional spraying delivers a level of uniformity that manual tools cannot match. Brushes often apply paint unevenly, leading to varying "mil" thicknesses across a single door. These thickness variations cause the paint to cure at different rates, which can lead to structural tension and eventual cracking. By using off-site spraying, we achieve a consistent, thin film that cures to a much harder state than a thick, brushed-on layer. This durability is essential for the high-traffic environment of a kitchen.
Final Steps for a Denver Kitchen Transformation
Once the spraying is complete, the final assembly requires the same level of precision. We recommend re-installing hardware with soft-close hinges to protect the new finish from impact damage. It is also important to distinguish between drying times and curing times. While your cabinets may feel dry to the touch within hours, modern enamels require several days to reach their maximum hardness. Avoid cleaning the surfaces with harsh chemicals during the first 30 days of use.
If you are ready to move past the DIY look and want a factory-quality result for your home, Get Your Free Cabinet Painting Quote in Denver. Our off-site spraying process is the most reliable way to transform your kitchen while ensuring a durable, modern masterpiece that lasts for years.
Elevate Your Kitchen with a Factory-Quality Transformation
Transforming dated oak into a modern masterpiece requires a technical approach to surface leveling and chemical sealing. You now understand that the secret to success involves a multi-stage process of deep degreasing, high-solids grain filling, and the application of tannin-blocking shellac primers. These steps ensure that the wood’s natural "valleys" are permanently filled and that unsightly yellowing never reaches the surface. Skipping these mechanical fundamentals is why most DIY projects fail to meet professional standards.
By following this professional-grade protocol, you can finally achieve a smooth finish on oak cabinets that rivals the look of brand-new cabinetry. Cabinet Painting Denver specializes in this exact process. We provide professional HVLP spraying to ensure zero brush marks and include a specialized grain-filling process as part of our standard service. We proudly serve the entire Denver Metro area with factory-quality results and local expertise in high-altitude drying conditions.
Ready for a change? Transform Your Oak Cabinets with a Flawless Denver Finish today. Your dream kitchen is closer than you think.
Frequently Asked Questions
Can you really make oak cabinets look smooth like modern cabinets?
Yes, you can achieve a factory-smooth look by mechanically leveling the wood surface. This process involves using high-solids grain fillers to fill the deep pores characteristic of oak. When combined with professional off-site spraying, the result is a flat, modern finish that eliminates the traditional wood texture. It is a technical correction of the wood structure that makes oak indistinguishable from smoother materials like maple once the painting is complete.
What is the best grain filler for oak kitchen cabinets?
The most effective products are high-solids wood fillers designed specifically for open-grain hardwoods. Water-based slurries are popular because they are easy to apply and sand quickly. Other professionals prefer solvent-based options for their extreme hardness and minimal shrinkage. The best filler is one that bonds well to the wood fibers and allows you to achieve a smooth finish on oak cabinets through multiple thin, well-sanded applications.
Do I have to sand oak cabinets before painting them?
Sanding is a non-negotiable step for ensuring paint adhesion and surface smoothness. You don’t need to strip the wood to its bare state, but you must scuff sand with 120 to 150 grit paper to remove the factory gloss. This creates a mechanical tooth for the primer to grab. Additionally, intermediate sanding between coats of filler and primer is necessary to remove grain raise and any microscopic surface imperfections.
How many coats of primer do oak cabinets need for a smooth finish?
Most projects require two distinct coats of professional-grade primer. The first coat acts as a chemical barrier to prevent tannin bleed, which is a common issue with oak wood. The second coat should be a high-build primer that serves as a final leveling layer. This secondary layer fills any remaining micro-pores that the grain filler might have missed. Sanding with 320-grit paper after this coat ensures a glass-like foundation.
Why is my paint turning yellow on my oak cabinets?
Yellowing is caused by tannins, which are natural organic oils in oak that react with water-based paints. If you don’t use a dedicated stain-blocking primer, these oils migrate through the paint film and create unsightly yellow or brown splotches. Shellac-based primers are the industry standard for stopping this reaction. They create a permanent seal that prevents the wood chemistry from reaching your topcoat, ensuring your white finishes stay crisp.
Is it better to spray or brush oak cabinets for a smooth finish?
Professional spraying is the superior method for achieving a flawless result. Brushes and rollers leave physical tracks and texture, known as stipple, which always settle into the wood grain. High Volume Low Pressure spraying atomizes the paint into a fine mist that levels out naturally on the surface. This method provides a uniform thickness and a factory-quality appearance that is impossible to replicate with manual tools, especially in Denver’s dry climate.
How long does it take to achieve a smooth finish on oak cabinets?
A professional transformation typically takes five to seven days depending on the total number of doors and drawers. This timeline accounts for deep cleaning, multiple rounds of grain filling, and the necessary drying times for tannin-blocking primers. To achieve a smooth finish on oak cabinets, you cannot rush the curing process. Each layer must be fully dry and sanded before the next application to ensure the final finish is durable.
Can I skip the grain filler if I use a thick primer?
Skipping grain filler is a common mistake that leads to visible texture in the final product. While high-build primers are thick, they are designed to fill microscopic imperfections rather than the deep canyons found in oak. As primer dries, it loses volume and shrinks into the pores, making the grain visible again. Grain filler is a much denser material that stays in place, providing the structural leveling needed for a flat surface.