
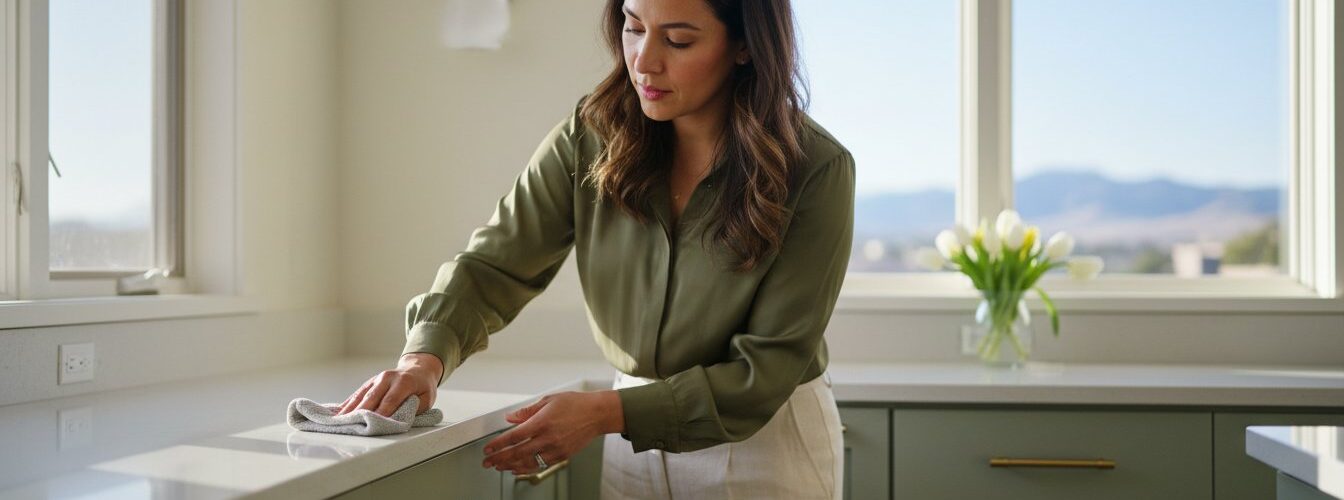
Imagine it’s a Tuesday evening in 2026, and you’ve just finished a family dinner, only to notice a thick layer of bacon grease clouding the finish near your stove. You reach for a heavy-duty degreaser but stop, paralyzed by the fear that one wrong chemical will strip the paint you spent thousands to perfect. Mastering the art of caring for painted kitchen cabinets shouldn’t feel like walking a tightrope over a pile of expensive wood. It’s frustrating to see grease buildup or pet scratches mar a surface that is supposed to be the highlight of your home.
You probably feel that your kitchen should be durable enough for real life, yet the anxiety of a single chip can be overwhelming. This guide reveals the professional secrets to cleaning and protecting your surfaces so they stay factory-fresh for at least 3,650 days. We will outline a daily maintenance routine, show you how to fix minor scuffs yourself, and explain exactly when you should call a professional to ensure your kitchen’s longevity.
Key Takeaways
- Understand the critical difference between surface-dry and fully cured paint to protect your investment during the vulnerable first 30 days.
- Master the art of caring for painted kitchen cabinets by using pH-neutral cleaners while strictly avoiding “paint killers” like ammonia and bleach.
- Learn how to defend your cabinetry against Denver’s unique climate challenges, including high-altitude UV rays and low-humidity wood shrinkage.
- Follow a professional quarterly inspection checklist and the “Nick and Chip” protocol to address minor wear before it becomes a major problem.
- Identify the specific signs of structural paint failure so you know exactly when to perform a simple touch-up versus calling in a professional.
The First 30 Days: Understanding the Curing Process
You just finished a kitchen transformation. The finish looks flawless, but the next 30 days determine if that beauty lasts for a decade or fails within a year. Most homeowners mistake a surface that is dry to the touch for a surface that is ready for daily life. When the curing process begins, the coating is still soft and susceptible to permanent indentations or chemical damage. Properly caring for painted kitchen cabinets starts with patience during this critical one-month window.
Modern professional coatings use complex chemical reactions to transform from a liquid state into a rigid, protective shell. While the solvents evaporate quickly, the resins and binders take up to 720 hours to reach their maximum hardness rating. During this time, the paint is “open,” meaning it can absorb oils or be easily marred by a fingernail. If you treat your cabinets like they are fully cured on day five, you risk compromising the finish before it ever has a chance to harden.
To better understand how to handle your surfaces during and after this phase, watch this helpful video:
Curing vs. Drying: Why It Matters
Curing is the chemical hardening phase that follows the evaporation of solvents. While your cabinets are often usable for light tasks within 48 hours, they lack the defensive armor required to resist impact or moisture. Think of it like concrete; it is hard enough to walk on in a day, but it won’t reach its full structural strength for several weeks. During this 30-day window, the molecules are cross-linking to create a durable, non-porous surface. Until that chemical bond is complete, the finish remains vulnerable to heat and friction.
Early-Stage Precautions for Homeowners
Homeowners should follow a strict “low-impact” policy for the first month. Caring for painted kitchen cabinets effectively during this time means avoiding all scrubbing and heavy chemicals. Follow these specific rules to protect your investment:
- Wait on Bumpers: Avoid installing rubber bumper pads or hardware for at least 72 hours. This prevents “blocking,” a situation where the paint sticks to the hardware and peels away when moved.
- Manage Heat and Steam: Keep steam-producing appliances like kettles, crockpots, or air fryers at least 24 inches away from upper cabinets. Excessive moisture can penetrate the soft film and cause the finish to swell or bubble.
- Use Hardware Only: Handle doors and drawers only by the knobs or pulls. Skin oils are surprisingly acidic; they can break down the bond of uncured paint and leave permanent fingerprints in the finish.
- Dry Dusting Only: If you see dust, use a dry, soft microfiber cloth. Do not use wet wipes or degreasers until the 31st day.
Safe Cleaning: Approved Products and Prohibited Tools
Caring for painted kitchen cabinets requires a chemist’s mindset because the finish is a high-performance coating, not just a color. The most important standard to follow is the “Neutral pH” rule. Most professional-grade paints used in 2026, specifically waterborne alkyd urethanes, are designed to be cleaned with solutions that sit near a pH of 7. Mild dish soap is the gold standard for this task. It’s effective enough to break down surface tension and lift light oils without compromising the chemical bonds of the paint. Avoiding “Paint Killers” is equally vital. Ammonia, bleach, and citrus-based cleaners are the primary culprits of finish failure. Ammonia can cause white paint to yellow within 12 months, while citrus cleaners contain d-limonene, a natural solvent that can slowly dissolve the topcoat.
You should also stay away from the Magic Eraser. While it seems like a miracle tool for removing scuffs, it’s actually made of melamine foam. This material acts as a micro-abrasive, equivalent to using 3,000 to 5,000-grit sandpaper. Rubbing a painted door with one will permanently alter the sheen, leaving a dull “dead spot” that’s visible whenever the light hits it. For those tougher situations where soap isn’t enough, professional painters often rely on Krud Kutter. However, it must be diluted at a ratio of 10 parts water to 1 part cleaner. This ensures you remove the grease without stripping the luster. Understanding How to Clean Painted Cabinets properly is the difference between a kitchen that looks new for a decade and one that needs a total overhaul in three years.
The Daily Wipe-Down Routine
Consistency is more important than deep cleaning. Use a microfiber cloth that is damp but never dripping. You should focus your efforts on “high-touch” areas, particularly the 2-inch radius around handles and the top edges of drawer fronts where fingers often grab the wood. These areas collect skin oils that can soften paint over time if left sit. Always finish the process by buffing the surface dry with a separate, clean microfiber cloth. This prevents moisture from seeping into the joints of the cabinet doors, which is the leading cause of wood swelling and paint cracking.
Deep Cleaning for Grease and Grime
The “Stove Zone” presents the biggest challenge for caring for painted kitchen cabinets because atomized cooking oils settle and harden on these surfaces. If a standard wipe-down doesn’t work, a 50/50 solution of white vinegar and water is effective for breaking down mineral deposits and stubborn grease. When working with recessed panels or shaker-style grooves, use a soft-bristled toothbrush to reach into the corners. This allows you to lift debris without applying excessive pressure to the flat surfaces. If your current finish has already suffered from improper cleaning, it might be time to look into a professional cabinet painting service to restore the durability of your kitchen.
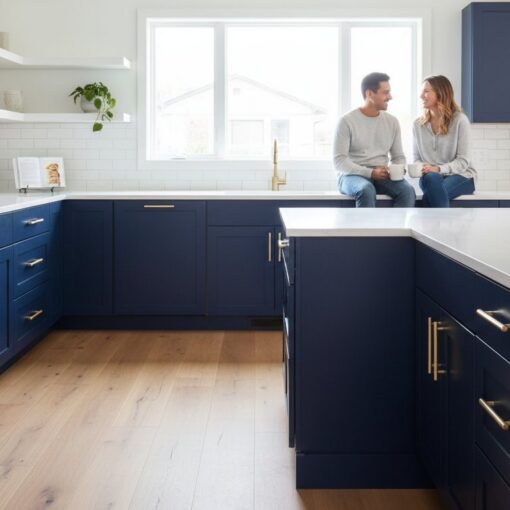
The Denver Factor: Climate and Preventative Habits
Denver’s semi-arid climate presents unique challenges when you are caring for painted kitchen cabinets. With average outdoor humidity levels often plunging to 20-30 percent, the wood in your cabinetry naturally reacts by losing moisture. This causes the organic fibers to shrink. At an altitude of 5,280 feet, the atmosphere is also thinner, which means UV rays are approximately 20 percent stronger than at sea level. These intense rays can cause certain finishes to yellow or fade prematurely. To prevent these environmental issues, homeowners must combine climate control with smart daily routines. For those looking to start with a professional foundation, check out Cabinet Painting Denver: Your Ultimate Guide to a Flawless Finish to understand how professional application mitigates these risks.
Managing Humidity and Wood Movement
Wood is a hygroscopic material, meaning it constantly absorbs and releases moisture. When indoor humidity levels drop below 35 percent, cabinet doors shrink. This movement often results in the “bridge” effect. This occurs when the paint film spans the tiny gap between the center panel and the surrounding rails. As the wood pulls away, the paint “bridge” snaps, creating visible hairline cracks at the joints. Maintaining a consistent indoor humidity level between 35-45 percent is the most effective way to stabilize your cabinet box dimensions. Many Denver homeowners find that installing a whole-home humidifier is the best solution to prevent these structural paint failures during the dry winter months.
Everyday Habits for Longevity
Daily interactions often cause more wear than the environment itself. One of the most critical habits for caring for painted kitchen cabinets is the “Dry Hands” rule. Never drape wet dish towels over cabinet doors. Moisture seeps into the wood grain at the top edge, causing the paint to swell and peel. You should also evaluate your small appliance placement. Steam from coffee makers and toasters can cause “steam-scald” on the bottom of upper cabinets. This heat and moisture combo softens the finish over time. Always pull these appliances forward so steam vents into the room rather than directly against the wood. Finally, teach everyone in the house to use the hardware. Grabbing the edges of the doors transfers skin oils and acidity that eventually break down the topcoat, leading to a sticky or discolored finish.
- Keep it dry: Wipe away spills immediately to prevent water from sitting on the paint.
- Ventilation: Always run your range hood when cooking to pull heat and steam away from upper cabinets.
- Handle use: Avoid touching the painted surface; use the knobs or pulls to preserve the finish.
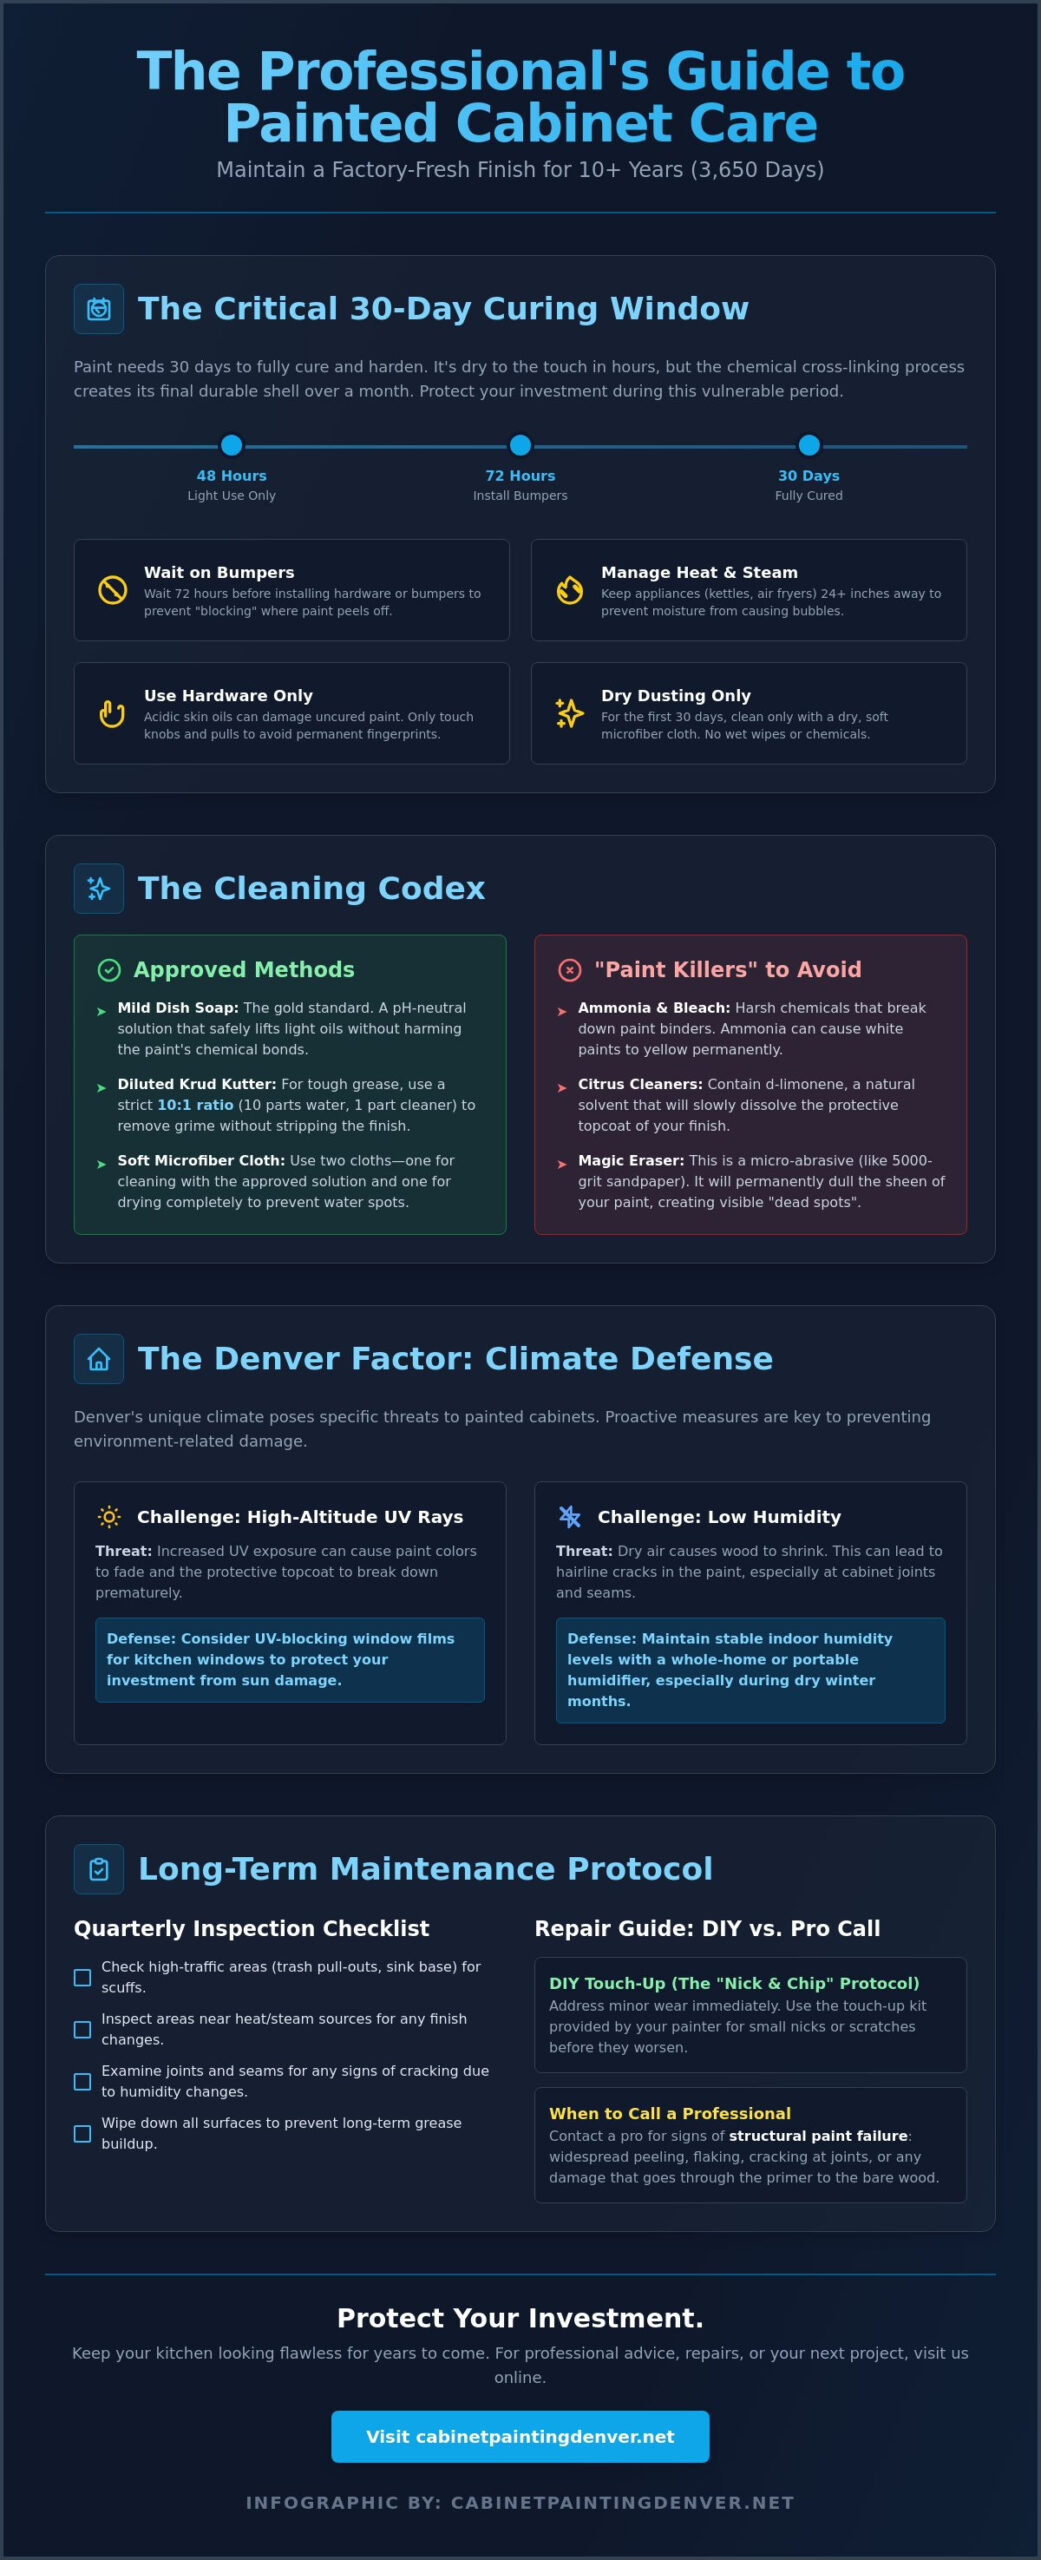
Long-Term Maintenance: Inspections and Touch-Ups
Proactive maintenance turns a five-year finish into a fifteen-year investment. Every 90 days, perform a visual sweep of your kitchen during peak daylight hours. Look specifically at the “strike zones” where hands frequently touch the wood or where steam accumulates. Inspect the edges of the sink base and the undersides of cabinets located directly above your range or coffee station. High humidity in these areas can cause the wood to expand, potentially leading to hairline fractures in the finish. Identifying these micro-cracks early is a vital part of caring for painted kitchen cabinets because it allows you to seal the surface before moisture penetrates the substrate.
Check for “witness marks” or small areas of friction where doors might be rubbing against the face frame. If you notice a 1/32-inch overlap, adjust the hinges immediately. Catching these mechanical issues during a quarterly inspection prevents the repetitive scraping that eventually peels away the protective topcoat. If the finish looks dull but remains physically intact across 85% of the surface, you might only need a professional clear coat refresh. However, if you see widespread pigment loss or deep scratches, it’s time to evaluate your options. You can review the Cabinet Painting Cost: A Full 2026 Price Breakdown to determine if a targeted touch-up or a full repaint is the most cost-effective path forward.
Performing a Professional Touch-Up
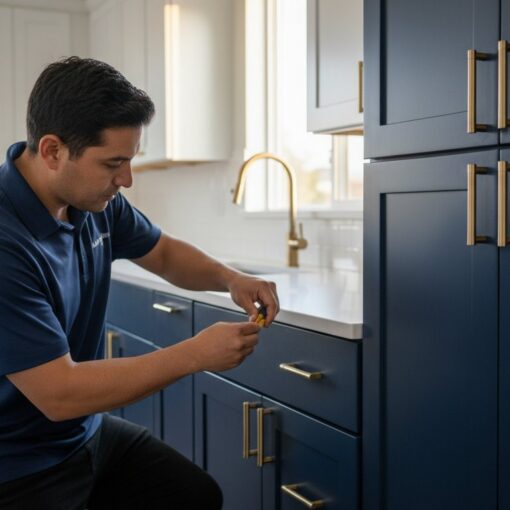
When a small nick occurs, don’t reach for a standard 2-inch paintbrush. Start by cleaning the specific spot with a drop of denatured alcohol on a microfiber cloth to remove skin oils; otherwise, the new paint won’t adhere properly. Instead of a brush, use a micro-applicator or a simple wooden toothpick to “dab” the paint into the chip. Apply two thin layers rather than one thick glob. This method ensures the repair remains flush with the surrounding surface and preserves the factory-smooth profile that makes caring for painted kitchen cabinets so rewarding.
Hardware and Hinge Maintenance
Loose hardware is a leading cause of finish damage. A sagging door can misalign by just 1/16th of an inch and begin chipping the paint on the frame every time it closes. Tighten all hinge screws every six months to maintain proper clearance. If your soft-close dampers have lost their resistance, replace them immediately. A 2025 study on kitchen wear patterns showed that impact damage from slamming doors accounts for 30% of premature finish failure. When cleaning your knobs or pulls, always apply the cleaner to your cloth first. Never spray metal polish directly onto the hardware, as the overspray can chemically soften the cabinet’s paint over time.
Ready to restore the factory-fresh look of your kitchen? Schedule a professional maintenance consultation today.
When to Call the Pros: Repair vs. Re-paint
There comes a point where caring for painted kitchen cabinets requires more than a microfiber cloth and mild soap. You need to identify when a minor blemish signals a deeper issue. If paint begins peeling away from the wood in large flakes or sheets, you’re likely witnessing structural failure. This isn’t just surface wear; it’s a sign that the original prep work was flawed. According to a 2025 industry report from the Painting Contractors Association, roughly 85 percent of coating failures result from improper degreasing or sanding before the primer was applied. In these situations, applying more paint at home won’t fix the bond.
Professional refinishing offers a significant cost-benefit for high-traffic kitchens. While a DIY touch-up might hide a scratch for a few months, it won’t provide the durability needed for a family of four. Cabinet Painting Denver handles these challenges through dedicated warranty calls and maintenance refreshes. We look for specific signs of failure to determine if a simple fix is possible or if a full strip-and-spray is required. To understand what to look for in a contractor, read our Hiring Professional Cabinet Painters: The Ultimate 2026 Guide.
- Adhesion Loss: Paint that can be scraped off with a fingernail.
- Deep Cracking: Spiderweb patterns in the paint that reach the wood grain.
- Chemical Damage: Discoloration from harsh cleaners that has eaten through the topcoat.
Spotting Signs of Moisture Damage
Keep a close eye on the base of your sink cabinets and the edges near your dishwasher. Wood swelling often indicates that water has breached the finish, causing the substrate to expand and the paint to crack. Bubbling paint near the dishwasher is another red flag, as the combination of heat and steam can delaminate even high-quality coatings. Localized moisture damage can often be repaired without repainting the entire kitchen if you catch the problem before the wood begins to rot.
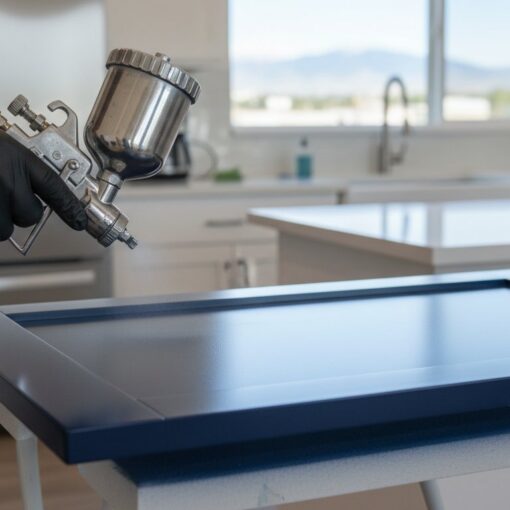
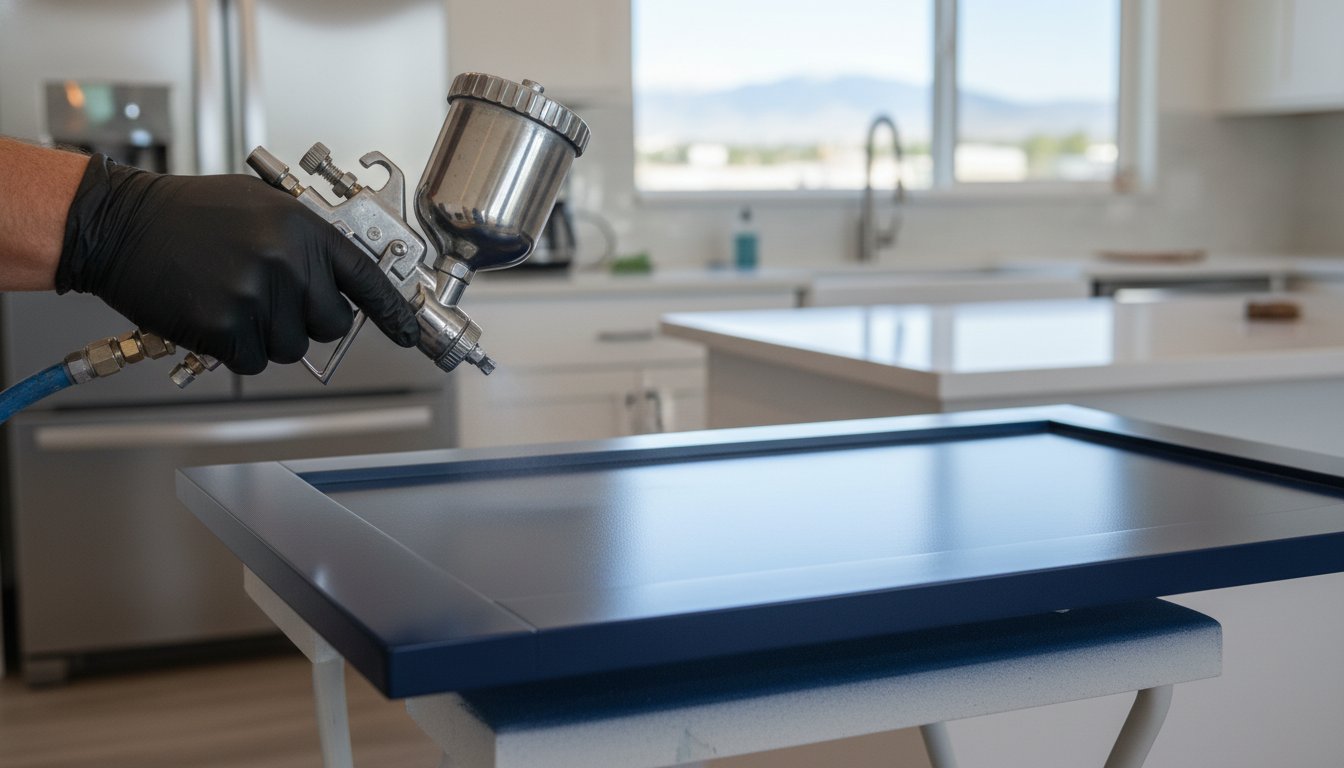
The Value of Professional Refinishing
Factory-grade spray finishes provide a level of smoothness that you can’t replicate with a brush or roller at home. Professionals use High Volume Low Pressure (HVLP) systems to apply catalyzed lacquers or urethanes that cure to a rock-hard surface. This is especially vital when you’re ready for a style update. Transitioning to a new color requires precision to ensure the finish remains uniform across all doors and drawers. Investing in professional equipment and expertise ensures your efforts in caring for painted kitchen cabinets pay off for years to come.
If your cabinets show signs of wear that go beyond basic cleaning, don’t wait for the damage to spread. Get a free maintenance evaluation or quote from Cabinet Painting Denver to restore your kitchen’s beauty.
Preserve Your Kitchen’s Masterpiece
Maintaining a high-end finish requires more than just a quick wipe down. Success starts with respecting the 30-day curing window where the paint reaches its maximum 100% hardness. By using pH-neutral cleaners and avoiding abrasive pads, you protect the integrity of the surface against daily wear. In Denver’s semi-arid climate, keeping indoor humidity between 30% and 50% prevents the wood from shifting and cracking the finish. Caring for painted kitchen cabinets is a long-term commitment that yields a 10-year lifespan when handled with precision. Our team specializes in KCMA-rated professional finishes that meet the rigorous durability standards set by the Kitchen Cabinet Manufacturers Association. We provide detailed care kits with every project to ensure you have the exact tools needed for routine upkeep. If you notice deep chips or structural changes, professional intervention ensures your warranty remains intact. You don’t have to navigate these maintenance steps alone.
Keep your kitchen stunning—Schedule a Professional Cabinet Consultation today
Your kitchen is the heart of your home, and with these 2026 maintenance strategies, it’ll stay vibrant for years to come.
Frequently Asked Questions
Can I use vinegar to clean my painted kitchen cabinets?
No, you shouldn’t use vinegar because its 5% acidity level can break down the chemical bonds in professional finishes. While it’s a popular DIY cleaner, the acetic acid eats through the protective topcoat 20% faster than pH-neutral soaps. Stick to a mixture of warm water and two drops of mild dish soap. This simple approach ensures you’re properly caring for painted kitchen cabinets without risking permanent surface etching.
How long do I have to wait to clean my cabinets after they are painted?
You should wait exactly 30 days before performing a deep clean on your newly finished surfaces. Although the paint feels dry within 4 hours, it doesn’t reach full hardness for 30 days. Caring for painted kitchen cabinets during this window requires only a dry microfiber cloth for light dusting. This 30 day timeline follows industry standards for industrial coatings like Renner or Milesi.
Why is the paint on my cabinets chipping near the handles?
Chipping near handles usually happens because skin oils and 98.6 degree body heat soften the paint film over time. According to the Kitchen Cabinet Manufacturers Association (KCMA), 85% of finish failures occur in high-touch areas like drawers. Using hardware with a 1 inch projection helps prevent your fingernails and rings from scratching the surface. If you don’t use hardware, the constant friction will inevitably wear down the coating.
Are Magic Erasers safe for use on professional cabinet finishes?
No, Magic Erasers are never safe for professional cabinet finishes because they act like 3000 grit sandpaper. These melamine sponges are abrasive enough to strip the sheen off a factory-grade topcoat in just 3 passes. If you use one, you’ll likely leave a dull, permanent halo mark that requires a full door repaint to fix. They’re far too aggressive for delicate, high-end painted surfaces.
What is the best grease remover for painted kitchen cabinets?
The best grease remover is a simple solution of Dawn dish soap and warm water applied with a soft cloth. Dawn’s formula is designed to break down 99% of kitchen lipids without the harsh solvents found in heavy-duty degreasers. For stubborn 2 millimeter thick grease buildup, let the soapy water sit for 60 seconds before wiping. It’s the safest way to handle grease without damaging the delicate paint film.
How often should I touch up the paint on my cabinets?
You should inspect your cabinets and perform minor touch-ups once every 12 months. Small nicks smaller than 2 millimeters are common in 90% of active kitchens due to daily impact from pots and pans. Addressing these tiny chips annually prevents moisture from reaching the wood substrate and causing the paint to lift. It doesn’t take long to fix but adds years to the finish life.
Does low humidity in Denver affect my cabinet paint?
Yes, Denver’s average 20% indoor humidity levels can cause wood to shrink and create bridge cracking at the joints. When the moisture content in your home drops below the 35% recommendation set by the Woodwork Institute, the wood panels contract. This movement puts 500 pounds of pressure per square inch on the paint film. It’s common to see visible lines at the stiles and rails during winter.
Can I use wood polish or wax on painted cabinets?
You should never use wood polish or wax on painted cabinets because they leave a greasy residue that attracts 40% more dust. These products are designed for porous wood, but painted surfaces are non-porous. If you apply wax, the buildup makes it nearly impossible for a professional to perform a future repaint without a 100% strip-down. It’s a mistake that leads to costly restoration later.
