

There’s nothing more deflating than stepping back to admire your freshly painted door, only to see a landscape of ugly brush strokes and stubborn drips. You followed the steps, but the finish is anything but flawless, and you’re left wondering if it will start chipping in a few months. If you’ve ever felt this frustration, you know that finding the best way to paint a door can feel like uncovering a well-guarded trade secret. The good news? It’s a secret we’re ready to share, and it’s simpler than you think.
Forget the guesswork and overwhelming trips to the hardware store. This comprehensive guide is designed to walk you through the exact process the pros use, from start to finish. We’ll cover the critical preparation steps that guarantee a long-lasting bond, help you choose the right paint and tools for a factory-smooth surface, and reveal the application techniques that eliminate imperfections for good. Get ready to transform any door in your home and achieve a durable, professional-quality finish that will make you proud and add instant value to your space.
Before You Start: The Professional’s Prep Checklist
Ask any professional painter, and they’ll tell you the secret to a flawless finish isn’t in the final coat-it’s in the preparation. In fact, about 80% of a perfect paint job happens before you even open a can of paint. The best way to paint a door starts with a methodical setup. Create a dedicated, well-ventilated workspace away from direct sunlight and wind to control dust and fumes. This is also the time to decide: will you paint the door in place or remove it? While painting it on its hinges is faster, removing it and placing it on sawhorses is the professional method for avoiding drips and ensuring complete, even coverage.
To see some of these crucial preparation steps in action, check out this helpful video from a seasoned pro:
Choosing the Right Paint and Finish
The paint aisle can be overwhelming, but the right product is critical. While traditional oil-based paints offer a hard finish, modern water-based latex and acrylic-alkyd hybrids are easier to use and clean. For a deeper dive into their composition, understanding paint types can be incredibly helpful. Professionals often lean towards urethane-enforced acrylics, which provide the durability of oil-based paint with the easy cleanup of water-based formulas. Your choice of sheen also matters. A semi-gloss finish is highly durable and easy to clean, making it ideal for high-traffic exterior or bathroom doors. For most interior doors, a satin finish offers a sophisticated, low-sheen look with excellent cleanability.
Essential Tools and Materials for a Pro Finish
Gathering all your tools before you begin prevents rushed mistakes and compromises. A truly professional finish requires more than just a brush and a can of paint. Your essential checklist should include:
- High-Quality Brushes & Rollers: An angled sash brush for cutting in panels and a 4-6 inch high-density foam or mohair roller for perfectly smooth flat surfaces.
- Surface Prep Materials: Wood filler for dings, sandable caulk for gaps in panels, and tack cloths to remove every last speck of sanding dust.
- Painter’s Pyramids or Stands: These inexpensive tools elevate the door, allowing you to paint one side and the edges, then flip it to paint the other side sooner without smudging.
- Safety Gear: A respirator (especially if sanding or using oil-based paint), gloves, and eye protection are non-negotiable for your health and safety.
The Critical First Step: Flawless Surface Preparation
Ask any professional painter, and they’ll tell you the same thing: the secret to a durable, glass-smooth finish has less to do with the final coat of paint and everything to do with what happens before you even open the can. Skipping or rushing surface preparation is the number one cause of chipping, peeling, and an unprofessional look. This stage isn’t just about cleaning; it’s about creating the perfect canvas for your paint to adhere to, ensuring your hard work lasts for years. Proper prep is the foundation of the best way to paint a door.
This principle is rigorously followed by professional services like Brisbane Roof & Paint, as proper preparation is the foundation for any long-lasting paint job, whether on an interior door or an entire home exterior.
Removing Hardware and Thorough Cleaning
While it’s tempting to just tape around them, always remove all hardware-knobs, locks, latches, and hinges. This guarantees clean lines and prevents paint from sealing hardware in place. Once the hardware is off, clean the door thoroughly. Even new doors have factory residue. Use a degreasing cleaner, like a TSP substitute, mixed with warm water to cut through years of grime, oils, and fingerprints. Gently scrub the entire surface, paying extra attention to the areas around the knob and detailed panels where dirt collects. Rinse with a clean, damp cloth and let the door dry completely.
Sanding for Maximum Adhesion
The goal of sanding isn’t to strip old paint, but to “scuff” the surface. This microscopic abrasion gives the new primer and paint something to grip onto. For a door in good condition, a fine-grit sandpaper (180 to 220-grit) is perfect. If you’re smoothing out minor imperfections or sanding a layer of old, glossy paint, start with a medium-grit (120-grit) and then finish with a finer grit. Important safety note: If your home was built before 1978, you must follow proper lead paint safety precautions when sanding. Once finished, vacuum the surface and wipe it down with a tack cloth to remove every last particle of dust.
Priming Like a Pro: When and Why It’s Necessary
Primer is the essential bond between the door and the paint. While not always required, it’s a non-negotiable step in many situations. You absolutely need to prime if you are:
- Painting over bare wood or MDF to seal the porous surface.
- Making a drastic color change (e.g., dark to light).
- Painting over a glossy, oil-based finish.
- Covering stains from water, smoke, or wood tannins.
Choose a high-quality bonding or stain-blocking primer. Apply one thin, even coat. After it has fully cured, give the primed surface a very light sanding with 220-grit sandpaper to knock down any bumps, creating an ultra-smooth base for your paint.
Painting Method 1: The Classic Brush and Roller Technique
For most DIY projects, the brush and roller method is the most accessible and cost-effective path to a beautifully painted door. While it may not have the speed of a paint sprayer, this technique offers incredible control and can produce a finish so smooth it rivals a factory spray. The secret isn’t in rushing the job; it’s in the patience and precision of your application. For many homeowners, mastering this hands-on approach is the best way to paint a door and achieve a flawless, professional result without investing in expensive equipment.
The Correct Order for Painting a Paneled Door
To prevent smudges and ensure clean lines on a paneled door, you must paint the sections in a specific order. Always work from the inside out, tackling the detailed areas first before moving to the large, flat surfaces. This methodical approach is key to a clean finish.
- Step 1: The Inset Panels. Using a high-quality 2-inch angled brush, carefully paint all the recessed panels and their detailed molding.
- Step 2: The Horizontal Rails. Next, use a small 4-inch mini-roller to paint the horizontal cross-pieces, starting with the top rail and working your way down.
- Step 3: The Vertical Stiles. Finally, paint the long vertical stiles on each side of the door, including the thin edge where the hinges and handle are located.
Tips for Avoiding Brush Marks and Drips
The primary challenge with this method is achieving a smooth, uniform surface free of imperfections. A few professional techniques can make all the difference, helping the paint level out perfectly for that coveted spray-like appearance.
- Use a Paint Conditioner: Add a paint additive like Floetrol (for latex paint) or Penetrol (for oil-based paint). This improves the paint’s flow and extends its drying time, giving it more time to self-level and reducing the appearance of brush strokes.
- Don’t Over-Work the Paint: Apply a confident, even coat and move on. Going back and forth over a section that has already started to dry will only create texture and marks. Trust the paint to do its job.
- Maintain a ‘Wet Edge’: Always paint from a wet area into a dry one. This technique ensures that each new stroke blends seamlessly into the previous one, preventing visible lap marks between sections.
- ‘Tip Off’ the Final Coat: After applying paint to a section with your roller, make one final, gentle pass from top to bottom with the very tips of a high-quality, lightly-loaded brush. This final stroke smooths out any roller texture for a pristine finish.

Painting Method 2: Spraying for a True Factory Finish
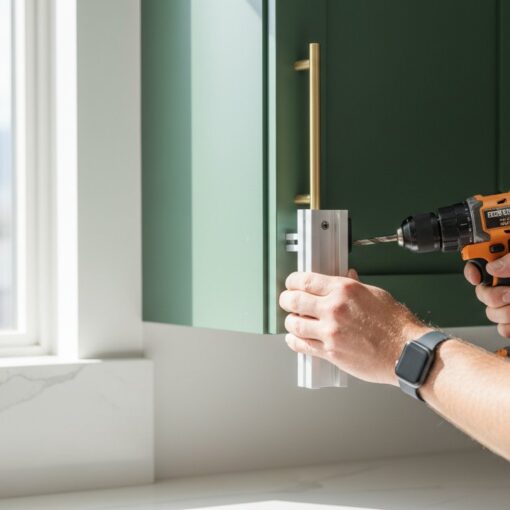
If you’ve ever admired the perfectly smooth, flawless surface on a brand-new cabinet or high-end interior door, you’ve seen the results of spray painting. While it requires more setup than a brush or roller, spraying is how professionals achieve an unmatched, factory-quality finish. This method is especially efficient for projects with multiple doors, like a full kitchen cabinet remodel. Understanding the fundamentals makes the process far less intimidating and unlocks a truly superior result.
Choosing a Sprayer: HVLP vs. Airless
The two main types of sprayers available to homeowners and pros are HVLP and airless. For the absolute finest finish on detailed pieces like cabinet doors, professionals almost always use an HVLP (High Volume, Low Pressure) sprayer. It offers maximum control and minimal overspray. Airless sprayers are much faster and can handle thicker paints, making them great for painting multiple flat interior doors quickly. For a one-time project, consider renting a quality sprayer to save on cost.
Setting Up for a Safe and Clean Spray Job
Proper preparation is non-negotiable for a clean spray job. Your goal is to contain the paint and fumes effectively. Start by creating a temporary spray booth in a garage or workshop using plastic sheeting. Ensure you have excellent ventilation with fans pointing outward to manage overspray and fumes-and always wear a respirator. Mask off everything you don’t want painted with painter’s tape and paper. Finally, thin your paint to the correct consistency according to your sprayer and paint manufacturer’s guidelines; this is crucial for a fine, even mist.
Applying Even Coats for a Glass-Smooth Surface
Mastering the application technique is the final step and arguably the best way to paint a door for a drip-free, glass-smooth surface. The key is applying multiple thin coats instead of one heavy one. To do this effectively:
- Keep the sprayer nozzle a consistent distance from the surface, typically 6-10 inches.
- Overlap each pass by 50% to create even, seamless coverage without visible lines.
- Start and stop your spray just off the edge of the door to avoid heavy buildup at the beginning or end of a pass.
This meticulous approach prevents runs and ensures a durable, professional-grade coating. For a perfect spray finish on your cabinets without the hassle, you can always trust the Denver pros.
Finishing Touches: Curing, Reassembly, and Long-Term Care
You’ve applied the final coat of paint, and your door looks fantastic. But the job isn’t quite finished. This final stage-curing and reassembly-is where patience pays off. Rushing now can easily mar the beautiful, smooth surface you worked so hard to achieve. Understanding these last steps is a critical part of the best way to paint a door for a truly professional and durable result.
Understanding Paint Curing vs. Drying Time
It’s crucial to know the difference between “dry” and “cured.” While your door may feel dry to the touch within a few hours, the paint is still soft underneath. Curing is the chemical process where the paint hardens to its maximum durability, which can take anywhere from several days to a full month.
- Dry Time: The surface isn’t tacky. You can typically handle the door carefully after 6-8 hours, but it remains vulnerable to damage.
- Cure Time: The paint reaches maximum hardness. Wait for the full cure time (check the paint can, often 21-30 days) before any aggressive scrubbing or cleaning.
Factors like high humidity, low temperatures, and the type of paint (oil-based vs. latex) can significantly extend the curing period.
Re-installing Hardware and the Door
Wait at least 24 to 48 hours before attempting to re-install doorknobs, hinges, or locks. This allows the paint to harden enough to withstand pressure. Before you screw anything in, take a sharp utility knife and carefully score the paint around the edges where the hardware will sit. This simple but vital trick creates a clean break, preventing the fresh paint from peeling or chipping as you tighten the screws. Once the hardware is on, you can carefully re-hang the door, checking that it swings freely without rubbing against the frame.
Long-Term Care for a Lasting Finish
To keep your door looking pristine, clean it with a soft cloth and a mild soap-and-water solution. Avoid abrasive cleaners or harsh chemicals, which can dull or damage the new finish. Following these after-care steps ensures your hard work stands the test of time. Executing a flawless paint job requires precision at every stage, which is why many homeowners trust professionals. If you’re looking for a guaranteed perfect finish on your doors or cabinets, explore our expert painting services.
Your Door to a Flawless, Professional Finish
Achieving a professional-looking finish on your door is entirely within your reach. As we’ve detailed, the true secret to success isn’t just the final coat of paint, but the meticulous preparation that comes before it. From thorough cleaning and sanding to applying the right primer, these initial steps make all the difference. Whether you opt for the control of a brush and roller or the impeccable smoothness of a sprayer, you now have the knowledge to do it right. The best way to paint a door is the one that combines patience and proven techniques for a result you can be proud of.
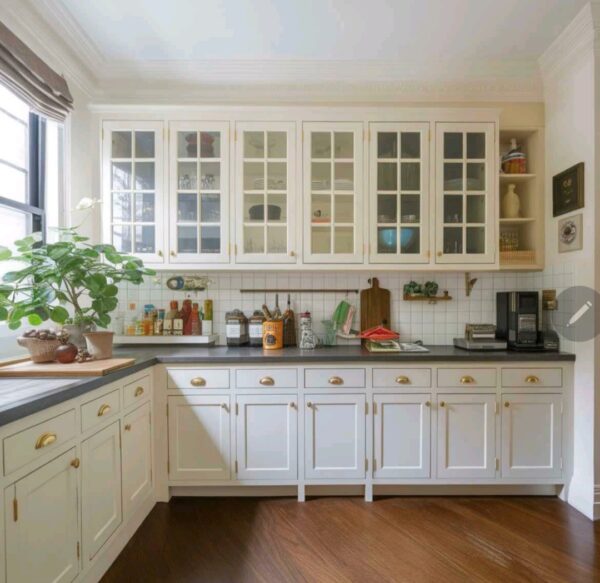
Painting one door is a project. Painting an entire kitchen’s worth is a transformation. If you’re inspired to upgrade your whole kitchen but want to guarantee that same perfect outcome, leave it to the pros. As Cabinet Painting Denver, we deliver a professional spray finish for cabinets that ensures durable, long-lasting results. For a guaranteed factory finish on your cabinets, get a free estimate from our Denver experts. Take the first step toward a stunning new kitchen today!
Frequently Asked Questions
Do I have to take the door off its hinges to paint it?
While you can paint a door while it’s hanging, we highly recommend removing it. Taking the door off its hinges and placing it on sawhorses allows you to paint horizontally. This position prevents drips and runs, ensuring a much smoother, more professional finish. It also provides easier access to all edges and the areas typically covered by the hinges, guaranteeing complete and even coverage for a truly flawless look.
What is the best paint finish or sheen for interior doors?
For interior doors, a semi-gloss or satin finish is the ideal choice. These sheens offer excellent durability and are easy to wipe clean, which is perfect for high-traffic areas. A semi-gloss finish provides a noticeable shine and maximum scuff resistance. A satin finish offers a more subtle, elegant luster with very good durability. Both options beautifully highlight the door’s architectural details without showing every minor imperfection like a high-gloss paint would.
How many coats of paint does a door typically need?
For a durable, professional-quality finish, a door always needs one coat of high-quality primer followed by two coats of your chosen topcoat. The primer is essential for ensuring the paint adheres properly and for blocking any stains or old colors from bleeding through. Applying two thin, even coats of paint will provide much better coverage and a smoother appearance than one thick, heavy coat, which is more likely to drip and sag.
Can I paint a door without sanding it first?
We strongly advise against skipping the sanding step. Sanding is crucial for creating a surface that the new paint can grip onto. A light scuff-sanding with 180 to 220-grit sandpaper removes the gloss from the previous finish and smooths out minor imperfections. If you paint directly over a slick, unsanded surface, the new paint will be prone to chipping, peeling, and scratching off easily, ruining all your hard work.
How long should I wait between coats of paint?
The time you should wait between coats depends on the paint. For latex or acrylic paints, the typical recoat time is 2 to 4 hours. Oil-based paints take much longer, usually requiring 6 to 8 hours or even overnight before you can apply a second coat. Always read the manufacturer’s specific instructions on the paint can, as factors like temperature and humidity in your workspace can significantly affect the actual drying time.
Is it better to spray paint or roll a door for the best finish?
For a perfectly smooth, factory-like finish, a paint sprayer is unmatched because it eliminates any chance of brush or roller marks. However, using a sprayer has a steep learning curve and requires significant prep. For most DIY projects, the best way to paint a door is by using a high-density foam mini roller. This tool minimizes texture, known as “orange peel,” and delivers a remarkably smooth finish that closely rivals spraying.
What’s the best way to paint cabinet doors specifically?
The best way to paint a door for a cabinet involves meticulous prep work. Always remove the doors and all hardware. Clean them thoroughly with a degreasing agent to remove any kitchen grime. After cleaning, sand the surface, apply a quality bonding primer, and then finish with two coats of a durable paint, such as a urethane-alkyd enamel. Using a sprayer or a high-density foam roller will give you that smooth, hard-wearing finish essential for cabinets.


