The most critical component of a high-end kitchen transformation is the layer you’ll never actually see. Many homeowners assume a “paint-and-primer-in-one” product is sufficient for a quick update. However, these shortcuts often lead to peeling, chipping, and wood grain bleed within months. A technical professional cabinet priming process is a chemical requirement for long-term durability rather than a simple preparation step. We recognize the frustration of seeing yellow stains or chips appear on a surface that should look brand new.
You require a factory-grade result that resists the heat and grease of a functional kitchen. This article explains how our approach to kitchen and bathroom cabinet painting ensures a permanent bond. We’ll examine the use of dedicated blocking primers and the necessity of mechanical sanding between coats to meet ANSI/KCMA A161.1-2022 standards. This overview provides the procedural clarity you need to understand the professional refinishing process and why it’s the foundation of a flawless finish.
Key Takeaways
- Understand why primer acts as a specialized chemical bonding agent between the cabinet substrate and the topcoat to prevent peeling under heat and moisture.
- Identify the technical advantages of shellac-based and water-borne alkyd primers for blocking tannins, odors, and wood bleed.
- Learn how the professional cabinet priming process utilizes industrial-strength degreasing and mechanical abrasion to create a uniform surface for maximum adhesion.
- Discover why consumer-grade “paint-and-primer-in-one” products and standard sprayers fail to meet the durability requirements of a high-use kitchen.
- Gain a clear understanding of the systematic steps required to achieve a factory-grade finish for kitchen and bathroom cabinet painting projects.
Why a Professional Cabinet Priming Service is Non-Negotiable
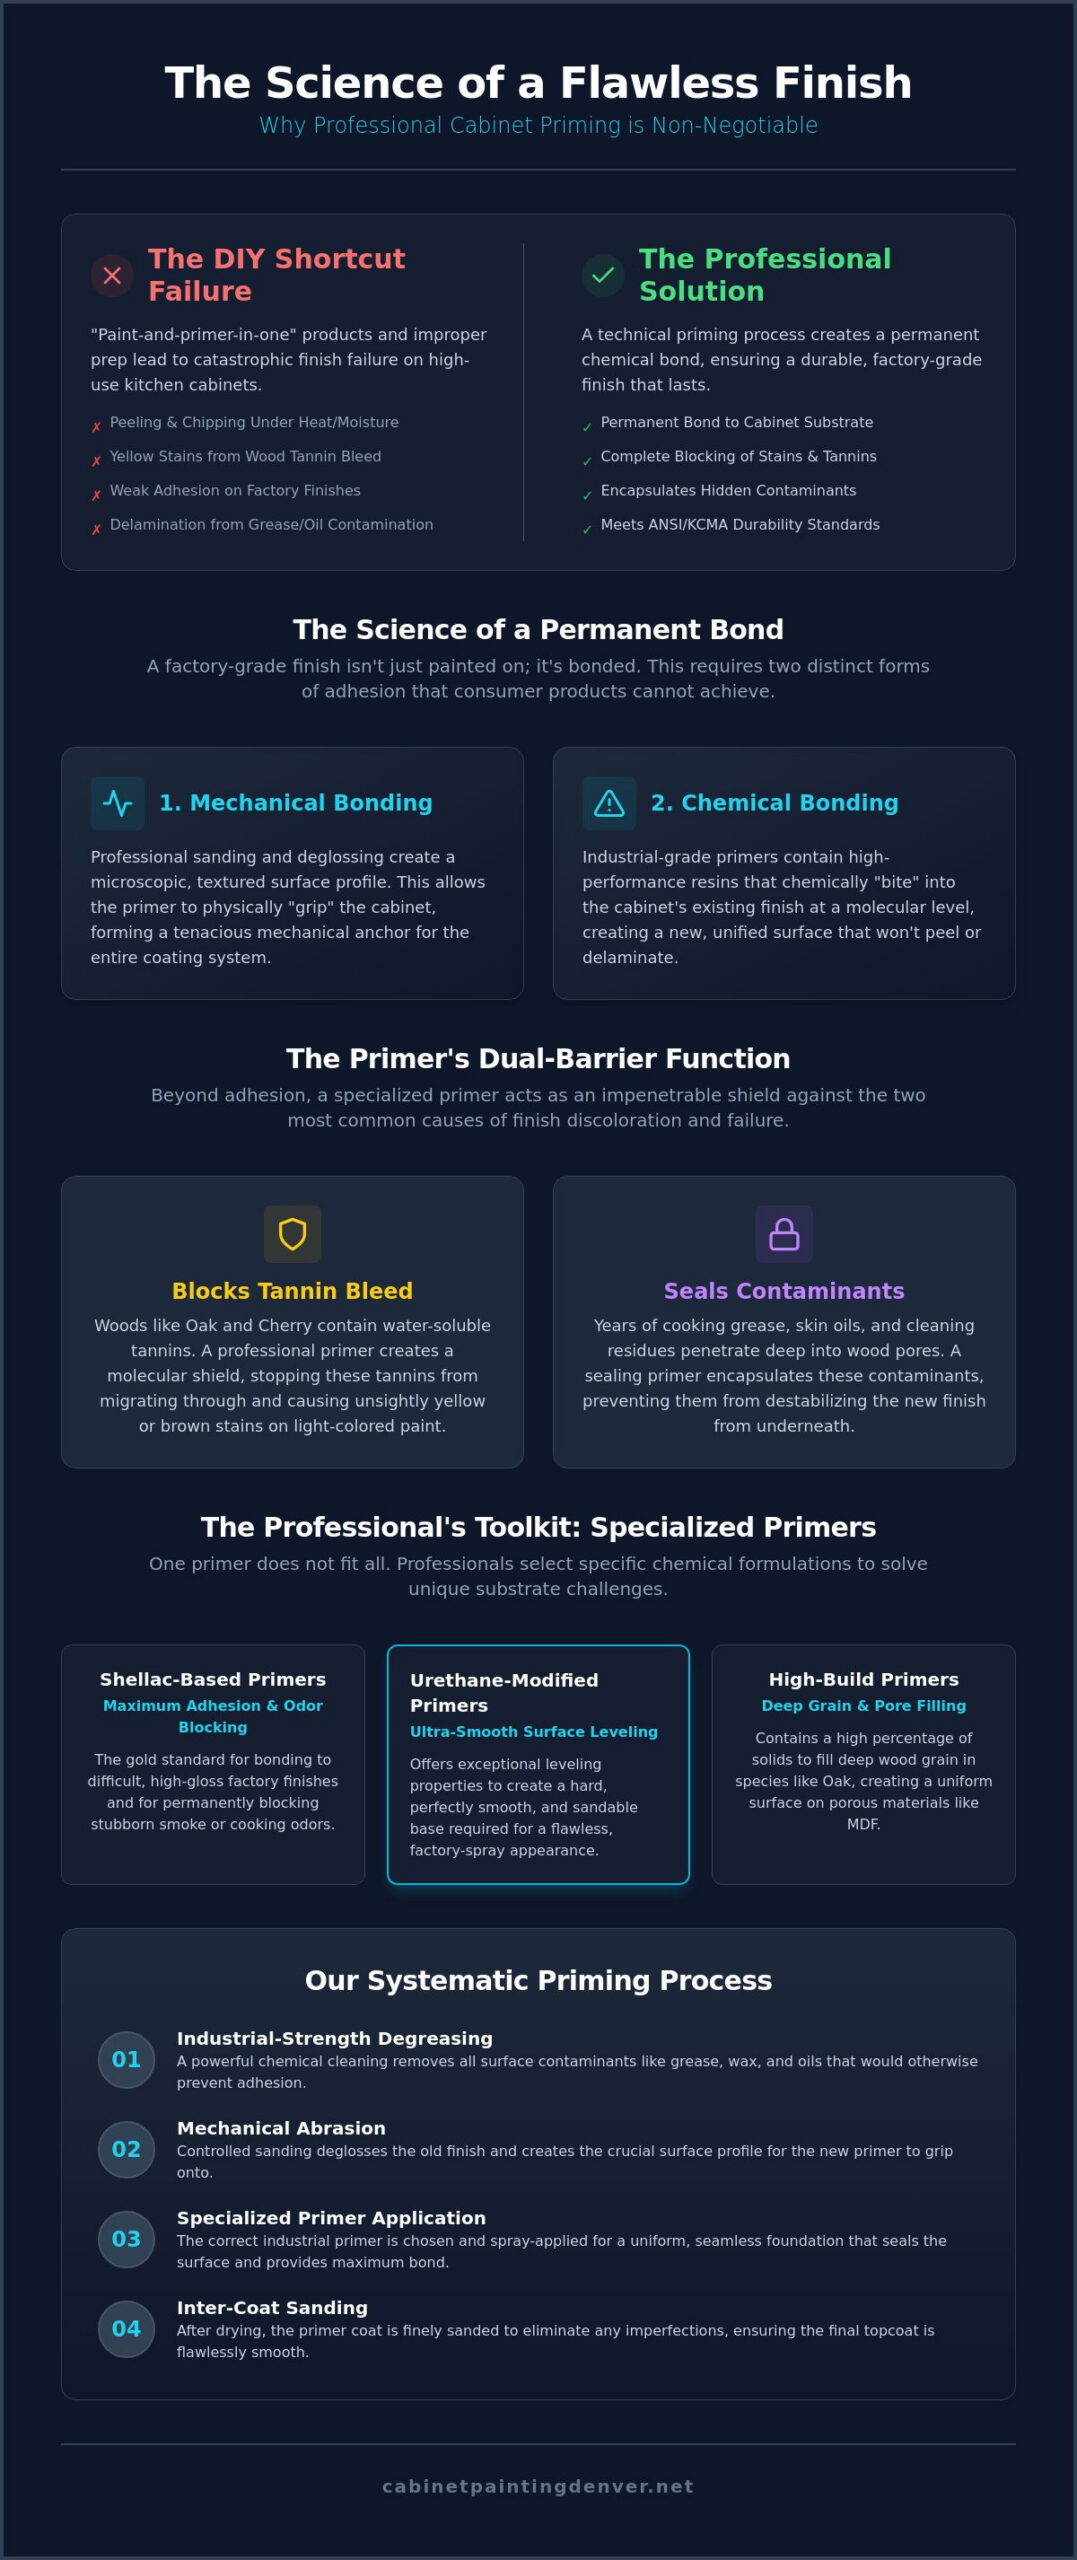
Professional priming serves as a specialized bonding layer between the cabinet substrate and the topcoat. While standard wall paint relies on gravity and low-impact environments, cabinets are high-touch surfaces subjected to constant physical stress. Functional adhesion is the primary goal of this stage. This ensures better adhesion of paint to the surface, effectively preventing the finish from peeling when exposed to kitchen heat or bathroom moisture. Without this foundational layer, the topcoat remains a superficial film rather than a durable part of the cabinetry structure.
A professional service also acts as a critical barrier to neutralize persistent contaminants. Even after a thorough cleaning, traces of skin oils and cooking grease can linger deep within the wood’s pores. Specialized primers encapsulate these residues, preventing them from destabilizing the new finish from underneath. This technical approach prevents common failures like chipping, scratching, and delamination that often plague amateur projects. By establishing a neutral, stable base, the professional cabinet priming process guarantees the longevity of the final aesthetic.
To better understand the technical requirements of this stage, watch this helpful video:
The Science of Adhesion: Chemical vs. Mechanical Bonds
Achieving a factory-grade finish requires two distinct types of bonding. Mechanical bonding is achieved through controlled abrasion and professional-grade deglossing, which creates a surface “profile” for the primer to grip. Simultaneously, chemical bonding agents in industrial primers “bite” into the existing factory-finished surface at a molecular level. Standard wall primers lack these high-performance resins. They cannot adhere to the high-density, catalyzed finishes found on original cabinetry, which leads to coating failure within months.
Blocking Tannins and Preventing Wood Bleed
Certain wood species, specifically Oak and Cherry, contain high levels of water-soluble tannins. When these woods are painted without a technical professional cabinet priming process, these tannins migrate through the paint. This results in unsightly yellow or brown staining on white or light-colored finishes. Professional-grade primers act as a molecular shield to stop this migration. Consumer-grade “all-in-one” products lack the chemical structure to block tannins in high-tannin scenarios, making them unsuitable for professional results.
Specialized Primers Used by Professional Cabinet Painters
Selecting the correct primer is a technical decision based on the specific wood species and the existing finish of your cabinetry. The professional cabinet priming process utilizes different chemical formulations to solve specific substrate challenges. While a general-purpose primer might suffice for drywall, cabinetry requires industrial-grade coatings that can handle the high-viscosity requirements of spray application. Professionals evaluate the density of the wood and the chemistry of the previous coating before choosing a bonding agent.
High-build primers are specifically utilized to fill deep wood grain in species like Oak or to create a uniform surface on porous materials like MDF. These coatings contain a higher percentage of solids, which allows them to bridge small imperfections and open pores. Urethane-modified primers are another staple in the professional toolkit. They offer exceptional leveling properties, which are necessary to achieve a factory-spray appearance that is free of brush marks or orange peel textures. These primers provide the hard, sandable base required for a smooth topcoat.
When to Use Shellac-Based Professional Primers
Shellac-based primers remain the gold standard for maximum adhesion on difficult surfaces. This technology is best for application on high-gloss factory finishes where other water-based primers might slide or fail to bond. It’s the most effective solution for blocking lingering kitchen odors or heavy smoke damage that has penetrated the wood. Because shellac dries extremely fast, usually within 45 minutes, it allows for quicker turnarounds in professional projects without compromising the integrity of the chemical bond. It’s particularly effective for Oak cabinets, where tannin bleed is a constant risk.
The Rise of High-Performance Water-Borne Primers
Modern water-borne alkyd primers provide the durability of traditional oil-based systems with significantly lower VOC levels. These primers meet the US EPA National AIM Rule limit of 350 g/L for primers while offering a safer environment for residents. This technology is highly compatible with modern water-based cabinet coatings, creating a cohesive chemical system that resists chipping and delamination. Implementing a systematic, multi-step approach ensures that each layer bonds correctly to the previous one. For those seeking a durable, low-odor update, professional kitchen cabinet painting often relies on these advanced alkyd formulations to deliver long-term results in a residential environment.
Professional Priming vs. DIY: Addressing Adhesion and Durability
A common reality for DIY projects is the “Scratch Test” failure. You might finish your cabinets and feel satisfied with the aesthetic, but the bond is often superficial. Within the first six months, standard retail coatings frequently begin to chip around handles and high-impact edges. This occurs because the professional cabinet priming process involves specialized resins that retail-grade products don’t contain. These industrial-grade bonding agents are designed to fuse with the substrate rather than just sitting on top of it.
Equipment limitations play a significant role in these failures. Consumer-grade sprayers are designed for thin stains or standard latex paints. They cannot effectively atomize the high-viscosity, high-solids primers required for a factory-grade finish. DIYers often resort to over-thinning these industrial coatings to make them sprayable. This compromises the chemical integrity of the professional cabinet priming process, leading to a brittle film that lacks the necessary flexibility to withstand kitchen heat. Without the correct spray pressure and tip size, the primer won’t lay flat, resulting in an “orange peel” texture.
Environmental control is another hurdle that separates professional work from home projects. Professionals often use dedicated spray booths to manage dust and humidity. In a standard kitchen, airborne particles and fluctuating moisture levels interfere with the curing process. If the primer doesn’t cure in a stable environment, it remains soft and vulnerable to scratching. Additionally, the cost of failure is high. Stripping a failed DIY prime job is significantly more expensive than hiring a professional initially, as it requires labor-intensive chemical removal before the surface can be properly treated.
Common DIY Priming Mistakes to Avoid
- Over-thinning: Reducing the viscosity of primer with water or solvents to accommodate cheap equipment weakens the chemical bond and reduces the coating’s protective properties.
- Skipping industrial degreasing: Failure to remove every trace of cooking oil leads to “fish-eyes,” where the primer pulls away from the surface during application, leaving small craters.
- Inadequate drying times: In Denver’s fluctuating climate, rushing the process results in trapped moisture. This leads to soft, unstable films that peel shortly after the project is completed.
The Value of a Professional Warranty
A professional service offers protection that DIY projects cannot match. Most reputable contractors provide a warranty against peeling and adhesion failure, ensuring that the materials used are industrial-grade rather than retail-grade. This security is vital for high-use areas like kitchens and bathrooms. If you are considering an update, reading Hiring Professional Cabinet Painters: The Ultimate 2026 Guide will help you understand the technical standards required for a lasting finish. Investing in a professional initially provides peace of mind and long-term durability against the daily wear of a functional home.
Our Systematic Approach to Professional Cabinet Priming
Every professional cabinet priming process begins with a rigorous decontamination phase. We use industrial-strength degreasers to eliminate cooking residue and skin oils that standard household cleaners leave behind. These oils are often acidic and can destabilize a new finish if they aren’t fully neutralized. Once the surface is chemically clean, we move to mechanical abrasion. We use dustless sanding systems, which capture up to 95% of airborne particles, to create a uniform surface profile. This provides the necessary “tooth” for the primer to bond permanently to the substrate.
Precision is maintained through a repetitive cycle of application and refinement. After the initial prime, we perform intermediate sanding using fine-grit abrasives. This step is essential to remove micro-imperfections and raised wood fibers that appear after the first coat of liquid is applied. We then use tack cloths to remove every trace of dust before the next layer. This systematic approach ensures that the final surface is perfectly level and ready for the topcoat.
Preparation: The Foundation of the Prime
We prioritize detailed masking and containment to protect the interior of your Denver home from overspray and dust. Doors and drawers are removed for off-site priming in a controlled environment. This allows for 360-degree coverage and prevents household contaminants from settling into the wet primer. Before the first coat is applied, we identify and fill minor dings, scratches, or cracks with high-performance fillers. This ensures the substrate is structurally sound and visually seamless before the bonding layer is established.
The Spraying Process: Achieving a Factory Finish
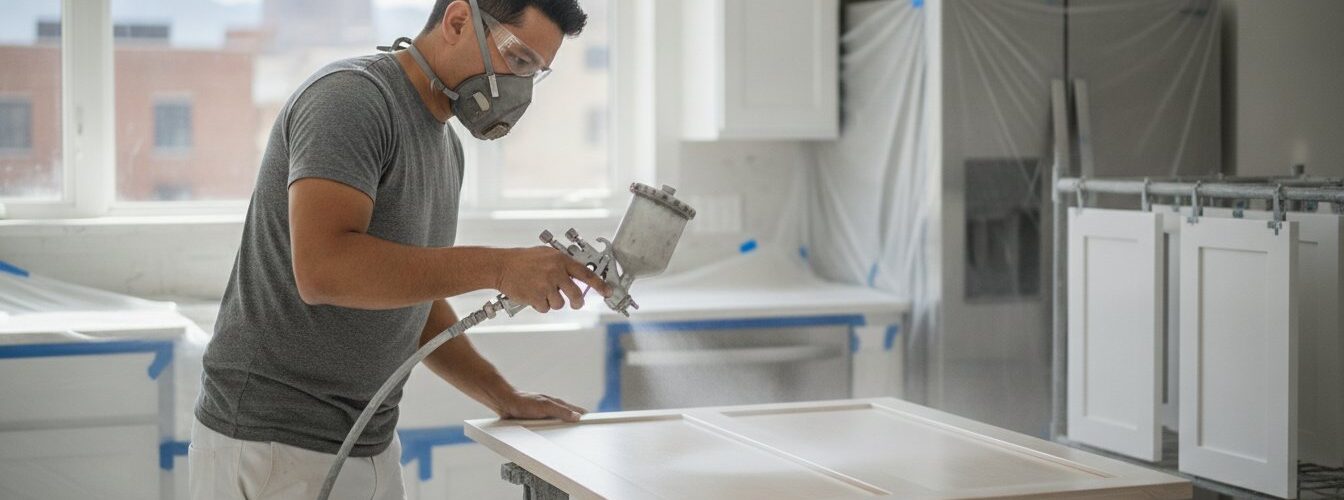
The application phase utilizes HVLP (High Volume Low Pressure) spray equipment. Professional spraying is superior to brush or roller application because it avoids the texture and marks left by manual tools. This technology allows us to maintain a consistent mil-thickness across all surfaces. Achieving the correct thickness is vital; a coat that’s too thin won’t provide adequate protection, while a coat that’s too thick can lead to cracking or “mud-cracking” as it cures. Our process ensures the primer lays flat for a factory-smooth appearance. For a deeper look at our full sequence, see Cabinet Painting Denver: Your Ultimate Guide to a Flawless Finish.
If you’re ready to upgrade your home with a durable, factory-grade finish, contact us for professional kitchen cabinet painting today.
Secure Your Kitchen Transformation with Cabinet Painting Denver
Cabinet Painting Denver provides specialized expertise for homeowners throughout the Denver metro area. We utilize high-performance, task-oriented priming systems designed for heavy-use residential environments. Our team maintains transparent communication from the initial estimate through the final re-installation of your doors and drawers. We provide direct, professional consultations to assess the specific condition of your cabinetry. This ensures the professional cabinet priming process is tailored to your unique substrate, whether you require kitchen cabinet painting or bathroom cabinet painting.
Colorado’s semi-arid climate requires a specific technical approach to coating application. Denver’s low humidity levels significantly accelerate drying times; however, this can complicate the deep curing process of industrial primers. If a primer dries too quickly on the surface before it can chemically “bite” into the wood, the finish becomes brittle and prone to delamination. We manage these environmental variables by selecting primers with appropriate open times. This prevents the cracking often caused by the rapid expansion and contraction of wood fibers in dry mountain air.
Denver-Specific Cabinet Refinishing Experts
Our team understands the environmental challenges unique to the Front Range. We serve local communities including Highlands Ranch, Cherry Creek, and Lakewood with technical precision. Because every home has different material needs, budgeting is a primary concern. You can consult our guide on Cabinet Painting Cost: A Full 2026 Price Breakdown to understand the investment required for a factory-grade transformation. We prioritize functional results that withstand the local climate for years without peeling or yellowing.
Request Your Professional Priming Estimate
We develop customized priming plans based on your specific wood species and the desired topcoat finish. A heavy-grain Oak cabinet requires a different high-build primer than a smooth Maple surface or porous MDF. Our commitment to procedural excellence ensures that every step of the professional cabinet priming process is executed with industrial-grade HVLP equipment. We don’t use retail-grade shortcuts that lead to premature failure. We focus on creating a permanent bond that resists the daily grease and heat of a busy kitchen environment. If you’re ready to begin your project, you can request your free cabinet painting quote to receive a detailed technical assessment of your cabinetry today.
Upgrade Your Cabinetry with Technical Precision
Achieving a durable result requires more than a standard coat of paint. It demands a rigorous professional cabinet priming process that addresses the chemical and environmental challenges of your home. By utilizing specialized tannin-blocking technology and industrial-grade bonding agents, we ensure your finish remains vibrant and resists peeling for years. This technical foundation eliminates the risk of yellowing stains and ensures a smooth, uniform surface that withstands daily kitchen use.
As a local Denver owner-operated service, we understand how the regional climate affects the curing of your cabinetry. Our systematic approach moves beyond basic preparation to provide a factory-quality spray finish that DIY methods cannot replicate. You can transition from dated, worn cabinets to a high-end finish with confidence in the structural integrity of the coating. We prioritize procedural clarity to ensure every project meets the highest industry standards for adhesion and longevity.
Request Your Free Professional Cabinet Priming & Painting Estimate to start your kitchen transformation with confidence. We are ready to deliver a permanent, high-performance finish for your home.
Frequently Asked Questions
Is professional priming really necessary if my cabinets are already painted?
Professional priming is necessary because existing coatings often contain contaminants or lack the chemical profile for new paint to bond. Skipping this step leads to delamination. A dedicated bonding primer acts as a bridge between the old finish and the new topcoat. This ensures the professional cabinet priming process creates a stable foundation that won’t fail when the wood expands or contracts over time.
How long does the professional priming and painting process take?
A professional cabinet painting job typically takes between 20 to 40 hours. This timeframe includes meticulous preparation, sanding between each coat, and specific curing windows. In Denver, the dry climate can influence these timelines, but we never rush the process. Allowing for full curing time rather than just drying time is essential before we reinstall doors to prevent surface damage or sticking.
What is the best primer for oak cabinets to hide the grain?
High-build primers are the standard for oak cabinets because they fill the deep, open pores characteristic of the wood species. These primers contain higher solids which help level the surface profile. For a truly smooth, factory-like result, we often apply multiple coats of high-build primer with intermediate sanding. This creates a uniform base that hides the heavy grain before the final color application.
Do professional cabinet painters prime both sides of the doors?
Yes, we prime and paint both sides of every door and drawer front. This practice ensures a consistent appearance when doors are opened and provides a complete moisture barrier for the wood. Treating all surfaces equally prevents warping that can occur if one side of the wood is sealed while the other is left exposed to the humidity and temperature changes in your kitchen.
Can you prime over laminate or thermofoil cabinets?
Priming over laminate or thermofoil is possible as long as the original material is not peeling or bubbling. We use specialized high-adhesion bonding primers specifically engineered for non-porous surfaces. These products are designed to “bite” into the slick laminate surface. However, if the thermofoil is already failing or delaminating from the substrate, it must be removed before any priming or painting can occur.
What happens if I skip the priming step and just use high-quality paint?
Skipping the priming step results in premature coating failure, often within the first six months. High-quality paint is designed for color and durability, not for adhesion or blocking. Without primer, you’ll likely see tannins bleeding through white paint and chips appearing around high-touch areas like handles. The cost of fixing a failed project is significantly higher than performing the professional cabinet priming process correctly the first time.
Will the professional primer smell during the application in my home?
Odor levels depend on the specific primer used, but we prioritize low-VOC water-borne alkyds that meet the 350 g/L limit to reduce smell. Some specialty primers, like shellac-based options for odor blocking, have a stronger initial scent that dissipates quickly. We use containment systems and ventilation to manage air quality. Most homeowners find the odor manageable and temporary during the 20 to 40-hour project window.
How do you ensure the primer sticks to factory-finished cabinets?
We ensure adhesion to factory finishes through mechanical abrasion and chemical deglossing. Factory-finished cabinets are designed to be stain-resistant and slick, which makes them difficult for paint to grip. By sanding the surface to create a microscopic profile, we provide a physical “tooth” for industrial bonding primers to grab. This mechanical bond, combined with the primer’s chemical resins, ensures a permanent and durable finish.