
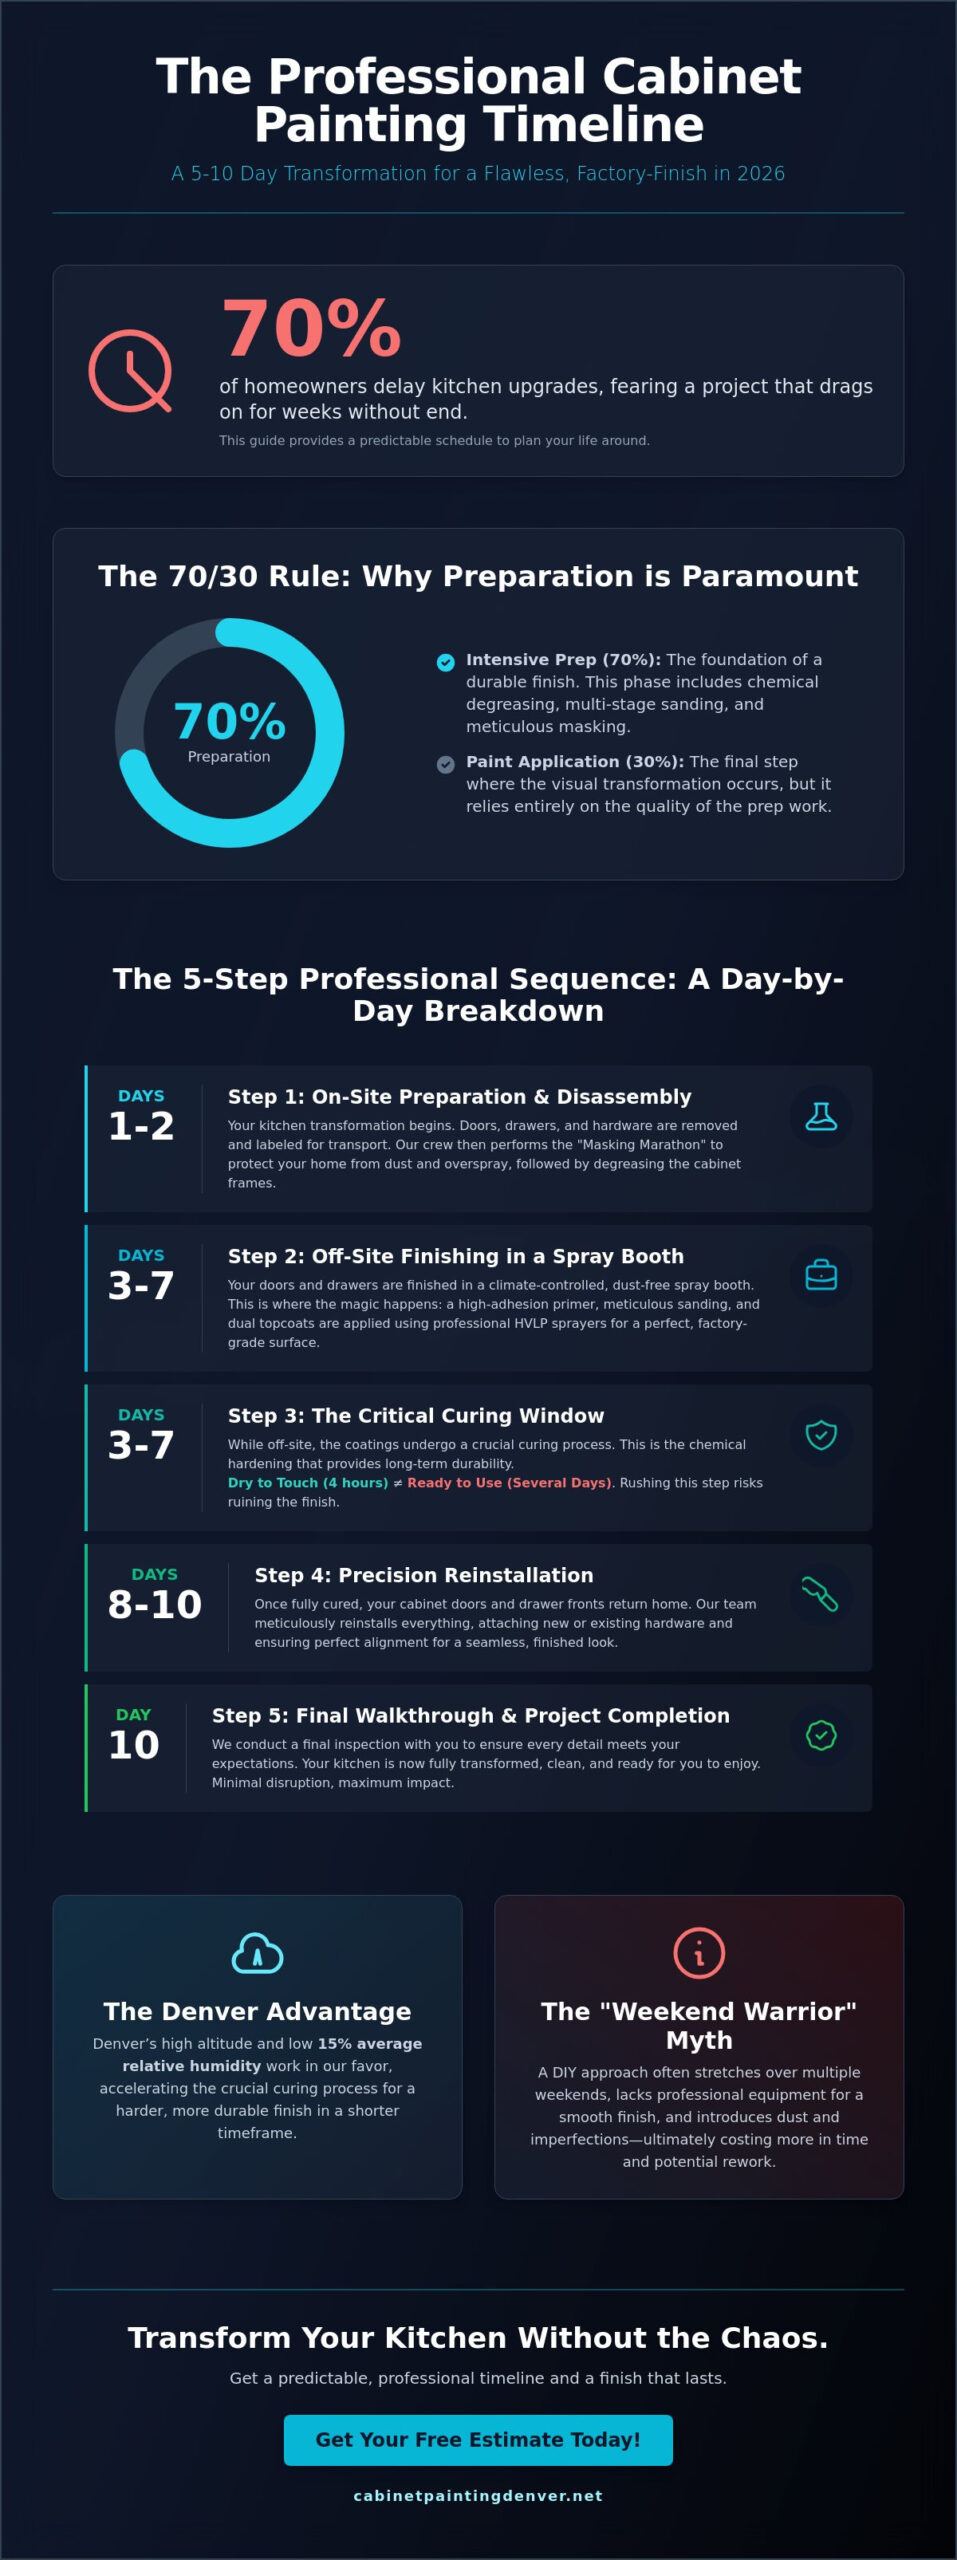
Nearly 70% of homeowners delay kitchen upgrades because they fear a renovation project will drag on for weeks without an end in sight. You likely understand that anxiety; the kitchen is the heart of your home, and losing access to it for even a few days feels like a major disruption. It’s frustrating to balance the desire for a fresh look with the reality of takeout meals and temporary kitchen setups. We know that your biggest hurdle isn’t choosing a paint color, but rather managing the cabinet painting timeline so your life can return to normal as quickly as possible.
In this guide, you’ll discover the exact day-by-day breakdown of a professional transformation in 2026, specifically tailored to how Denver’s 15% average relative humidity impacts drying and curing speeds. You will gain a clear understanding of the 5 step sequence professional crews use to ensure a durable, factory finish. We will also clarify the critical difference between “dry to touch” and “ready to use” so you don’t accidentally ruin your investment on day four. This breakdown provides a realistic schedule and the confidence to plan your family’s routine around a predictable kitchen refresh.
Key Takeaways
- Understand the standard 5-to-10-day window required to achieve a professional, factory-grade finish that stands the test of time.
- Learn why 70% of the project involves intensive preparation and how chemical degreasing ensures your new finish won’t peel.
- Discover how Denver’s unique high-altitude climate and low humidity directly influence your professional cabinet painting timeline.
- Compare the efficiency of professional HVLP spraying against the “Weekend Warrior” myth to see the real time cost of DIY.
- Get a practical survival checklist to help you navigate kitchen downtime and manage home access during the transformation.
The Standard Cabinet Painting Timeline: What to Expect in 2026
Most homeowners want a fast turnaround, but a professional cabinet painting timeline usually spans 5 to 10 business days. In 2026, industry experts prioritize factory-grade finishes over sheer speed. These high-end finishes rely on modern water-borne alkyd resins that require specific drying windows. These coatings combine the durability of traditional oil with the low-VOC benefits of water. Understanding the science of paint helps explain why these advanced formulas need precise atmospheric conditions and curing times to prevent future chipping or peeling.
To better understand how professionals handle specific parts of your kitchen during this window, watch this helpful video:
A standard project follows three distinct phases. First, teams handle intensive on-site preparation. Second, they move to off-site spraying in a climate-controlled environment. Finally, they return for the precision reinstallation. This structured approach ensures your kitchen remains functional for the majority of the week while the most labor-intensive work happens at a dedicated facility. Quality cannot be rushed because 85% of a long-lasting finish depends on the bond created during the first 48 hours of application.
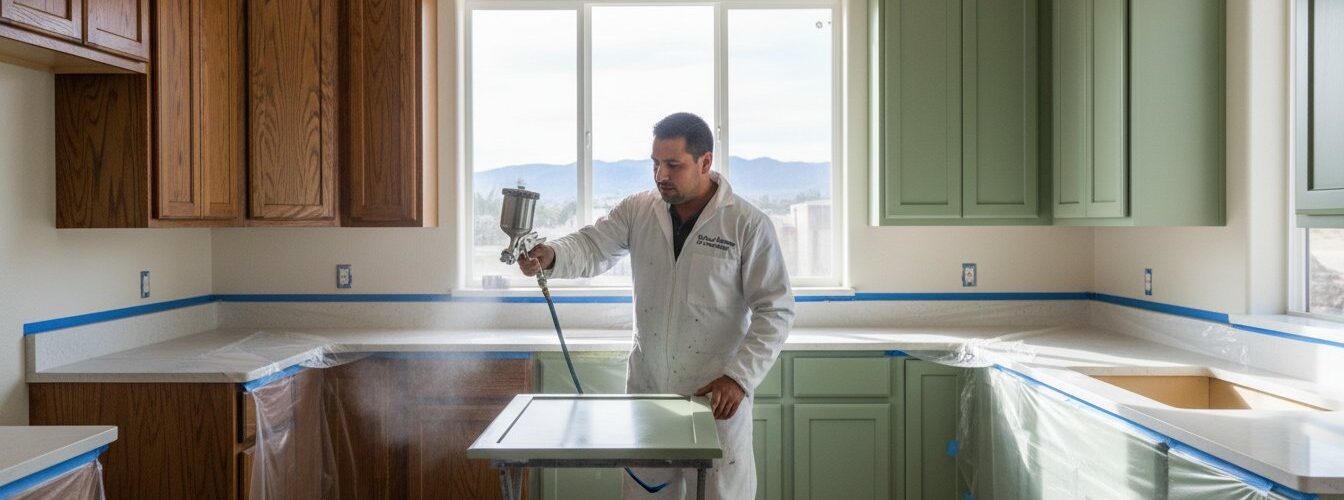
Day 1-2: Disassembly and the “Masking Marathon”
The process starts with removing every door, drawer front, and piece of hardware. These items are labeled and packed for transport to a professional spray facility. Back at your home, the “Masking Marathon” begins. This involves using plastic, paper, and specialized tape to seal off appliances, floors, and ceilings. The Masking Marathon is the most critical protection step to ensure 100% of your home stays free of dust and overspray. Technicians then clean the cabinet frames with industrial deglossers to ensure the new coating adheres perfectly to the wood grain.
Day 3-7: The Off-Site Spraying and Curing Window
While your kitchen frames are prepped, the doors undergo a multi-coat transformation in a professional spray booth. This environment eliminates dust and debris that often ruin a finish in a standard home setting. The process includes:
- Application of a high-adhesion primer.
- Meticulous mechanical sanding between every layer.
- Dual applications of specialized topcoats for maximum depth.
For a deeper look at the spraying process, check out the Kitchen Cabinet Painting: The Ultimate Guide for Homeowners. In 2026, curing is a non-negotiable part of the schedule. Even though modern resins feel dry to the touch in 4 hours, they require several days to reach the chemical hardness needed to withstand daily kitchen use.
The Preparation Phase: Why 70% of the Project Time Happens Before Paint
Many homeowners assume that “painting” is the bulk of the work, but professionals know that applying color is only about 30% of the total labor. The remaining 70% is dedicated to prep work. In a professional kitchen environment, surfaces are coated in invisible layers of cooking oils, steam, and skin oils from daily use. If these aren’t removed with industrial-strength chemical de-greasers, the new coating will fail within months. Sanding isn’t a one-time event either; it’s a multi-stage process involving different grits to ensure the surface is perfectly level. For homeowners with oak or other open-grain woods, adding a grain-filling step is necessary to achieve a smooth, modern look. This specific task often adds 24 to 48 hours to your cabinet painting timeline because each layer of filler must dry completely before it’s sanded flat. Skipping this step on porous wood results in a pitted texture that looks amateurish once the light hits it.
De-glossing and Chemical Etching
New paint won’t bond to the slick, factory-hardened finishes found on most cabinets without proper intervention. Pros use a combination of mechanical scuff sanding and chemical etching to “open up” the surface. This creates a microscopic profile for the primer to grab onto. Skipping this step is the reason 90% of DIY projects experience chipping around the handles after only six months of use. Scuff sanding preserves the integrity of the wood while ensuring the new finish becomes part of the door, not just a layer sitting on top. It’s a delicate balance; you want to remove the gloss without gouging the substrate or damaging the profiles of the door panels.
The Role of Specialized Primers
Priming is where the foundation of the project is built. High-adhesion, stain-blocking primers are essential to stop tannins, especially in cherry or oak, from bleeding through and turning your white cabinets yellow. These specialized coatings require specific drying windows that cannot be ignored. Rushing this stage leads to catastrophic failure where the topcoat peels off in sheets. During this phase, professionals prioritize health and safety from paint fumes by using high-grade ventilation systems to manage VOC levels. Ensuring every door is cured and ready for the next stage is a non-negotiable part of a successful cabinet painting timeline. If you want to see how these professional steps lead to a factory-grade finish, you can explore the options at cabinetpaintingdenver.net. This careful attention to chemical bonding ensures your kitchen looks new for a decade rather than just a season.
DIY vs. Professional Timelines: Analyzing the Real Cost of Speed
Many homeowners fall for the “weekend warrior” myth. They assume a couple of days is enough to refresh a kitchen. Reality tells a different story. A standard DIY cabinet project requires 30 to 40 hours of focused labor. When you factor in work schedules and family life, that 40-hour commitment often stretches across three or four weeks. Professionals condense this work into a predictable four-day window. DIYers also face the “re-work” trap. A single drip or a layer of dust trapped in wet paint can add five hours of sanding and re-coating to your cabinet painting timeline. Mistakes like these happen in 65% of unassisted home projects, effectively doubling the time spent on prep work.
The Equipment Advantage
Pros use High Volume Low Pressure (HVLP) sprayers. These tools atomize paint into a fine mist. This creates thin, even coats that dry 50% faster than thick layers applied by a brush or roller. Brushes leave heavy ridges that take hours to set. A sprayed coat is often dry to the touch in 20 minutes. Professionals also utilize industrial-grade fans and HEPA ventilation systems. These tools move 2,000 cubic feet of air per minute to accelerate evaporation. Most pro teams take doors to an off-site shop. This removes 70% of the project from your home. It allows your kitchen to remain functional while the finish hardens in a dust-free zone.
- Atomization: Sprayers create a smoother finish that requires fewer coats.
- Airflow: Professional fans reduce humidity and speed up the chemical drying process.
- Off-site transport: Using specialized racks prevents the need to lay doors flat on your garage floor.
Managing the “Cure” at Home
The biggest risk in a DIY cabinet painting timeline is premature reinstallation. Paint might feel dry after two hours, but it hasn’t “cured.” Curing is a chemical process that takes 14 to 21 days for standard retail paints. If you hang doors too early, you’ll experience “blocking.” This is when the door sticks to the frame, peeling the finish off when opened. Pros avoid this by using vertical drying racks and climate-controlled curing rooms kept at 70 degrees Fahrenheit. This controlled environment ensures the finish is hard enough for transport within 24 hours. You can review our guide on Cabinet Painting Cost to see how this specialized equipment and time efficiency influence the total investment.
The Denver Influence: Altitude, Humidity, and High-Desert Drying Times
In the high-altitude environment of the Mile High City, the cabinet painting timeline is dictated by physics as much as labor. Denver averages a relative humidity between 30% and 40%, which is significantly lower than the national average. This dry air causes moisture to evacuate from paint at an accelerated rate. While fast drying sounds like a benefit, it often leads to a “Flash Dry” risk. This occurs when the top layer of paint seals shut before the solvents underneath have evaporated. If the surface dries too quickly, it traps moisture inside, leading to micro-bubbles or a finish that remains soft and prone to peeling for weeks.
Altitude also plays a role in the final aesthetic. At 5,280 feet, lower air pressure changes how paint atomizes from a spray gun. Professional crews must calibrate their equipment differently than they would at sea level to ensure the finish levels out smoothly without creating an “orange peel” texture. To get the best results, homeowners should target late summer or early fall for their projects. Avoiding the April and May “monsoon” season prevents excess moisture from stalling the project, while avoiding the extreme dry snaps of January prevents the wood from shrinking too rapidly during the curing phase.
Humidity Management in the Mile High City
Professional painters in Colorado frequently use retarders to extend the “open time” of their coatings. These additives slow down the drying process, allowing the paint to flow and level into a glass-like surface despite the thirsty Denver air. During winter months, when indoor humidity can drop below 15%, a humidifier is often necessary in the kitchen area. This ensures the coating cures rather than just drying out. Denver’s dry air is a double-edged sword for painters; it accelerates the schedule but threatens the structural integrity of the finish.
Temperature Fluctuations and Your Kitchen
Denver is famous for 40-degree temperature swings within a 24-hour period. These rapid shifts cause wood cabinets to expand and contract, which can stress a fresh finish before it has fully bonded. It is vital to maintain a steady HVAC setting between 68 and 72 degrees for at least 48 hours after the final coat is applied. We recommend that homeowners keep their thermostats locked during this window to prevent the furnace or air conditioner from cycling too aggressively, which can introduce dust or cause uneven curing across different cabinet faces.
Minimizing Disruption: How to Navigate Your Kitchen During the Process
Managing a kitchen renovation doesn’t have to feel like a camping trip gone wrong. While the onsite portion of a professional cabinet painting timeline typically lasts only 3 to 5 days, those days require strategic planning. You’ll face an Access Window where the kitchen is completely off-limits. This usually happens during the cleaning, masking, and spraying phases. During these 48 to 72 hours, the area is sealed with plastic to prevent dust from ruining the finish. You won’t be able to reach your fridge or pantry during this time, so plan your snacks and meals accordingly.
Use this survival checklist to stay sane during the process:
- Relocate your coffee station and microwave to the dining room or laundry area.
- Stock up on 100% compostable plates and utensils to avoid washing dishes in the bathtub.
- Clear a path for the crew to move between their van and your kitchen.
- Keep pets in a separate room or gated area to prevent hair from drifting into wet paint.
Setting Up a Temporary Kitchen
Move your small appliances 24 hours before the crew arrives. Stick to a no-cook menu or use an outdoor grill located far from the kitchen door. Avoid using a portable stovetop or electric griddle near the work zone. Steam and cooking oils are the primary enemies of a fresh cabinet finish. If grease particles or moisture settle on a surface before it fully cures, it can compromise the paint’s adhesion. This results in a finish that might peel or bubble within the first 12 months.
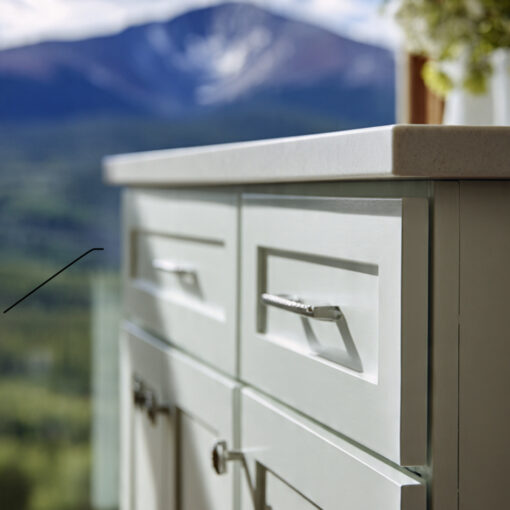
The Final Walk-Through and Hardware
Once the crew begins reinstallation, the transformation is nearly complete. During the final walk-through, check that every door and drawer aligns within 1/16th of an inch. Test every soft-close hinge to ensure smooth operation. If you’re upgrading your handles or pulls, have them ready on Day 1. Installing new hardware during the final reassembly adds zero extra hours to your cabinet painting timeline. It is the most cost-effective way to modernize the space without extending the project duration.
After the crew leaves, the Care Period begins. Your cabinets will be dry to the touch within 4 hours, but the finish takes 14 to 30 days to reach its maximum hardness. During this first month, the paint is still soft and susceptible to fingernail gouges or water damage. Avoid scrubbing the surfaces or using harsh chemical cleaners. Treat them with extra care to ensure the finish remains durable for 10 years or more.
Ready to Elevate Your Denver Kitchen This Year?
A successful kitchen renovation hinges on understanding the cabinet painting timeline before the first drop of primer hits the wood. While DIY attempts often stretch into three week marathons, our professional team streamlines the process into a predictable five day window. We dedicate 70% of our schedule to meticulous surface preparation because that is where long-term durability is won. In Denver’s unique high-desert climate, we calibrate our drying phases to account for the 15% lower humidity levels found at our altitude. This precision ensures your finish cures perfectly without the risk of premature cracking.
By utilizing a Professional HVLP Spray Finish, we deliver Factory-Quality Durability that outlasts standard brush applications by several years. Our local Denver experts have refined this system since 2026, ensuring you get a premium look without weeks of household disruption. You don’t have to live in a construction zone to get the kitchen you’ve always wanted. Get Your Free Cabinet Painting Quote in Denver today and start your transformation. Your dream kitchen is closer than you think.
Frequently Asked Questions
How long do I have to wait to use my kitchen after the cabinets are painted?
You can typically resume light use of your kitchen 24 hours after the final coat is applied. This means you can walk through the space, but you should wait 48 hours before reinstalling heavy appliances or sliding items across the counters. For a standard 20 cabinet kitchen, we recommend 7 full days before high contact use to prevent surface damage.
Do I need to empty all my cabinets before the painters arrive?
You must empty 100 percent of the items from your cabinets and drawers before the first day of the project. Removing your dishes and pantry items prevents dust contamination and gives painters full access to the frames. Most homeowners spend 2 to 4 hours clearing out a standard sized kitchen to ensure the cabinet painting timeline stays on track and avoids delays.
Can I stay in my house during the cabinet painting process?
You can stay in your home during the process, but the kitchen will be a designated work zone for 3 to 5 days. We seal off the area with 6 mil plastic sheeting to contain dust and fumes. While the rest of the house remains safe, 90 percent of our clients choose to dine out or use a temporary kitchenette during the active spray phase.
Why does it take so much longer to paint cabinets than walls?
Cabinet painting takes 4 to 5 times longer than walls because of the intensive 7 step preparation process. Walls require minimal sanding, but cabinets need degreasing, two rounds of sanding, and specialized primer. While a bedroom takes 6 hours, a professional cabinet painting timeline includes 40 to 60 labor hours to ensure the finish doesn’t peel or chip over time.
What happens if I touch the cabinets before they are fully cured?
Touching the surface before the 30 day cure period ends can leave permanent fingerprints or oil marks in the finish. Even if the paint feels dry after 4 hours, it remains soft and vulnerable to indentations. If a smudge occurs within the first 72 hours, it often requires a full sand and respray of that specific door to fix the blemish.
Does Denvers dry climate make the paint dry faster?
Denver’s average humidity of 30 percent or lower accelerates the initial evaporation of water based coatings. This allows the surface to feel dry to the touch in 30 to 60 minutes. However, the chemical cross linking that provides long term durability still requires the full 21 to 30 days recommended by major manufacturers like Sherwin Williams to reach maximum hardness.
How long will the paint smell last in my home?
The strongest odors usually dissipate within 24 to 48 hours after the final spray application. We use high volume exhaust fans that move 2,000 cubic feet of air per minute to clear the atmosphere quickly. If we use low VOC (Volatile Organic Compound) products, 95 percent of the detectable scent is gone by the third evening after completion.
Can the timeline be shortened if I choose a specific type of paint?
You can reduce the project schedule by 1 to 2 days if you choose UV cured coatings or rapid dry industrial urethanes. These products allow for immediate handling of doors once they leave the drying rack. While standard paints take 5 days to process, these advanced options can finish a 25 door kitchen in as little as 3 days without sacrificing quality.

