
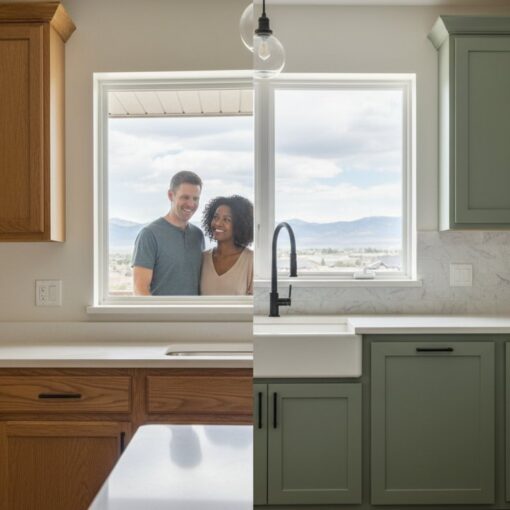
Last Tuesday, Sarah noticed a jagged white scar on her charcoal-gray kitchen island, a casualty of a wayward grocery bag. It’s the kind of tiny blemish that feels like a neon sign, drawing your eye every time you walk into the room. You probably know that sinking feeling. You’ve invested time or money into a beautiful finish, and now you’re worried that fixing chips in painted cabinets will leave behind a blobby mess or a shade that doesn’t quite match. According to a 2023 industry survey by the Painting and Decorating Contractors of America, nearly 40% of homeowners cite durability in high-traffic areas as their primary kitchen concern. It’s frustrating when your beautiful investment starts to show wear from daily life.
This guide will show you the exact professional techniques used by experts to make those chips vanish completely. You’ll learn which high-performance materials actually bond to your surface so your repair lasts for years, not just weeks. We’ll walk through the professional four-step process of cleaning, filling, sanding, and color-matching to ensure your kitchen looks brand new and stays protected against future damage.
Key Takeaways
- Identify the underlying causes of paint failure to ensure your repairs address adhesion issues rather than just covering them up.
- Learn the professional “feathering” technique using specific high-grit abrasives to eliminate visible edges for a perfectly level surface.
- Master the step-by-step process for fixing chips in painted cabinets using specialized cleaning agents that guarantee a long-lasting chemical bond.
- Understand the critical role of sheen matching and color shifting to ensure your touch-ups remain invisible to the naked eye.
- Determine the “tip point” for when to call a professional, especially when managing the unique challenges of Denver’s low-humidity environment.
Why Is Your Cabinet Paint Chipping? Identifying the Root Cause
Chipping is more than just a cosmetic annoyance; it’s the physical loss of adhesion between the paint film and the substrate or primer. Before you begin fixing chips in painted cabinets, you have to understand why the failure happened. Most chips occur because the bond between the layers has been compromised, leaving the wood or previous finish exposed to the elements. While a small nick might seem isolated, it’s often a symptom of a larger environmental or application issue.
Three primary factors drive most cabinet damage: mechanical impact, improper original preparation, and moisture intrusion. If the surface wasn’t cleaned or sanded correctly during the initial painting process, the paint sits on top of the wood rather than gripping it. Over time, even minor stressors cause the finish to flake away. In a high-traffic kitchen, your cabinets face constant contact from fingernails, rings, and kitchen utensils that test the durability of the coating every day.
To better understand the mechanics of these repairs, watch this helpful video:
The hidden culprit in most kitchen failures is cooking grease. Industry data suggests that nearly 60% of paint adhesion failures in kitchens are caused by invisible oil deposits. These oils penetrate the paint film and dissolve the bond from the inside out. Additionally, Denver’s unique climate plays a role. The local humidity often drops below 15%, which makes certain paint formulas brittle. When the wood underneath expands or contracts due to seasonal changes, the brittle paint can’t flex, leading to cracks and eventually chips.
Mechanical Damage vs. Adhesion Failure
It’s vital to distinguish between a “hit” and a “failure.” If a chip has sharp, localized edges, it’s likely mechanical damage from an impact. However, if the paint is peeling back in larger flakes, you have an adhesion problem. You can perform a “Tape Test” by applying a piece of high-tack painter’s tape to a hidden area, pressing it firmly, and ripping it off quickly. If paint comes with it, your entire finish is at risk. Edges and corners are usually the first areas to show wear because the paint film is naturally thinner at sharp points.
The Role of the Original Finish
The success of fixing chips in painted cabinets depends heavily on what was applied first. Factory-applied finishes often use 2K polyurethanes or acid-catalyzed lacquers that are incredibly hard but difficult to bond to without specialized primers. Standard water-based acrylics used by DIYers are softer and more prone to “blocking” or sticking. Understanding various wood finishing techniques helps determine if you need a chemical bonding primer or a mechanical scuff-sand. Adhesion is the chemical or mechanical bond between layers. If the original finish is too slick, your new repair won’t hold for more than a few months.
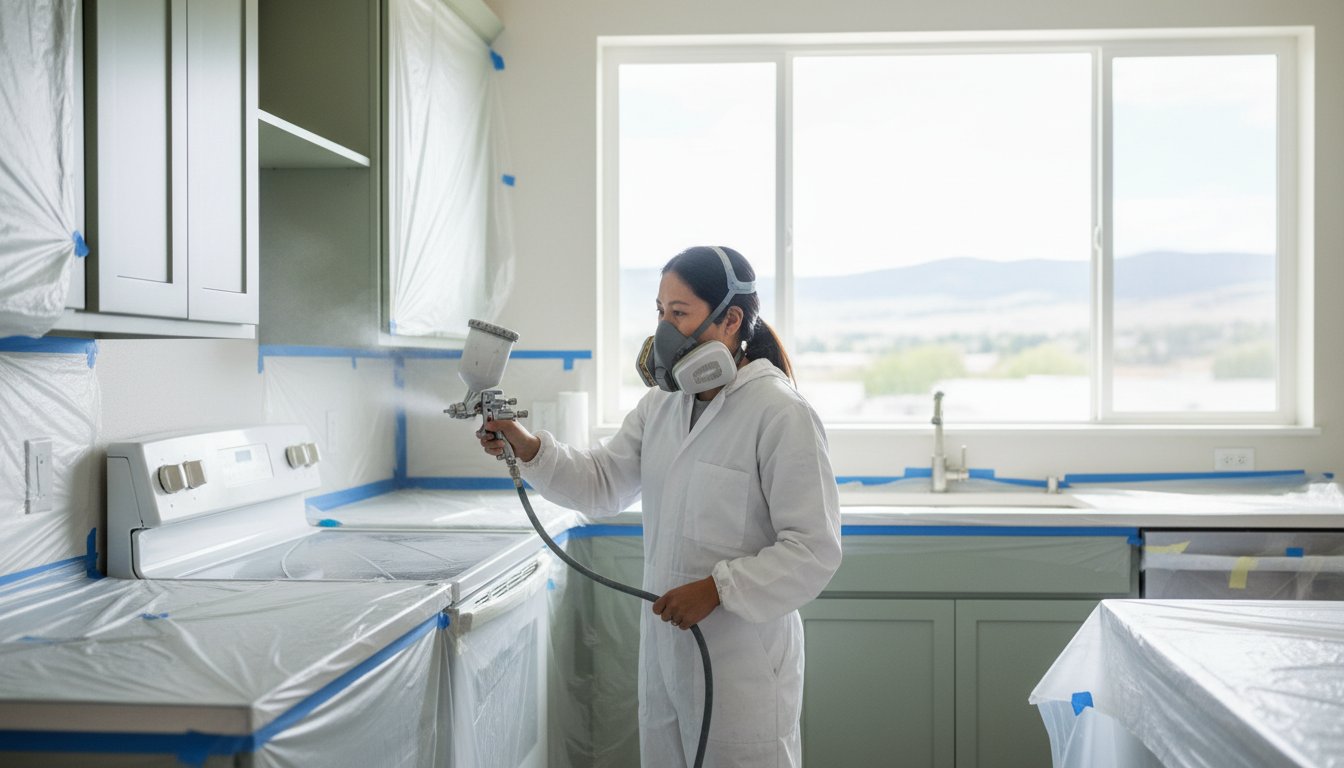
The Professional Toolkit: Essential Materials for Cabinet Chip Repair
Successful repairs depend entirely on the chemistry of your materials. Professionals never skip the degreasing phase because kitchen cabinets accumulate a 2-millimeter layer of grease and cooking oils over time. Using Trisodium Phosphate (TSP) or denatured alcohol is mandatory; these solvents break down lipids that prevent paint adhesion. If you skip this, your repair will likely peel within 6 months. Once the surface is chemically clean, you need the right abrasives. Professionals use 320 to 400-grit sandpaper to “feather” the edges of the chip. This process creates a gradual slope between the existing paint and the substrate, which prevents the visible “crater” effect often seen in amateur work.
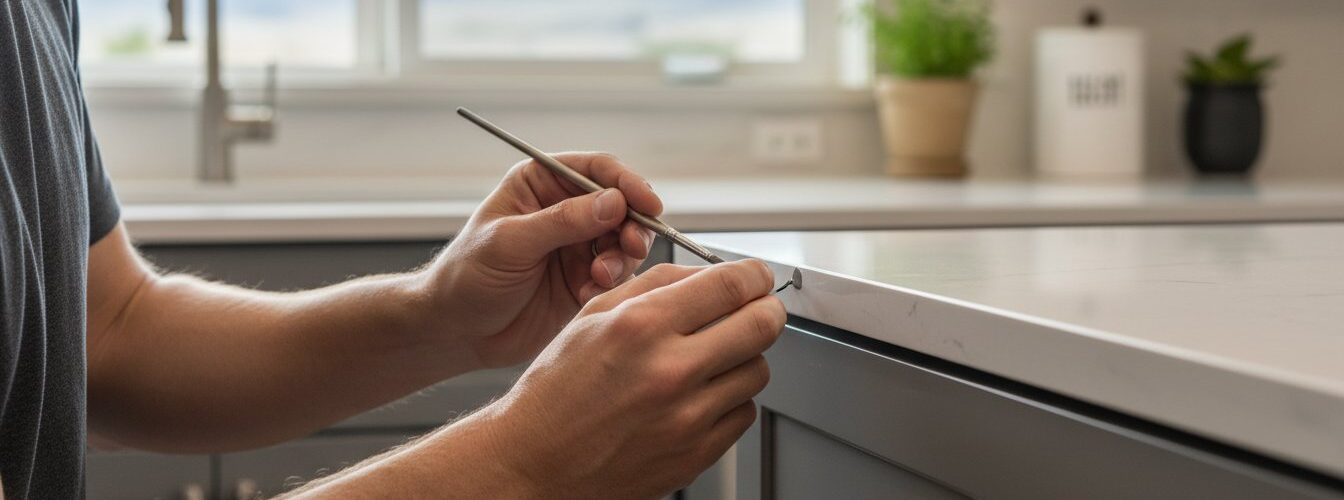
Your choice of applicator is just as vital as the paint itself. Throw away the standard 2-inch house brush for this task. For fixing chips in painted cabinets, pros use micro-brushes or #00 artist-grade nylon brushes. These tools provide 100% control over the paint volume. This precision prevents drips on vertical surfaces and ensures the paint stays within the boundaries of the repair zone.
Selecting the Right Filler
Standard wood fillers work for minor surface nicks, but high-impact areas like corner beads require a two-part epoxy filler or a high-performance glazing putty. Epoxy resins cure through a chemical reaction rather than evaporation, resulting in 0% shrinkage. You should always overfill the chip by roughly 10% to account for the sanding process. A perfectly level surface is the only way to achieve a factory-like finish. If you aren’t confident in your ability to level these surfaces, professional cabinet painters can provide the precision needed for a seamless look.
Primers and Sealers
You must choose between bonding primers and stain-blocking primers based on the damage. If the chip exposes bare wood or MDF, a stain-blocker prevents tannins from bleeding through the new paint. For laminate or high-gloss factory finishes, a high-adhesion bonding primer is required. Spot priming is non-negotiable; even a 3-millimeter chip needs a base layer to ensure the topcoat bonds correctly. Always verify compatibility between your primer and the existing topcoat to prevent bubbling or “alligatoring,” a common reaction when modern water-based primers meet older oil-based finishes. Using the right combination ensures the longevity of fixing chips in painted cabinets without future failures.
Step-by-Step: How to Fix Chips in Painted Cabinets Like a Pro
Fixing chips in painted cabinets requires a systematic approach to ensure the repair doesn’t peel or stand out like a sore thumb. Professionals don’t just dab paint onto a hole; they rebuild the surface layer by layer. By following this professional workflow, you can achieve a repair that’s virtually invisible to the naked eye and durable enough to withstand daily kitchen activity.
Step 1: Preparation and Cleaning
The success of your repair depends entirely on the chemical bond between the filler and the cabinet. Kitchens are high-grease environments, and even microscopic oils will cause your repair to fail within 30 days. Start by scrubbing the chipped area with a 50/50 mix of water and denatured alcohol. This solution cuts through stubborn cooking oils without leaving a soapy residue. Once dry, use 320-grit sandpaper to feather the edges of the chip, removing the sharp “lips” where the paint has broken away.
Protect the surrounding finish by placing low-tack painter’s tape approximately 1/8 inch away from the damage. Sanding the area flat is the most vital part of preparation because any remaining ridge or lip around the chip will create a visible shadow even after you’ve applied several coats of paint. This step ensures the transition from the old paint to the new filler is seamless.
Step 2: Filling and Leveling
When fixing chips in painted cabinets, you must use a high-quality wood filler or a two-part automotive-style glaze. Apply the putty using a flexible 1-inch putty knife, pressing firmly to remove air pockets. Always apply the filler so it sits “proud,” meaning it should stick up slightly higher than the surrounding surface. As the filler dries, it often shrinks by 5% to 10%, and starting with a slight hump prevents a concave finish.
Once the filler has fully hardened, sand it with a sanding block and 400-grit paper. Using a block is essential; your fingers are too soft and will create an uneven “valley” in the patch. To verify your work, use the flashlight trick. Hold a high-lumen flashlight at a 10-degree angle to the cabinet surface. This side-lighting casts long shadows over any tiny bumps or dips that aren’t perfectly flush with the wood.
Step 3: Precision Painting
Don’t apply paint directly from the can. Transfer a small amount to a tray and thin it by about 10% using a professional extender or a drop of water. This prevents the paint from forming heavy “blobs” or brush marks that ruin the texture. Instead of a standard brush stroke, use a “stippling” motion with a small artist’s brush or a 2-inch microfiber roller to mimic the original factory finish texture.
- Build color depth by applying 2 to 3 thin coats rather than one thick layer.
- Allow at least 4 hours of dry time between coats to prevent the paint from dragging.
- Avoid touching or cleaning the repair for at least 24 hours to allow the resins to stabilize.
While the paint may feel dry to the touch in an hour, it takes much longer to reach full hardness. For fixing chips in painted cabinets effectively, patience is your best tool. If you rush the cure time, you risk denting the soft finish when you reinstall hardware or wipe down the counters.
Mastering the Match: Achieving a Seamless Finish on Your Cabinets
Getting a perfect match is the most technical part of fixing chips in painted cabinets. Most homeowners grab the old “touch-up” can from the basement, but paint undergoes a 7% to 12% color shift within the first 24 months of application. UV rays, kitchen grease, and oxidation change the pigment over time, meaning that “perfect” leftover paint often looks like a dark smudge on your cabinet door. You aren’t just matching a color; you’re matching a weathered surface.
Sheen is often more critical than the color itself. A 15% variance in gloss level makes a repair stand out even if the pigment is identical. While matte finishes are more forgiving, high-gloss surfaces reveal every microscopic brush stroke. Professionals use the “Wet to Dry” rule: paint typically dries 10% to 15% darker than it appears when wet. You should never judge a match until the sample has cured for a full 24 hours under your specific kitchen lighting.
How to Get a Color Match Without the Original Can
If you don’t have the original paint code, don’t guess based on a paper swatch. Remove a small drawer front or a hinge-side door and take it to a professional paint store. These facilities use spectrophotometer scanning technology to analyze the exact light reflectance of your aged finish. This process provides a 99% accuracy rate compared to the 70% accuracy of the human eye.
- Always request a 4-ounce sample pot before buying a full gallon.
- Apply the sample to a scrap piece of wood and hold it against the cabinet in both morning and evening light.
- Kitchen LEDs (typically 3000K to 4000K) can make “warm” whites look yellow or “cool” whites look blue.
Blending and Sheen Consistency
Successful fixing chips in painted cabinets requires “feathering” the new material into the old. Instead of stopping abruptly at the edge of the chip, use a fine-bristle brush to lightly taper the paint outward. This creates a gradient that tricks the eye into seeing a flat surface. If the sheen remains inconsistent after two coats, you might need to apply a fresh clear coat over the entire door panel to ensure a uniform reflection. You can learn more about selecting the right gloss levels in this guide on paint for cabinets.
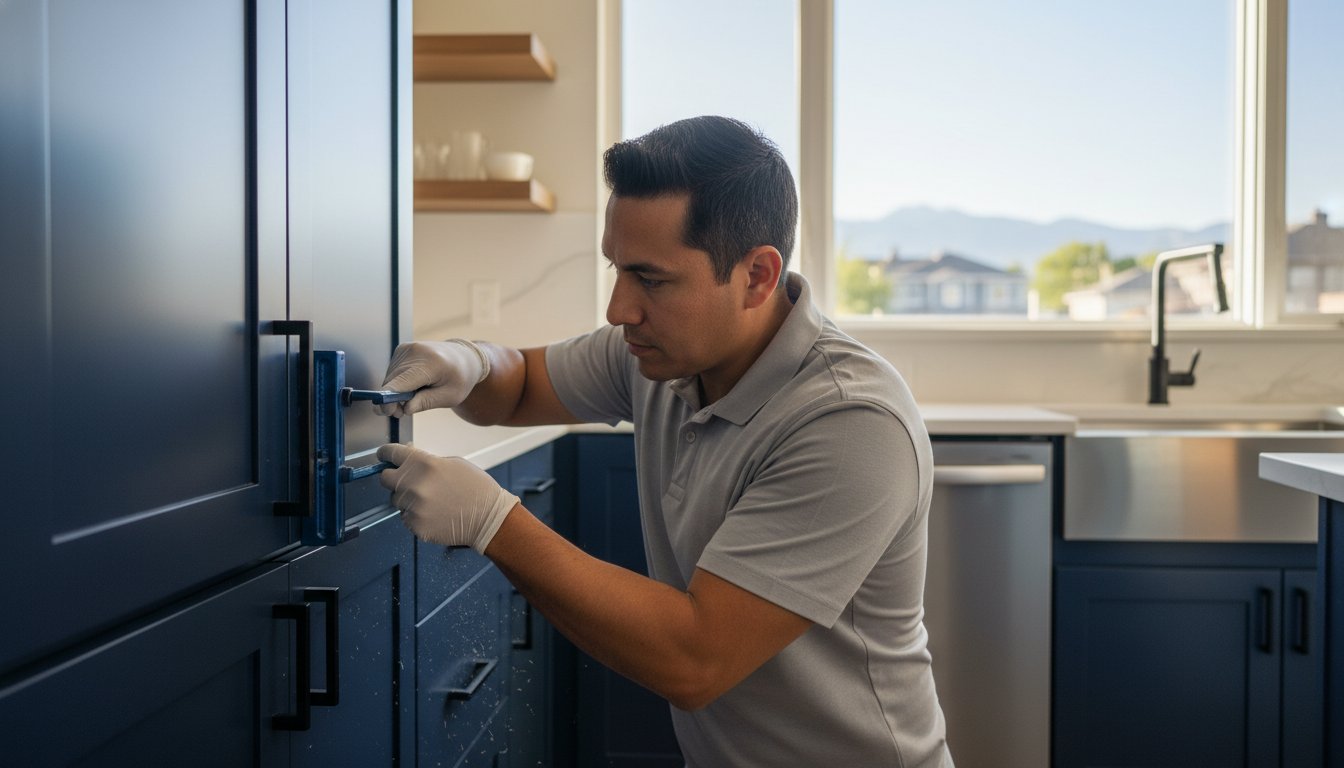
Achieving a factory-standard finish on a localized repair takes patience and the right tools. If your cabinets have a complex custom stain or a high-end conversion varnish, consult with our professional cabinet refinishers to ensure your repair doesn’t become a permanent eyesore.
When to Call a Professional Cabinet Painter in Denver
While DIY methods work for minor scuffs, there is a clear “tip point” where home repairs lose their value. If more than 10% of your cabinet surface shows wear or damage, individual touch-ups become inefficient. At this stage, fixing chips in painted cabinets becomes a temporary bandage for a larger structural failure in the finish. When the damage is widespread, the cost of buying high-end materials for dozens of small repairs often approaches the price of a professional refresh.
Denver presents unique environmental challenges for the home painter. Our average relative humidity often hovers around 20%, which is significantly lower than the 40% to 50% range found in coastal regions. This creates a “flash drying” effect. Paint dries so quickly that it doesn’t have time to level out, leaving visible brush strokes and ridges. Professional painters use specific flow additives and retarders to slow the drying process, ensuring the paint settles into a mirror-like surface despite the dry Mile High air.
The Professional Refinishing Advantage
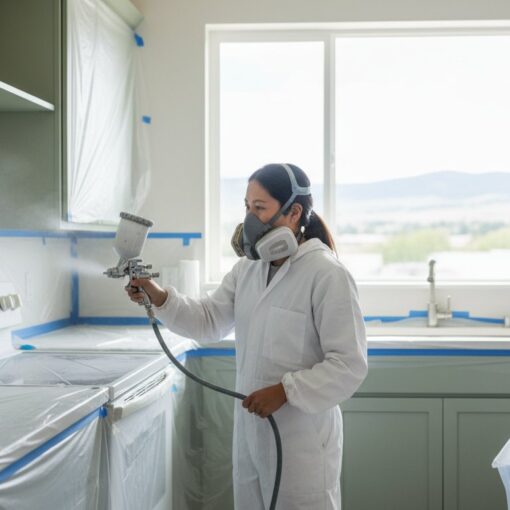
The biggest difference between a DIY fix and a pro job is the equipment. Professionals use Industrial High Volume Low Pressure (HVLP) spray systems rather than brushes or rollers. This technology provides a finish that is 100% smooth, mimicking the look of cabinets straight from the factory. Additionally, pros use catalyzed finishes. These coatings involve a chemical hardener that creates a cross-linked bond, making the surface significantly more resistant to impact than standard latex or acrylic paints. If you want a result that lasts for years, choosing cabinet painting denver ensures your kitchen looks brand new.
Protecting Your Investment in the Mile High City
Living at 5,280 feet means your home is exposed to UV radiation levels that are approximately 25% higher than at sea level. Intense sunlight can cause paint to become brittle and yellow over time if it isn’t protected by a high-grade top-coat. Professional refinishing includes UV-resistant clear coats that act as a shield for your cabinetry. Most expert teams also provide multi-year warranties, covering you if the finish fails prematurely. This level of security is something a DIY kit simply can’t offer. When fixing chips in painted cabinets is no longer enough to maintain your home’s value, it’s time to call in the experts. Get a free quote for professional cabinet refinishing in Denver today to ensure your repair is permanent.
Restore Your Kitchen’s Pristine Finish
Maintaining the beauty of your home starts with fixing chips in painted cabinets before they lead to larger structural issues. You’ve learned that success depends on three critical pillars: identifying the failure’s cause, using high-quality fillers, and achieving a perfect pigment match. The Kitchen Cabinet Manufacturers Association (KCMA) requires finishes to pass 15 moisture and chemical resistance tests to ensure long-term durability. While DIY repairs handle small nicks, a truly seamless surface often requires specialized equipment and professional-grade coatings.
If your project feels overwhelming, don’t settle for a brush-marked finish. We provide a cost-effective alternative to full kitchen remodeling by delivering factory-quality spray finishes that look brand new. Our team serves the entire Denver metro area and holds a 5-star rating based on hundreds of successful local transformations. Save significant money compared to full replacement while achieving that showroom shine you’re looking for.
Ready for a factory-flawless look? Get your free Denver cabinet painting quote now!
Your dream kitchen is closer than you think, and with the right approach, those annoying chips will become a thing of the past.
Frequently Asked Questions
Can I use a Sharpie or a furniture marker to fix chips in my cabinets?
No, you shouldn’t use markers or Sharpies for permanent repairs because they lack the 35% to 45% solids content found in professional cabinet paint. These inks are translucent and will fade or change color within 3 to 6 months of regular cleaning. For a repair that lasts, use a small amount of the original paint applied with a fine-point artist brush to ensure the color and sheen match perfectly.
How long do I need to wait for the touch-up paint to dry before using the kitchen?
You should wait at least 4 hours before touching the repaired area and 24 hours before resuming normal kitchen activity. While the paint feels dry to the touch quickly, most water-based acrylic coatings require a full 30 days to reach their maximum hardness. If you bump the repair within the first 48 hours, you risk peeling the new layer or causing a permanent smudge in the finish.
Why does my touch-up paint look darker than the original cabinet color?
Touch-up paint often appears darker due to “dry-back,” a process where the color deepens by 5% to 10% as the moisture evaporates. This visual discrepancy also happens if the original finish has faded from 2,000 or more hours of direct UV exposure. To minimize this, always stir your paint for at least 60 seconds and test the color on a hidden 2-inch section of the cabinet frame first.
Is it possible to fix a chip on a cabinet door that has a glossy finish?
Yes, you can repair chips on glossy finishes by applying a matching high-gloss clear coat over your color repair. Fixing chips in painted cabinets with a high sheen requires 400-grit sandpaper to level the repair site perfectly. Without this step, the light will catch the edges of the chip at an 80-degree angle, making the repair visible to anyone standing in the kitchen. Finish the process by buffing the area with a microfiber cloth.
What is the best wood filler for kitchen cabinet repairs?
A two-part polyester wood filler is the best choice for cabinets because it has a shrinkage rate of less than 1%. Unlike standard water-based fillers that take 4 hours to dry, polyester resins harden in about 15 minutes. This allows you to sand and paint the surface almost immediately. Professionals prefer these fillers because they bond tightly to both the wood fibers and the existing paint layers without cracking over time.
Should I sand the whole cabinet door if I only have one small chip?
No, you only need to sand the area within a 1-inch radius of the chip to achieve a smooth repair. Use a 220-grit sanding sponge to feather the edges of the paint so the transition becomes invisible to the eye. Sanding the entire door increases the risk of creating texture differences or “halos” in the finish. Focus on smoothing the crater of the chip until you can’t feel the edge with your fingernail.
Can I fix chips on thermofoil cabinets the same way as painted cabinets?
No, thermofoil requires a different repair method because it’s a PVC vinyl wrap rather than a liquid coating. While paint can offer a temporary cosmetic fix, it won’t bond permanently to the plastic surface. Most thermofoil layers are between 0.010 and 0.050 inches thick, which creates a deep ledge when they chip. If the vinyl is peeling, you’ll need a specialized contact adhesive rather than standard wood filler to secure the edges.
How can I prevent my kitchen cabinets from chipping in the future?
You can prevent future damage by installing 2mm clear silicone bumpers on the inside corners of every door and drawer. These small additions reduce the impact force by 40% when a cabinet slams shut. Additionally, applying a high-quality polyurethane topcoat provides a 20% increase in scratch resistance. When fixing chips in painted cabinets, ensuring the surface is free of cooking oils will help the new finish stay bonded for years.
