
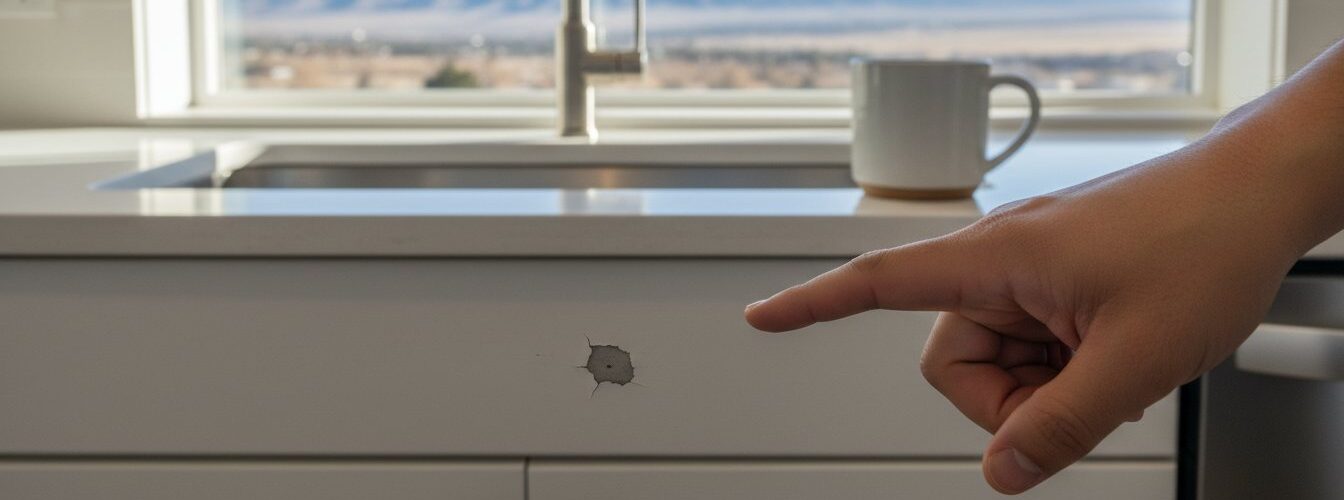
On a Tuesday morning in July, you walked into your kitchen to pour a cup of coffee, only to find a jagged flake of white paint sitting on the floor. You looked up and saw a thumb-sized bare spot on your lower cabinet door that wasn’t there yesterday. It’s a gut-punch moment that leaves you wondering, “why is my cabinet paint chipping” after you spent three days of prep work or a specific budget on the job last spring. Nobody wants their home’s centerpiece to look like a peeling eyesore, especially when you’ve already put in the effort to make it beautiful.
It’s completely normal to feel frustrated when your kitchen cabinets don’t hold up to daily wear and tear. You deserve a finish that lasts for years, not just months. This guide will help you identify the root cause of your chipping paint and reveal the professional secrets to achieving a durable, factory-like finish. We’re going to break down the 7 specific reasons your paint is failing and provide the exact steps needed to fix each one permanently.
Key Takeaways
- Learn how to distinguish between minor surface impact and systemic adhesion failure to finally understand why is my cabinet paint chipping.
- Discover the science of “bond breakers” and how common kitchen oils or cleaning residues can prevent paint from properly gripping the wood.
- Understand how Denver’s unique high-altitude climate and low humidity levels directly impact the curing and longevity of your cabinet finish.
- Identify the critical signs that determine whether your cabinets can be fixed with a simple DIY patch or require a professional-grade restoration.
- Explore the benefits of KCMA-rated coatings and industrial-grade materials for achieving a durable, factory-like finish that resists future wear.
Understanding Why Cabinet Paint Chips and Fails
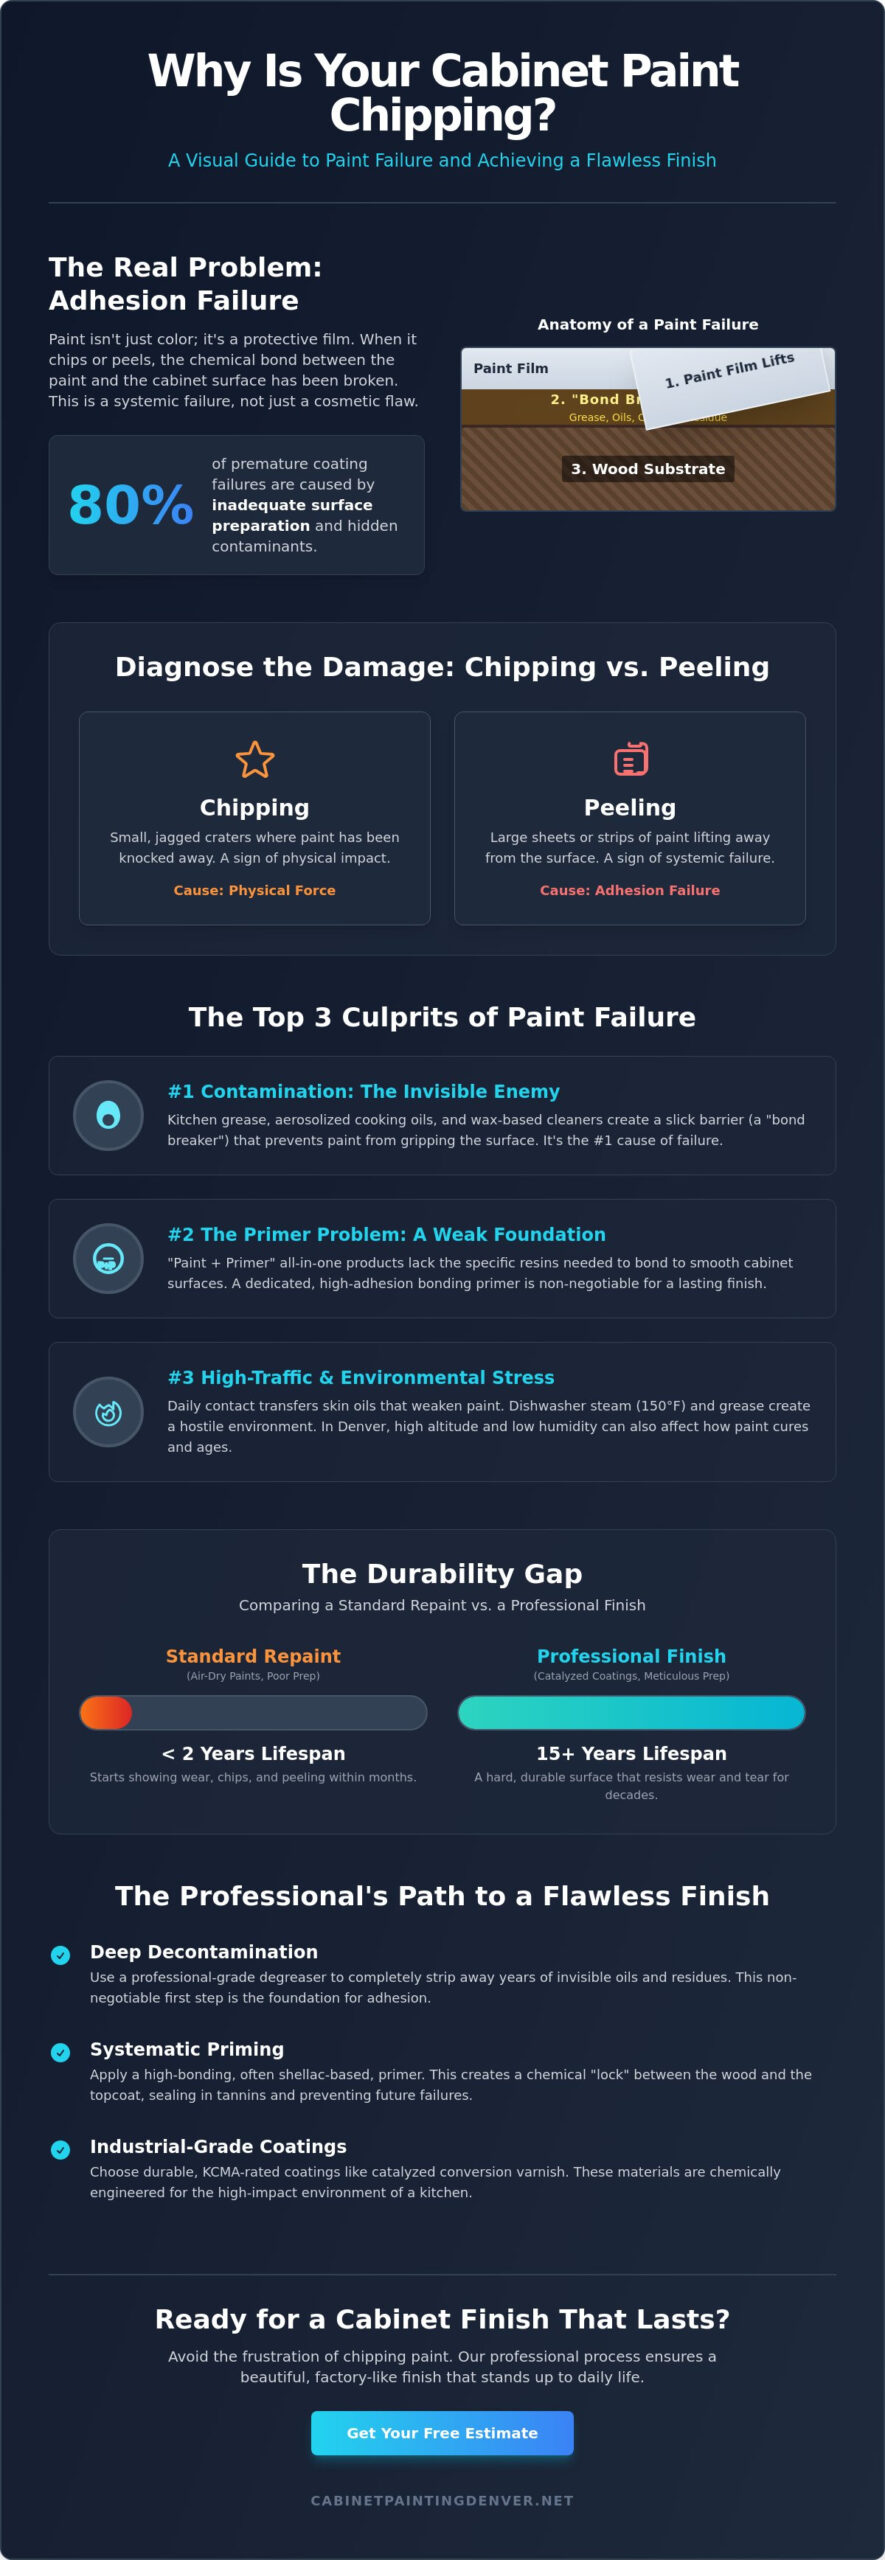
When you notice flecks of color missing from your kitchen island or base cabinets, you’re witnessing a fundamental failure of the bond between the wood substrate and the protective coating. If you’re asking yourself why is my cabinet paint chipping, it helps to realize that paint isn’t just a color; it’s a chemical film designed to adhere to a surface. In high-moisture environments like kitchens, this film faces constant stress. Research into common causes of paint failure shows that inadequate surface preparation or moisture trapped beneath the layer accounts for nearly 80% of premature coating breakdowns.
Professional factory finishes differ significantly from standard residential paint jobs. Most factory-made cabinets use a catalyzed conversion varnish that’s baked on in a controlled environment. When homeowners or contractors apply standard air-dry paints without the right primers, the durability gap becomes obvious. While a factory finish might last 15 years, a poorly executed repaint can start showing signs of distress in less than 24 months.
To better understand this concept, watch this helpful video:
Chipping vs. Peeling: Identifying the Symptom
Distinguishing between these two issues is the first step in a lasting repair. Chipping usually presents as small, jagged craters where the paint has been knocked away by physical force. Peeling involves large sheets or strips of paint lifting away, indicating a systemic adhesion failure. If you can slide a credit card under the edge of a flake, the bond has failed across a wide area. You can perform a fingernail test by pressing your nail into an inconspicuous spot; if the paint feels soft or leaves a permanent indentation, the coating never fully cured or the chemistry is unstable.
The Role of High-Traffic Stress
Kitchen cabinets endure more physical contact than almost any other surface in a home. The areas around handles and hinges receive 10 to 20 touches per day, transferring skin oils that slowly dissolve the paint binder. Steam from dishwashers, which can reach 150 degrees Fahrenheit, and grease from stovetops create a slick film that prevents paint from staying anchored. Edges and corners are particularly vulnerable because the paint film is naturally thinner at sharp 90-degree angles, making these spots the first places where you’ll see the answer to why is my cabinet paint chipping in real time.
The Science of Adhesion: Why Kitchen Cabinet Paint Loses Its Grip
Understanding why is my cabinet paint chipping requires a look at the molecular level. Paint sticks to wood through two primary methods: chemical and mechanical bonding. Chemical bonding happens when the paint molecules fuse with the surface, while mechanical bonding relies on a physical grip. If either process is interrupted, your finish will inevitably fail. In the high-moisture, high-heat environment of a kitchen, the bond between the coating and the substrate is constantly under stress.
Contamination: The #1 Enemy of Paint
Cooking is a messy process. Over time, aerosolized fats and oils settle on your doors. While standard dish soap works for plates, it’s rarely enough for pre-paint preparation. These oils permeate the wood grain, creating a slick barrier that rejects new coatings. If you’ve used wax-based cleaners for years, that residue acts as a permanent bond breaker. Industry data suggests that 80% of coating failures in kitchens are caused by invisible surface contaminants that weren’t properly neutralized with a professional-grade degreaser.
The Primer Problem: Why All-In-One Paints Fail
Many homeowners reach for “Paint + Primer” products to save time, but these are generally unsuitable for cabinets. These products are simply thicker paints; they don’t have the resin structure to bite into non-porous surfaces. To achieve a lasting finish, you need a specialty high-bonding primer, often shellac-based, to seal in tannins and oils. According to the USDA Forest Products Laboratory’s guide on the Finishing of Wood, the interaction between wood properties and the coating is vital for long-term durability. Without a dedicated primer acting as the glue for the entire system, the paint sits on top of the wood rather than becoming part of it. This lack of integration is a primary reason why is my cabinet paint chipping after only a few months of use.
Inadequate Sanding and Surface Prep
You must scuff sand every square inch, even if the cabinets look pristine. This isn’t about removing the old finish entirely, but rather creating “teeth” for the new layer. However, over-sanding can be just as damaging. If you sand through the factory seal into the raw wood fibers excessively, you risk compromising the structural integrity of the surface. A mechanical bond is the physical interlocking of paint into the microscopic grooves created by sanding. If you’re unsure about your surface prep, consulting a team experienced in professional cabinet refinishing can prevent a costly do-over.
- Mechanical Bonding: Physical grip created by sanding.
- Chemical Bonding: Molecular fusion between the primer and the topcoat.
- Bond Breakers: Grease, wax, and oils that prevent adhesion.
Environmental Factors and the Denver Climate Impact
Living at 5,280 feet creates a unique set of challenges for any architectural coating. If you’re wondering why is my cabinet paint chipping, the answer often lies in the local atmosphere rather than just the application technique. Denver’s semi-arid climate and thin air change how paint behaves on a molecular level. The physics of evaporation and wood movement are simply different here than they are at sea level.
Low Humidity and Brittle Finishes
Denver humidity levels frequently drop below 20 percent, especially during the winter months. This lack of moisture causes solvents to evaporate too quickly. This phenomenon is known as “flash drying.” While the paint feels dry to the touch in record time, it hasn’t actually cured. Curing is a chemical process where molecules cross-link to form a resilient, protective shell. When the top layer dries instantly, it prevents the paint from leveling out and bonding deeply with the wood grain.
This creates a finish that’s surface-hard but structurally brittle. It lacks the internal strength to resist impacts from pots, pans, or fingernails. Professional kitchen cabinet painting teams in Colorado manage this by:
- Using specialized retarders to slow down the evaporation rate.
- Maintaining controlled job site environments with industrial humidifiers.
- Applying thinner, multiple coats to ensure each layer bonds correctly without trapping gasses.
Thermal Expansion in Colorado Homes
Wood is a hygroscopic material; it acts like a sponge that reacts to its environment. In the Mile High City, temperature swings are extreme. It’s common to experience a 40-degree temperature shift in a single 24-hour period. These fluctuations force wood fibers to expand and contract rapidly. Most stress occurs at the “cope and stick” joints where the vertical stiles and horizontal rails of a cabinet door meet.
If a contractor uses a rigid, low-quality paint, the coating can’t move with the wood. The paint eventually snaps under the pressure. This leads to hairline fractures at the seams, which is a primary reason why is my cabinet paint chipping in older Denver kitchens. To prevent this, we recommend high-solids coatings with high elasticity ratings. These formulas are designed to “breathe” and flex. They remain supple enough to handle the expansion of the wood during humid summer days and the contraction that happens during the dry, heated winter months.
The altitude also plays a role. Lower atmospheric pressure means solvents reach their boiling point faster. This accelerates the “off-gassing” process. If the paint isn’t formulated for high-altitude application, it can develop micro-bubbles that eventually turn into chips and flakes. Choosing a product specifically tested for mountain climates is the only way to ensure a finish lasts more than a few seasons.
DIY Patching vs. Professional Repainting: Which Is Right for You?
Deciding between a quick patch and a full renovation depends on the root cause of the damage. If you’re asking why is my cabinet paint chipping, you must determine if the issue is a localized accident or a systemic failure of the coating bond. Localized repairs often cost less than $50 in materials; however, they rarely address the underlying chemistry of a failing finish. A DIY kit might hide a blemish for a few months, but it won’t stop a poor-quality original coat from peeling in other areas.
When a DIY Touch-Up is Sufficient
If a single heavy pot or a sharp utensil struck a cabinet door, a touch-up kit is usually sufficient. This works best when the surrounding paint is still firmly adhered to the wood. To do this right, use the “feathering” technique. This involves sanding the edges of the chip until they’re smooth to the touch, ensuring the new paint blends without a visible ridge. While matching color is easy with modern scanners, matching the sheen is much harder. A 20% difference in gloss levels can make a repair stand out under bright kitchen LED lighting.
Signs You Need a Full Professional Repaint
Small chips are often the “canary in the coal mine” for your kitchen. You likely need a full refinishing job if you notice these three red flags:
- Multiple chips appearing in low-contact areas, such as the top edges of upper cabinets.
- Paint that can be scraped off easily with a coin or a fingernail using light pressure.
- Widespread “alligatoring” or a network of fine cracks in the finish.
These symptoms suggest the original primer failed or the surface wasn’t deglossed before the paint was applied. In these cases, why is my cabinet paint chipping is answered by poor adhesion, and a simple patch will only delay the inevitable failure of the entire surface.
The Value of Professional Refinishing
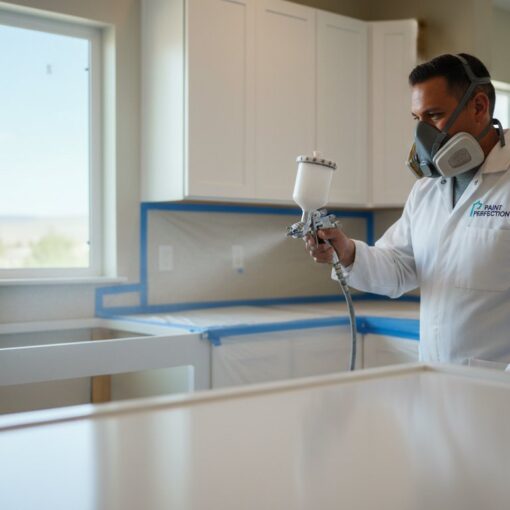
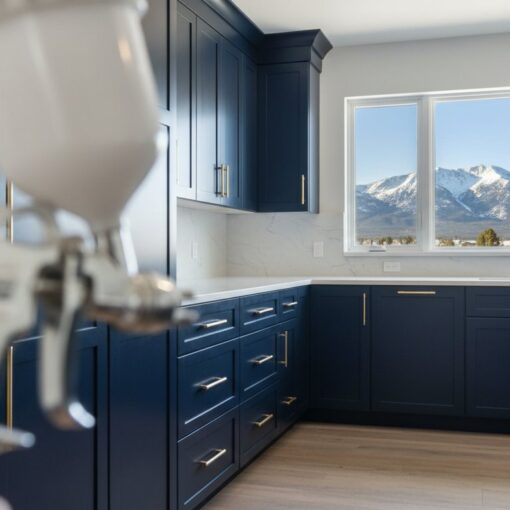
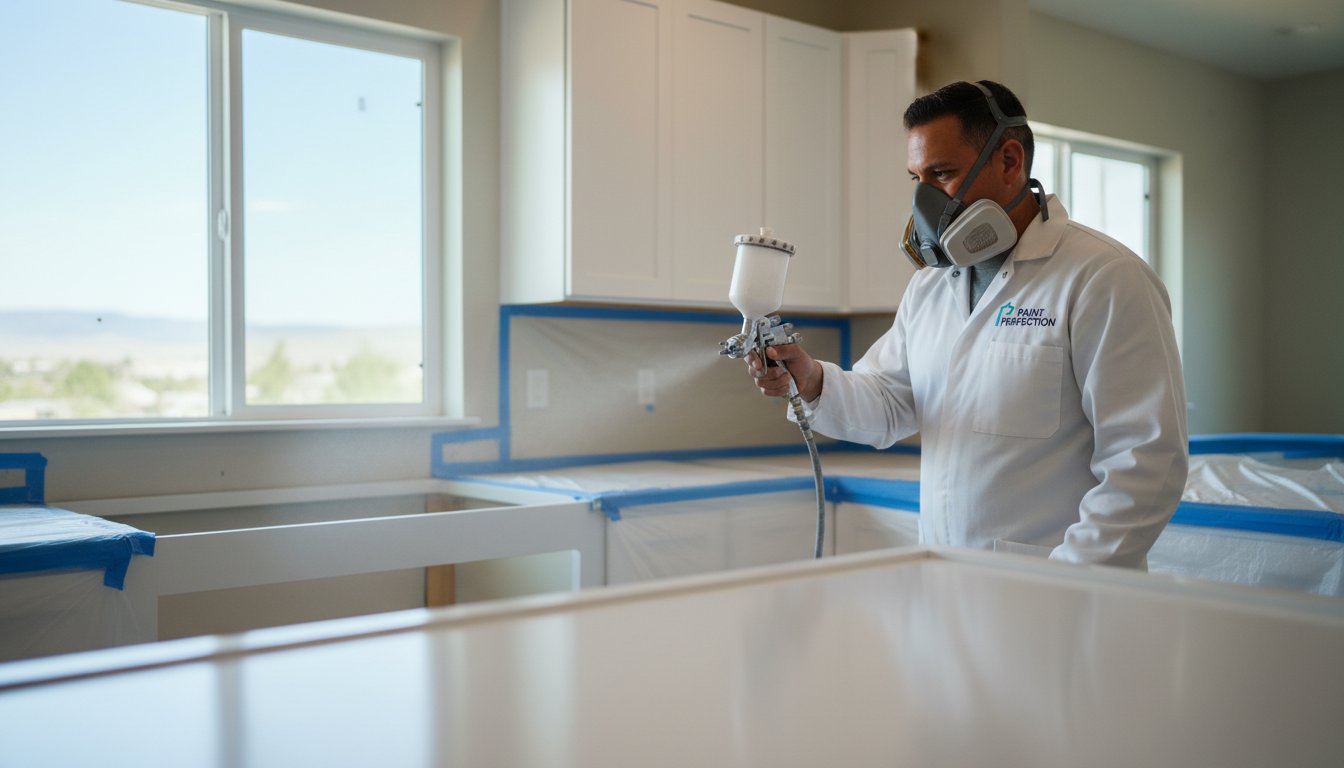
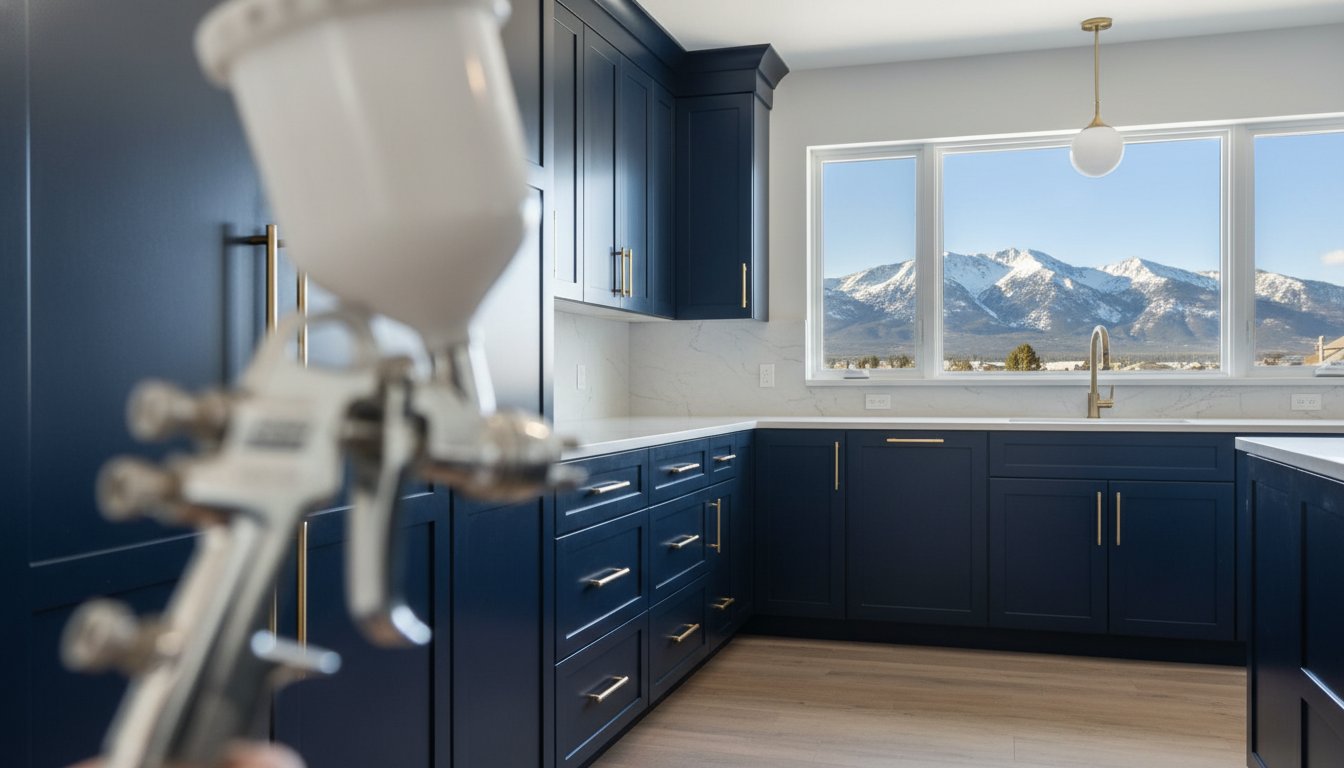
A professional cabinet refinishing project involves stripping or deep-sanding the existing failure before applying industrial-grade coatings. Unlike DIY brush-on methods, professional HVLP spraying creates a factory-smooth surface that resists chipping for 10 to 15 years. While the initial cost to paint kitchen cabinets is higher than a bottle of touch-up paint, the durability of a sprayed conversion varnish far exceeds hardware store acrylics.
If your cabinets show signs of systemic failure, get a professional refinishing quote to restore your kitchen with a durable, long-term solution.
How to Ensure Your Next Cabinet Finish Lasts a Lifetime
If you are tired of asking why is my cabinet paint chipping, the solution starts with the chemistry of your coating. Most homeowners use standard latex or oil-based paints that aren’t designed for the high-friction environment of a kitchen. To get a finish that lasts 10 to 15 years, you must use the best paint for cabinets, specifically professional-grade coatings rated by the Kitchen Cabinet Manufacturers Association (KCMA). These industrial finishes are tested to withstand 24 hours of exposure to harsh substances like vinegar, lemon juice, and mustard without staining or softening.
Patience is the second secret to longevity. Even though modern finishes feel dry to the touch in about 4 hours, they require a full 30 days to reach maximum chemical hardness. During this curing window, the paint is still vulnerable to deep scratches or “blocking” where the door sticks to the frame. Treating your kitchen with extra care during this first month prevents 90% of future chipping issues.
The Professional Process at Cabinet Painting Denver
Our team follows a strict 5-step decontamination and deglossing protocol to ensure the bond is unbreakable. We don’t just wipe down surfaces; we use industrial cleaners to strip 100% of the oils and waxes that cause peeling. We apply our coatings using High Volume Low Pressure (HVLP) sprayers. This technology provides a factory-smooth finish that is significantly thicker and more durable than anything achieved with a brush or roller. Because Denver’s humidity can drop below 15%, we use climate-controlled curing environments to prevent the paint from drying too fast, which can lead to brittle surfaces and cracking.
Post-Painting Care and Maintenance
Once your cabinets are cured, maintenance is simple but vital. Avoid cleaners containing ammonia or bleach, as these chemicals can slowly dissolve the topcoat. Instead, use a soft microfiber cloth and a drop of mild dish soap. You should also install high-quality felt bumpers on every door and drawer. These small pads absorb the impact of daily use, preventing the “slam” damage that often causes edges to flake. If you notice a spill, wipe it up immediately. Water sitting on the edge of a cabinet door is the leading cause of finish failure near sinks and dishwashers.
Ready for a Flawless Finish?
Understanding why is my cabinet paint chipping helps you appreciate why professional-grade materials and techniques are non-negotiable for a kitchen remodel. Expert help is the only way to guarantee a result that looks like it came straight from the showroom. You can see the difference our precision makes by visiting our cabinet painting Denver gallery to view local results. Don’t settle for a finish that will peel in six months. Contact an expert cabinet painter today to receive a free, no-obligation quote and start your kitchen transformation the right way.
Protect Your Investment with a Professional Cabinet Finish
Understanding why is my cabinet paint chipping is the first step toward a kitchen that looks brand new for years. You’ve learned that improper cleaning and low-quality primers cause most failures. In Denver’s unique climate, our detailed 5-step prep process ensures every surface is ready for maximum adhesion. We don’t just paint over old problems; we fix the wood foundation so your finish stands up to daily wear. Skipping these essential steps leads to visible failure within the first 180 days of use.
Our team uses specialized HVLP spraying equipment to deliver a factory-smooth result that resists chips and scratches better than any brush or roller. We account for Denver’s high-altitude curing requirements to ensure the paint bonds correctly to the wood. Don’t settle for a temporary fix that will peel again next year. Choose a solution backed by local expertise and professional-grade materials. Your cabinets deserve a finish that can handle the daily demands of your household.
Stop the chipping and get a factory-quality finish; Request your Free Denver Quote!
Your dream kitchen is closer than you think, and we’re here to make sure it lasts a lifetime.
Frequently Asked Questions
Can I just paint over chipping cabinet paint?
No, you shouldn’t paint over chipping paint because the new layer won’t bond to a loose surface. If you skip sanding and priming, the new finish will likely fail within 3 to 6 months. You must scrape away loose flakes and sand the edges smooth first. This creates a level surface for the new coating to grip properly.
How long should cabinet paint last before it starts chipping?
Professionally applied cabinet paint typically lasts between 8 and 10 years before showing signs of wear. High quality factory finishes or industrial coatings often extend this lifespan to 12 years or more. If you’re wondering why is my cabinet paint chipping within the first 24 months, it usually indicates a failure in the surface preparation or curing process.
Does the type of wood affect how easily the paint chips?
Yes, oily woods like teak or open grained woods like oak impact paint adhesion if not treated correctly. Oak has deep pores that require a grain filler to prevent air pockets; these pockets cause chips in 15 percent of DIY projects. Hardwoods like maple or cherry provide a smoother surface, resulting in 20 percent better bond strength for most acrylic alkyd paints.
Will a clear topcoat prevent my cabinets from chipping?
A clear topcoat adds a layer of protection but won’t stop chipping if the base layer hasn’t bonded to the wood. Polyurethane or lacquer topcoats increase impact resistance by 30 percent compared to paint alone. However, if the primer fails, the entire system will peel away from the cabinet door in large sections regardless of the topcoat quality.
Is it cheaper to repair chips or repaint the entire cabinet door?
Repairing individual chips is cheaper for minor damage, but repainting the whole door is more cost effective if 10 percent or more of the surface is failing. Spot repairs often leave visible edges and color mismatches. A full door repaint ensures a uniform 2 to 3 mil thickness across the surface, providing better long term durability for your kitchen.
Why is my cabinet paint chipping specifically around the handles?
Paint chips around handles because of frequent contact with skin oils and physical impact from fingernails. Skin oils break down paint resins in 100 percent of cases where a chemical resistant topcoat isn’t used. Repeated strikes from rings or jewelry also create micro cracks. Using a 3 inch backplate behind handles can reduce this specific wear by 90 percent.
How much does it cost to have a professional fix my chipping cabinets in Denver?
Professional repair costs in Denver vary based on the kitchen size and the extent of the damage. According to HomeAdvisor, the national average for cabinet refinishing ranges from 1,800 to 4,500 dollars. Local Denver contractors typically follow these industry standards. If you’re asking why is my cabinet paint chipping, an on site inspection is the most accurate way to determine the total repair price.
What is the best way to clean painted cabinets without damaging the finish?
Use a mixture of warm water and a few drops of mild dish soap to clean cabinets without harming the paint. Avoid abrasive sponges or harsh chemicals like ammonia; these can strip 50 percent of a paint’s gloss in a single cleaning session. Wipe the surface with a soft microfiber cloth and dry it immediately to prevent moisture from seeping into the wood joints.