
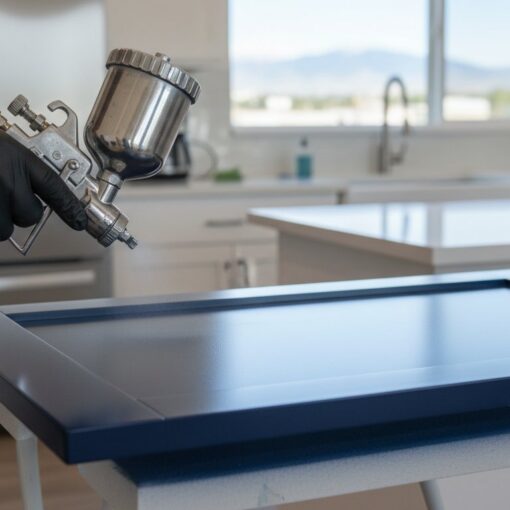
The most expensive part of a cabinet project isn’t the premium paint you select; it’s the preparation steps you choose to skip. Having cabinet painting prep work explained is vital because many homeowners feel anxious about the mess of a kitchen renovation or worry that their new finish will start peeling after only six months. These concerns are valid when “no-sand” claims and DIY shortcuts often lead to failed adhesion and costly rework. You deserve a result that remains durable and smooth for years.
This article outlines the multi-stage chemical and mechanical bonding process required for a factory-grade finish. It’s essential to understand why professional labor focuses on the foundation of the project rather than just the final coat of color. We provide a clear overview of degreasing, precision sanding, and the application of specialized bonding primers designed to prevent tannin bleed. This procedural approach ensures your kitchen, bathroom, or bookshelf cabinets resist chips, fades, and daily wear.
Key Takeaways
- Understand why a multi-stage cleaning and sanding process is required to create a permanent bond that prevents chipping within the first year.
- Learn the “Blueprint Method” for labeling hardware and components to ensure a seamless reinstallation after the project’s completion.
- See the professional steps for cabinet painting prep work explained, focusing on the difference between standard degreasing and three-stage chemical neutralization.
- Discover how grain filling and professional repairs can transform dated wood into a modern, factory-smooth surface suitable for new hardware upgrades.
- Evaluate the impact of environmental factors like humidity on paint leveling and why specialized HVLP equipment requires more rigorous preparation than DIY methods.
The Foundation of Adhesion: Why Prep Work Dictates Longevity
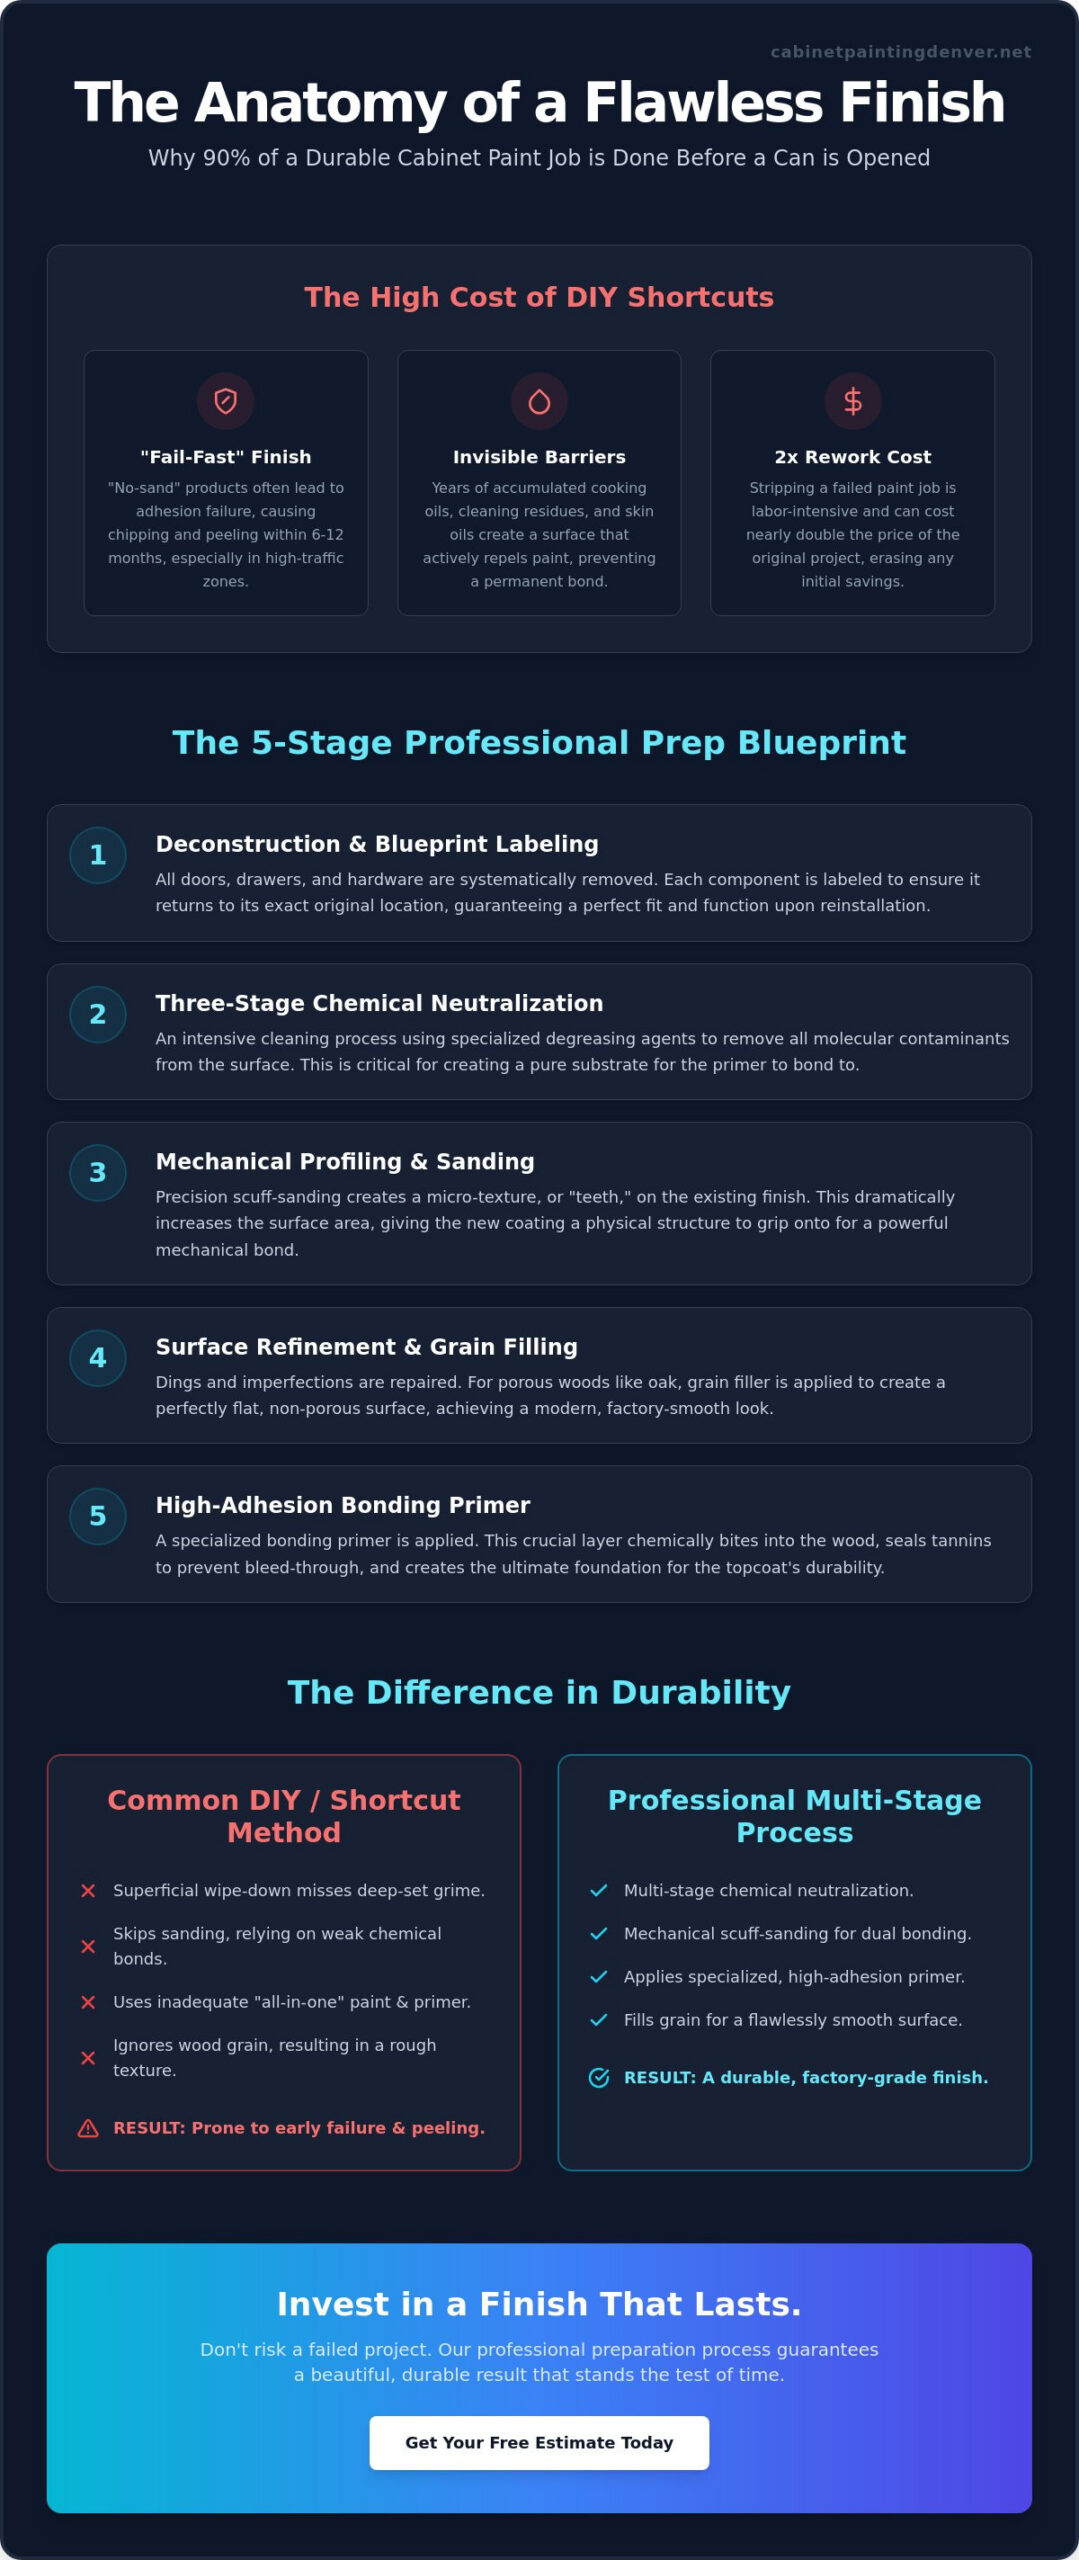
Prep work is the series of technical steps taken to ensure a permanent bond between the cabinet substrate and the new coating. While many DIY guides suggest shortcuts, having cabinet painting prep work explained from a professional perspective reveals that preparation constitutes 90% of a project’s success. The ultimate goal is to achieve a factory finish. This result mimics the durability and smoothness of brand-new cabinetry, rather than looking like a layer of paint sitting on top of wood.
To better understand the physical requirements of this process, watch this helpful video:
Surfaces that appear clean to the eye are rarely ready for paint. Kitchen environments accumulate invisible barriers like aerosolized cooking oils, steam, and skin oils around handles. A surface must be chemically clean, meaning all molecular contaminants are removed through specialized degreasing agents. If these barriers remain, the paint will fail to bond. This often leads to a “fail-fast” scenario where the finish begins chipping or peeling within the first 12 months. Professional cabinet painting prep work explained emphasizes that without this chemical neutrality, even the most expensive paint will eventually delaminate from the wood.
The Cost of Cutting Corners
Skipping essential steps leads to visible adhesion failure. This is most common in “steam zones” near dishwashers or on doors frequently touched by hands. Beyond peeling, poor preparation often results in an “orange peel” texture, a bumpy surface that lacks the reflection of a professional job. Correcting these mistakes is expensive. Stripping failed paint often costs double the price of the original project because it requires specialized chemicals and significantly more labor to return the cabinets to a paintable state. Homeowners who opt for “no-sand” shortcuts often find themselves paying for the same project twice within two years.
Mechanical vs. Chemical Bonding
A durable finish requires two types of connection. Mechanical bonding occurs when the surface is physically altered to provide “teeth” for the paint. We define mechanical profiling as the process of scuff-sanding to increase surface area for adhesion. This ensures the coating doesn’t just slide off the existing slick finish. Chemical bonding involves how the preparatory coating or primer interacts with the wood’s molecular structure. High-quality primers are engineered to bite into the substrate and create a bridge for the topcoat. Unlike “no-sand” products that rely on weak chemical reactions, professional preparation utilizes both mechanical and chemical methods to prevent the finish from ever lifting or fading. This dual-action approach is what creates the factory-grade durability that resists daily wear and tear.
The Professional Deconstruction: Labeling and Workspace Protection
Professional deconstruction begins with a systematic removal of all doors, drawers, and hinges. This isn’t a simple demolition. It’s a controlled disassembly. Every component must be cataloged. We use the “Blueprint Method” to ensure every screw and hinge returns to its specific original location. This is a critical detail in having cabinet painting prep work explained, as even identical-looking doors may have settled differently over years of use. A door from cabinet A might not hang correctly on cabinet B. Following a comprehensive guide to painting cabinets underscores that skipping this logic often results in misaligned doors or “rubbing” during the final stage.
Protection is the next priority. We mask all non-painted surfaces. This includes floors, countertops, and appliances. We use professional-grade tape and heavy-duty paper to create a barrier against overspray. It’s not just about the cabinets. We protect the ceiling and the walls adjacent to the cabinet boxes. This meticulous masking ensures that the high-pressure spray used for a factory finish stays exactly where it belongs. Without these barriers, fine paint mist can settle on furniture or flooring several rooms away. It’s a procedural requirement that keeps the rest of the home livable during the project.
Organization and Hardware Management
A successful project depends on a rigorous numbering system. We apply discreet labels to the hinge cups of doors and the back of drawer faces. We store hinges and handles in labeled containers. This prevents the loss of specialized hardware that can be difficult to replace. We also evaluate the hardware’s condition. While some hinges just need cleaning, others might require replacement to ensure the doors function as intended once reinstalled. We recommend checking for hardware upgrades at this stage, as it’s the ideal time to swap out old mechanisms for modern alternatives.
Creating a Dust-Free Environment
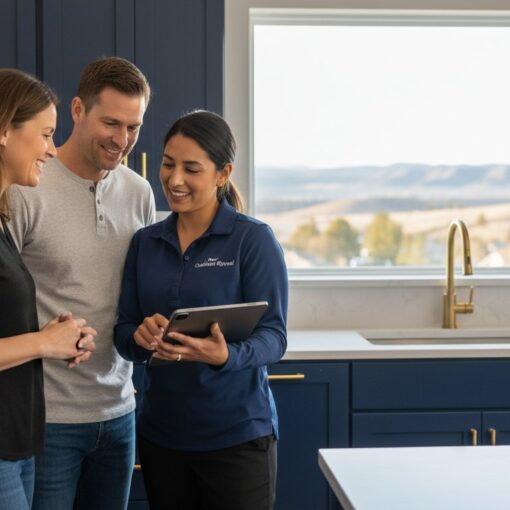
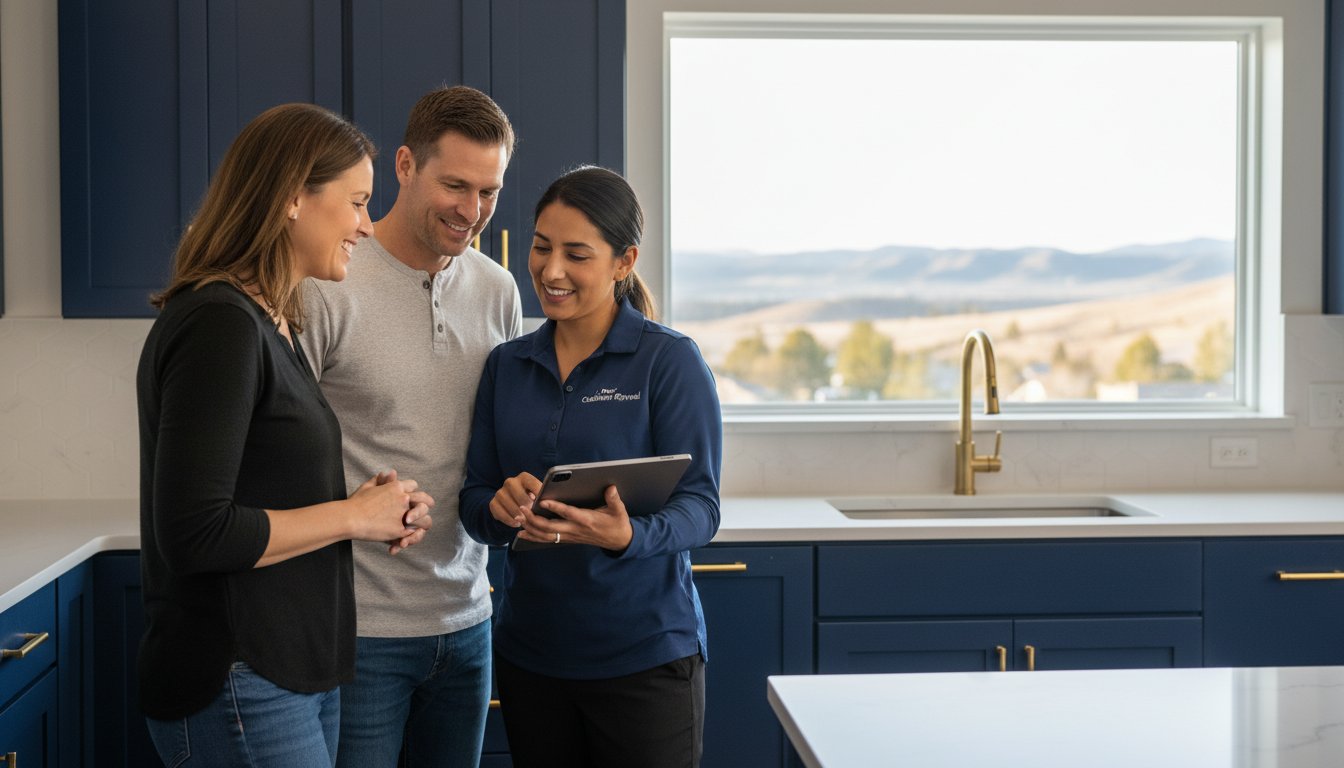
Maintaining air quality is vital. We use plastic sheeting and “ZipWalls” to isolate the kitchen from the rest of the home. This containment prevents dust from traveling into living areas. We use HEPA vacuums during all sanding phases to capture fine particles at the source. This level of control is why professional kitchen cabinet painting outperforms DIY attempts in residential settings. It’s about safety and cleanliness. If you want to avoid the logistical headache of managing a construction zone, you can request a professional assessment of your kitchen’s specific requirements.
Chemical Cleaning vs. Sanding: Removing the Invisible Barriers
Removing invisible barriers like grease and chemical residue is the most critical phase of surface preparation. While many guides suggest a quick wipe with soapy water, having cabinet painting prep work explained by a professional reveals why this is insufficient. We utilize a “Three-Stage” cleaning process. This involves aggressive degreasing, thorough rinsing, and chemical neutralizing. Standard dish soap is engineered to break down food on ceramic, but it often leaves a surfactant film on wood that actually interferes with paint bonding. Professional degreasers like Trisodium Phosphate (TSP) or specialized liquid de-glossers are required to strip away the years of accumulated oils that household cleaners leave behind.
This stage is non-negotiable. If you skip chemical cleaning, you’re essentially painting over a layer of oil. This creates a weak foundation that will eventually delaminate. Even the highest quality water-based alkyd enamels cannot overcome a contaminated substrate. By following a strict procedural cleaning, we ensure the surface is chemically receptive to the primer and topcoat.
The Battle Against Cooking Oils
High-grease zones are usually located directly above the stove and near the dishwasher. In these areas, aerosolized cooking fats settle into the grain of the wood over time. Grease acts as a “release agent,” which is a substance that prevents a coating from sticking to a surface. Professional degreasers break down lipids that household cleaners leave behind. If these lipids aren’t completely neutralized, the paint may remain tacky or slide off the surface entirely. This chemical cleaning ensures the substrate is ready for the mechanical stage of preparation.
The Art of Scuff Sanding
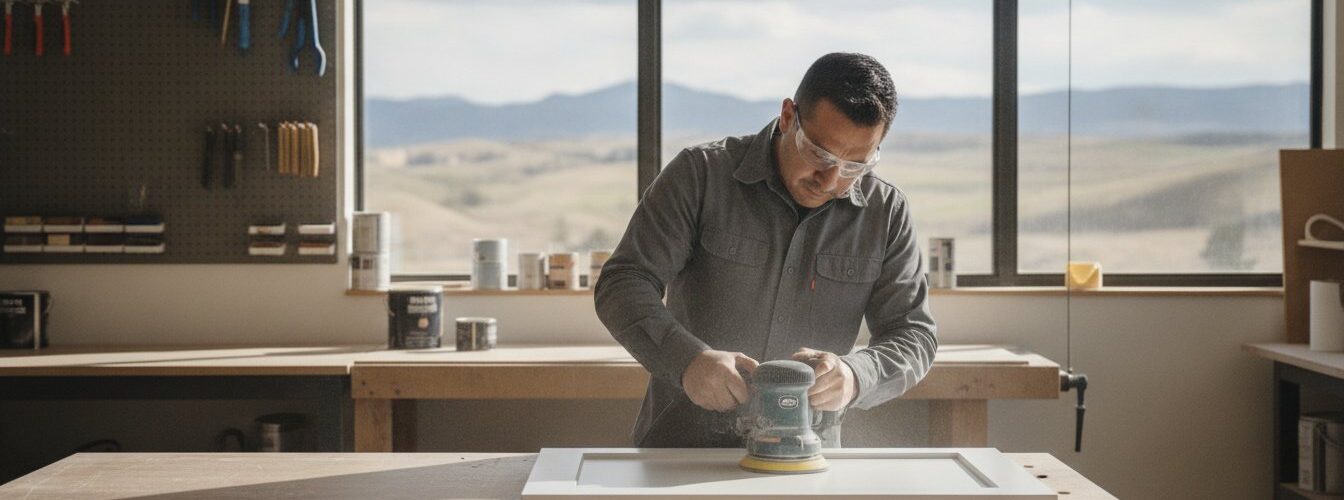
Mechanical sanding is not about stripping the cabinets down to bare wood. Instead, the goal is to create a “profile” for the new coating. We use 180-220 grit sandpaper, which is the industry sweet spot for cabinet preparation. This grit is abrasive enough to dull the existing finish without leaving deep scratches that show through the final coat. We focus heavily on the edges and corners. These are the high-stress areas where paint is most likely to fail first. Sanding for adhesion is a precision task. It provides the physical grip necessary for a factory-grade result. Many “no-sand” products claim to skip this step, but they rarely provide the long-term durability required for high-traffic areas like kitchens or bathrooms. Having cabinet painting prep work explained correctly means acknowledging that physical sanding is the only way to ensure the paint has a mechanical anchor to the wood.
Repairs and Surface Refinement: Grain Filling and Priming
Once the substrate is clean and profiled, the focus shifts to structural refinement. This is where cabinet painting prep work explained moves from cleaning to surface engineering. We fill all redundant hardware holes with high-performance wood filler. This step is essential for homeowners planning to upgrade from dated knobs to modern pulls, as it creates a clean slate for new drilling. We then perform a precision sand across these repairs to ensure every patch is flush and invisible. This stage eliminates the imperfections that would otherwise be magnified by the final coat of paint.
Grain Filling for Oak Cabinets
Oak is a common wood species in many older kitchens, characterized by deep, open pores. These pores often trap shadows, which makes painted cabinets look “dated” even after a fresh application of color. We use a specialized “troweling” technique to force grain filler into these open pores. This process often requires multiple rounds of filling and precision sanding to achieve a “Level 5” finish, which is a perfectly smooth, glass-like surface. If you prefer to maintain the natural wood texture rather than achieving a solid, opaque look, you may want to explore cabinet refinishing as an alternative to painting.
The Critical Role of High-Adhesion Primers
Selecting the correct primer is a technical requirement, not a preference. Standard water-based primers often fail on oily woods like cherry or oak because they cannot block tannins. Tannins are organic compounds that bleed through the finish, causing yellow or brown staining over time. We utilize shellac-based or solvent-based primers to “lock in” these compounds and provide a high-adhesion foundation. This chemical layer acts as the “glue” between the wood substrate and the professional paint for cabinets. Without this bridge, the topcoat will eventually delaminate or discolor.
After the primer cures, we perform a “Fine Finish” sand using high-grit abrasives. This removes any raised grain or minor imperfections introduced during the priming stage. It ensures the final topcoat lays down perfectly flat. If you are ready to transform your kitchen with a durable, factory-grade finish, you can request a professional quote for your project today. This systematic approach to refinement is the only way to guarantee a result that looks and feels like new cabinetry.
The Denver Standard: Why Professional Prep Outperforms DIY
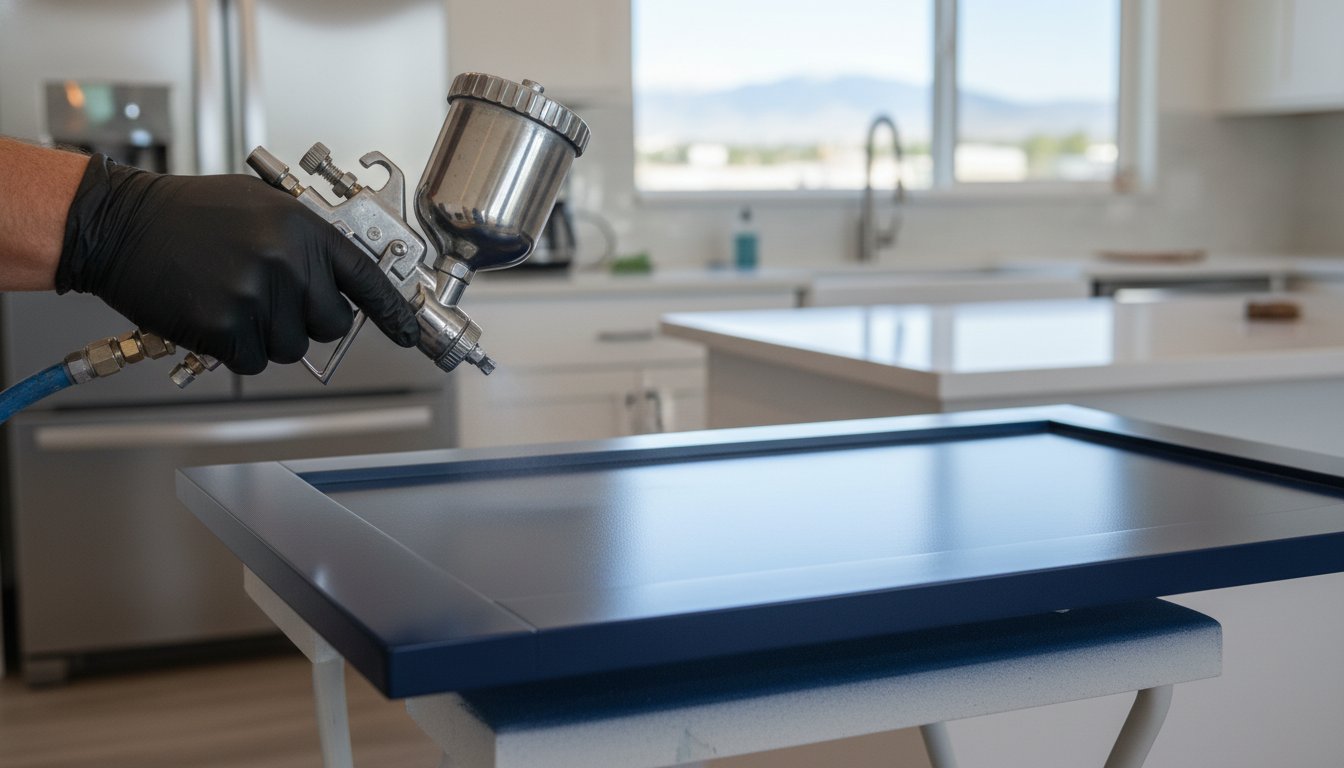
The “Denver Standard” refers to a level of technical precision required to handle Colorado’s unique environmental challenges. When having cabinet painting prep work explained, it’s vital to recognize that 70% of a professional cabinet painting Denver project is completed before a single drop of color is applied. Professional equipment like High Volume Low Pressure (HVLP) sprayers requires a significantly higher level of preparation than traditional brushing. While a brush might hide minor surface imperfections, a high-end sprayer will highlight every grain of dust or uneven patch. This procedural rigor ensures a finish that isn’t just aesthetically pleasing but chemically bonded to withstand the test of time. Skipping these foundation steps results in a finish that looks amateur and fails prematurely.
Local Climate Considerations for Colorado Homeowners
Colorado’s dry air and high altitude create a challenging environment for paint application. In Denver, low humidity causes paint to dry rapidly, which reduces “open time.” This is the critical window where the paint levels itself out to a smooth, factory-like finish. Without professional-grade retarders and precise climate control, DIY finishes often end up with visible brush marks or “dry spray” textures. Local expertise is also vital for understanding the cost to paint kitchen cabinets, as professional labor accounts for the specialized techniques needed to manage Denver’s environment. We prioritize dust management in this dry climate to prevent “nibs” or small particles from settling into the wet finish. Maintaining a controlled workspace is essential for quality.
The Final Inspection Protocol
The final stage of preparation involves a rigorous inspection protocol that separates professional results from DIY attempts. We use high-lumen side-lighting, known as the “Light Test,” to identify microscopic surface imperfections that are invisible under standard kitchen lighting. By casting light across the surface at an angle, we find tiny dips, scratches, or leftover grain patterns. This ensures the substrate is flawless before the final topcoat. Having cabinet painting prep work explained means understanding that even after hours of sanding, a final “Tack Cloth” wipe-down is required to remove the last traces of debris. This level of detail is why professional preparation is an investment in your home’s long-term value and daily durability. If you’re ready for a professional transformation, Get your free Denver cabinet painting quote today!
Achieve a Lasting Kitchen Transformation
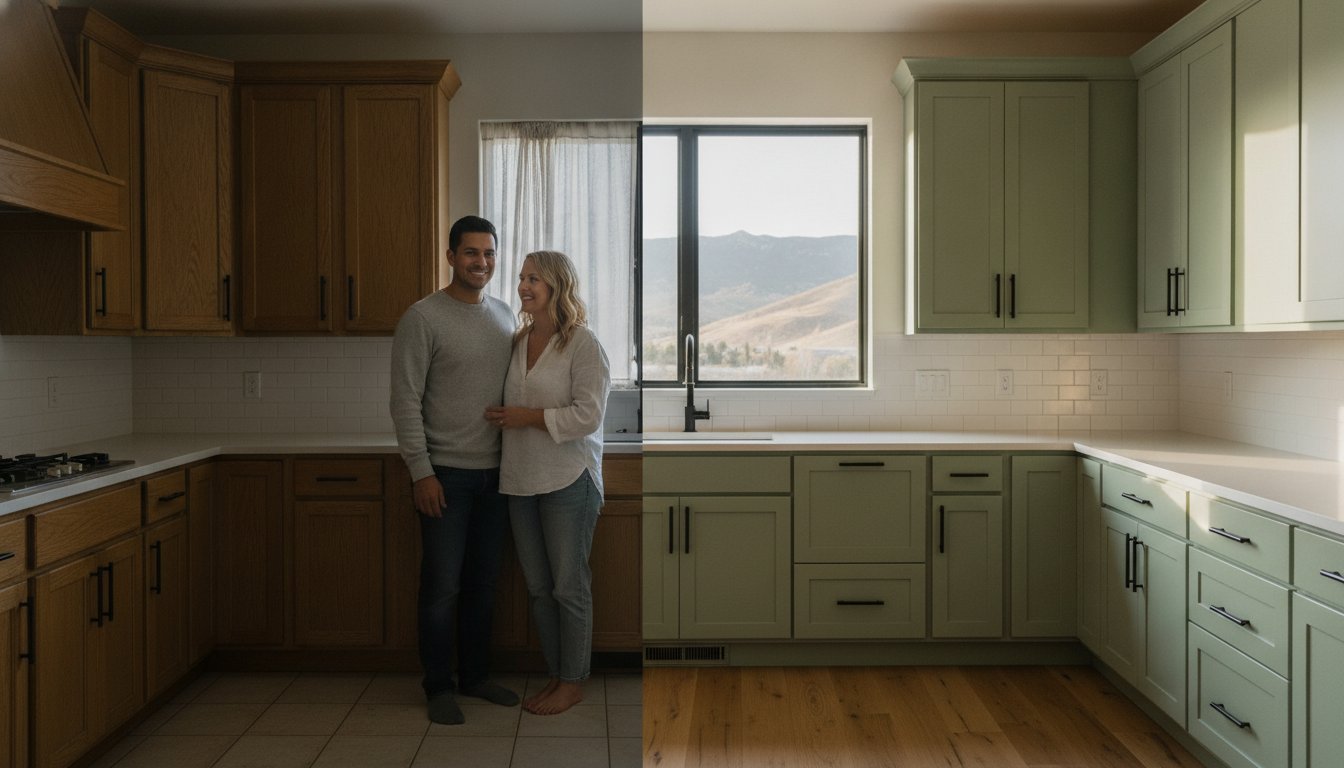
Meticulous preparation is the only path to a factory-grade finish that resists daily wear. Having cabinet painting prep work explained clarifies that shortcuts like “no-sand” methods often lead to failed adhesion and peeling. Project success depends on a rigorous 10-step preparation process that addresses both chemical contaminants and mechanical bonding requirements. This professional foundation allows for the application of a specialized HVLP spray finish that mimics the durability of brand-new cabinetry. It ensures your investment remains vibrant and intact for years.
Our local Denver experts serve the entire Metro area with task-oriented precision. We prioritize procedural clarity and surface refinement in every project to ensure long-term value for your home. You don’t have to navigate the complexities of grain filling or Colorado’s unique climate-specific drying times alone. Get Your Free Professional Cabinet Painting Quote in Denver to ensure your kitchen receives the professional care it requires. You can enjoy a beautiful, durable kitchen that looks and feels brand new.
Frequently Asked Questions
Can I skip sanding if I use ‘Cabinet Paint’ or ‘Milk Paint’?
No, sanding is a technical requirement for mechanical bonding regardless of the paint type. Even specialized cabinet paints cannot properly adhere to a slick, factory-finished surface without a profiled substrate. Skipping this step often results in the coating peeling off in large sheets within the first year of use.
How long does the prep work usually take for an average kitchen?
Preparation typically requires two to three full days of labor for a medium-sized kitchen. This timeline accounts for the deconstruction of hardware, a three-stage chemical cleaning, and precision sanding of all boxes and doors. Rushing this foundation phase is the primary cause of project failure in residential settings.
Is TSP really necessary, or can I use vinegar and water?
Trisodium Phosphate (TSP) or a professional-grade degreaser is required to break down aerosolized cooking oils. Vinegar and water are too weak to neutralize the lipids that accumulate on kitchen surfaces over time. Having cabinet painting prep work explained correctly means acknowledging that only heavy-duty cleaners ensure the chemical neutrality needed for paint to bond.
Will the prep work create a lot of dust in my house?
Professional preparation utilizes containment systems to keep your home clean. We use plastic sheeting to isolate the kitchen and HEPA-filtered vacuums during the sanding phase to capture fine particles at the source. These procedural steps prevent dust from migrating into your living areas or settling into your HVAC system.
What happens if you paint over cabinets that weren’t cleaned properly?
Painting over contaminated surfaces leads to immediate adhesion failure. The oils trapped under the paint act as a release agent, causing the finish to bubble, crack, or peel. This failure is most common around high-touch areas like handles and drawer fronts where skin oils are most concentrated.
Do I need to prime my cabinets if they are already painted?
Yes, a dedicated bonding primer is necessary to bridge the gap between the old finish and the new coating. Even if the existing paint is in good condition, the primer provides a uniform surface for the topcoat to grip. This step also prevents previous colors or wood tannins from bleeding through and staining your new finish.
Can you fill the grain on oak cabinets so they look smooth?
Grain filling is a standard part of professional cabinet painting prep work explained for open-pore woods. We trowel specialized fillers into the grain and sand them flush to create a “Level 5” smooth surface. This process removes the deep pits characteristic of oak, resulting in a modern, factory-grade appearance.
How do I know if my painter is doing enough prep work?
Verify that your painter is following a multi-stage process that includes degreasing, mechanical sanding, and the use of dedicated primers. Professional painters don’t use “paint and primer in one” products for cabinetry. They should be able to clearly identify the specific bonding and stain-blocking primers they intend to use for your wood species.
