
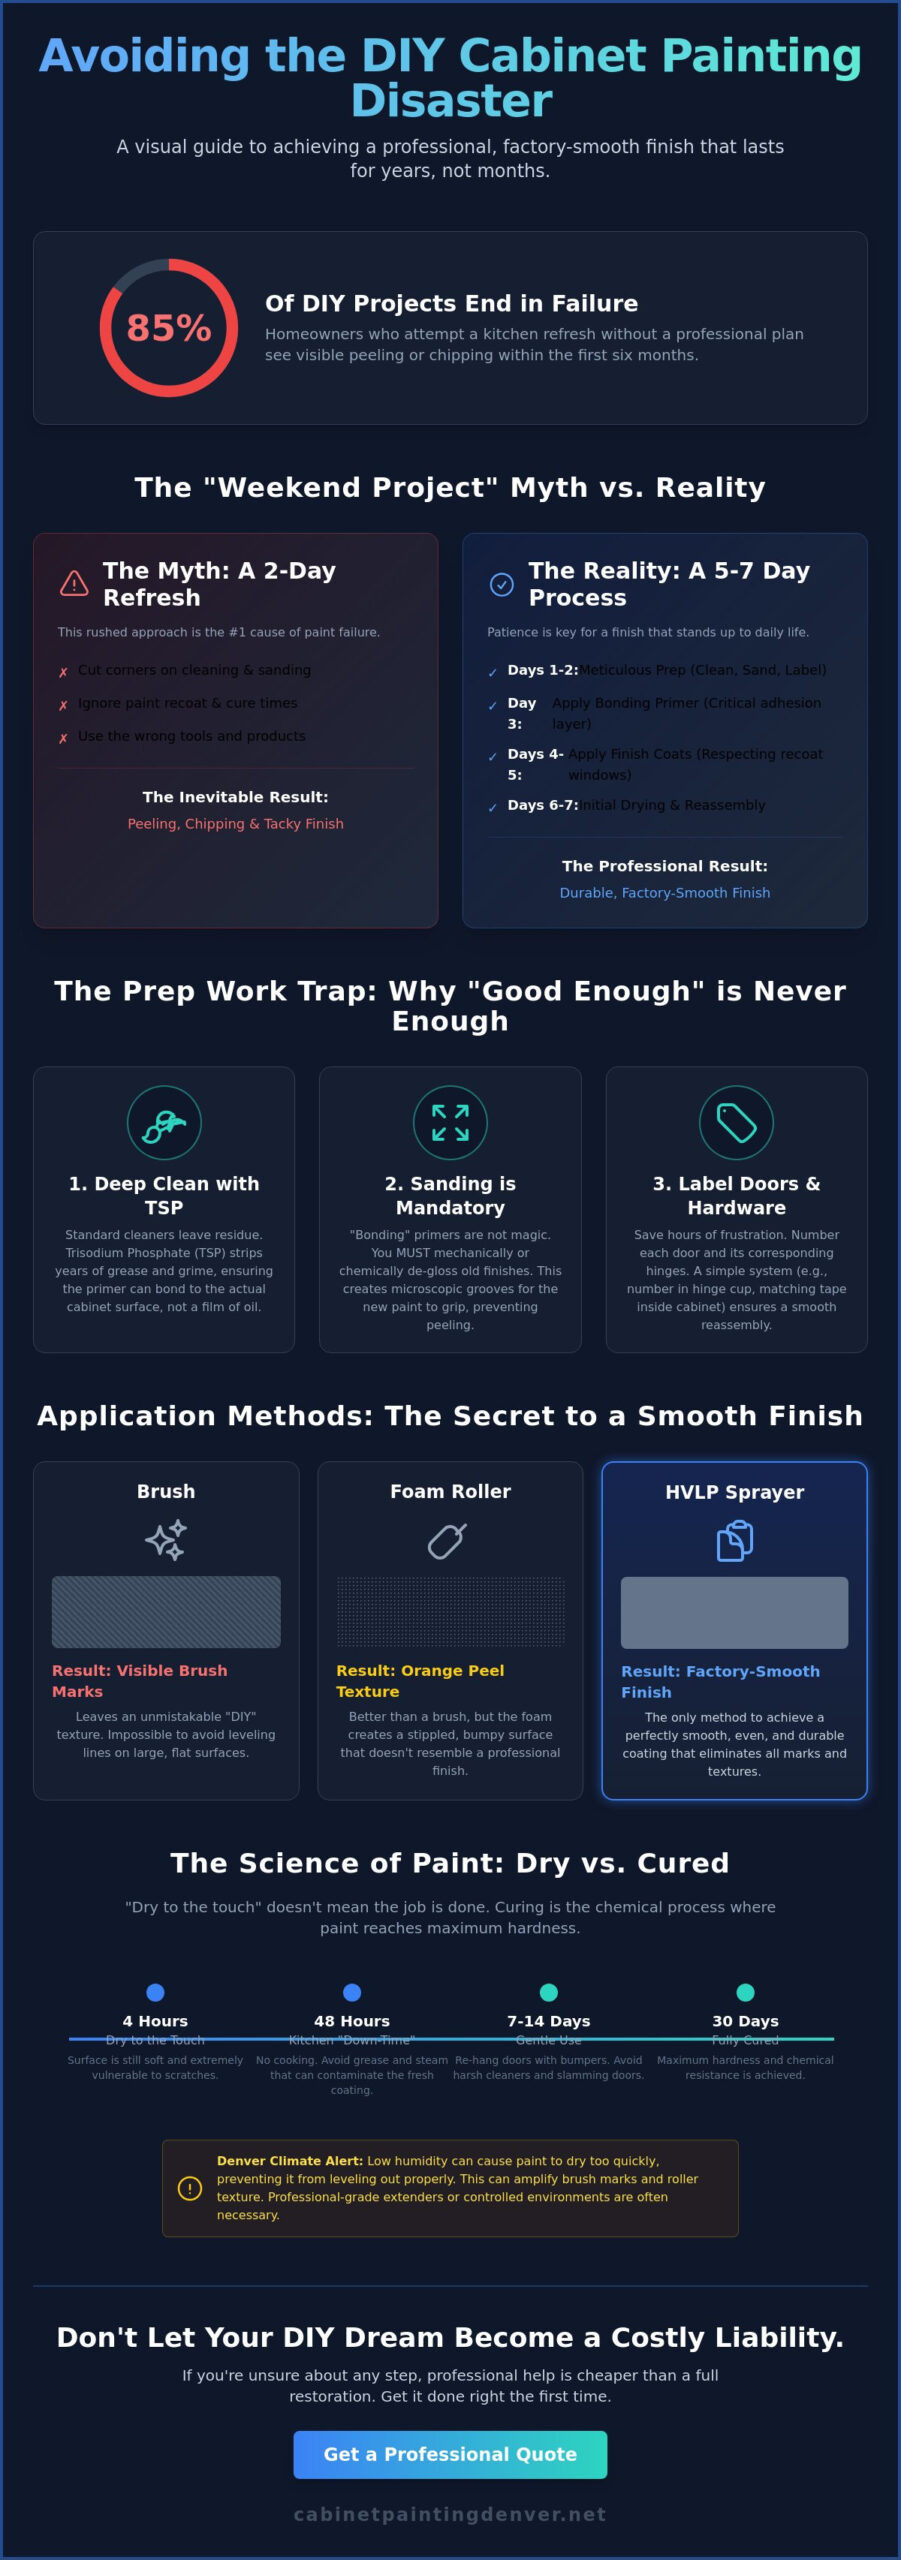
According to 2024 industry survey data, 85% of homeowners who attempt a kitchen refresh without a professional plan end up with visible peeling or chipping within the first six months. It’s a heartbreaking statistic, especially when you’ve spent your hard earned weekends scrubbing and sanding. You likely want that Pinterest perfect kitchen, but you’re probably worried about the common DIY cabinet painting mistakes to avoid that turn a three-day project into a three-week disaster. It’s completely normal to feel anxious about ruining the most expensive room in your home.
This guide will show you how to bypass the high stakes errors that ruin DIY kitchen transformations so you can achieve a factory smooth finish that lasts for years. We’ll cover the exact materials you need to buy and the 10 critical steps that will make your kitchen look professionally remodeled instead of just “DIYed.” By the time you finish reading, you’ll have the confidence to pick up a brush and create a durable, beautiful space that stands up to daily life in 2026.
Key Takeaways
- Understand why a “weekend refresh” is a myth and how to plan a realistic 5-7 day timeline for a durable, professional-quality finish.
- Identify the most common DIY cabinet painting mistakes to avoid during the prep stage, including the science of grease removal and why sanding is never optional.
- Compare the results of brushes, foam rollers, and HVLP sprayers to determine which tools are necessary to eliminate brush marks and achieve a factory-smooth look.
- Learn how Denver’s low humidity impacts paint leveling and why using standard wall paint on cabinets is a recipe for premature wear and tear.
- Calculate the true cost of your time and materials to recognize when a DIY project risks becoming a costly liability that requires professional restoration.
The “Quick Weekend Project” Myth: Why Time Management is Your First Hurdle
Most homeowners start their renovation on a Friday night, expecting a reveal by Sunday brunch. This mindset is one of the most common DIY cabinet painting mistakes to avoid. A standard 20-cabinet kitchen requires a minimum of 5 to 7 days for a professional-grade finish. Rushing through the cleaning, sanding, and priming phases causes 85% of early finish failures, such as peeling or chipping within the first six months of use.
Success starts with understanding paint composition and how modern resins interact with wood surfaces. Since 2024, high-end waterborne alkyds have become the DIY standard, but they require strict adherence to recoat windows to prevent solvent entrapment. Cutting corners on these wait times ensures a finish that stays tacky for weeks.
To better understand this concept, watch this helpful video:
Drying time refers to when the surface feels non-tacky to the touch, while curing time is the duration required for the coating to reach its maximum hardness and chemical resistance.
The Logistics of Hardware and Door Management
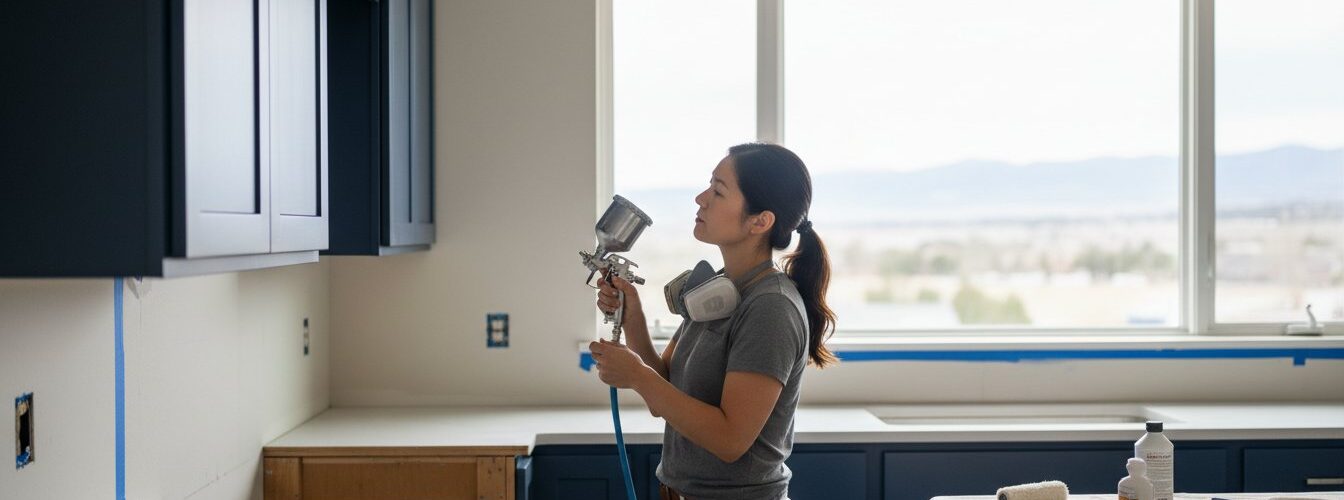
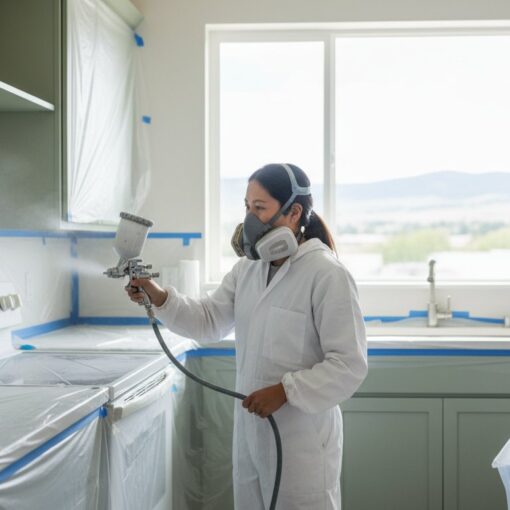
You’ll lose 4 hours of your life trying to realign hinges if you don’t label them properly from the start. Professionals use a numbering system: write a number in the hinge cup of the door and place a matching number on a piece of painter’s tape inside the corresponding cabinet frame. Removing doors is mandatory for a quality result. You can’t reach the edges or prevent vertical drips while doors hang on the frames. Set up a dedicated drying station in a low-traffic area like a garage or basement. This keeps the kitchen functional for basic needs while preventing dust from settling on the wet paint.
Planning for the Curing Phase
Don’t let the “dry to the touch” feel fool you into thinking the job is done. While 2026 paint formulas might dry within 4 hours, they often remain “soft” for up to 30 days. This is the critical window where you must avoid using harsh chemical cleaners or slamming doors. If you rehang doors too early without using silicone bumpers, the paint will bond the door to the frame, causing the finish to rip off the next time you open the cabinet. Plan for at least 48 hours of total kitchen “down-time” where no cooking occurs to prevent grease and steam from contaminating the fresh coating during its most vulnerable state.
The Prep Work Trap: Why “Good Enough” Leads to Peeling Paint
Kitchen cabinets endure more stress than almost any other surface in your home. They face 365 days of heat, steam, and microscopic grease particles. One of the most common DIY cabinet painting mistakes to avoid is assuming that a high-quality primer can overcome a dirty surface. Paint requires a clean, porous substrate to form a mechanical bond. If grease or cooking oils remain, the paint sits on top of the film rather than sticking to the wood. This lack of adhesion leads to “alligatoring” or peeling within the first 12 months of use.
Many homeowners fall for the myth that sanding is optional if they use a “bonding” primer. While modern primers are impressive, they aren’t magic. You must break the surface tension of old factory finishes. These finishes are designed to repel liquids, which is exactly what wet paint is. De-glossing chemically or mechanically ensures your new coating doesn’t slide off. For a deeper look at the professional standards required for a lasting finish, check out this guide on kitchen cabinet painting.
Cleaning Beyond the Surface
Standard household cleaners often contain silicones or waxes that actually prevent paint adhesion. Professionals use Trisodium Phosphate (TSP) to strip away the years of accumulated grime found in most kitchens. Focus heavily on the “hidden grease” zones. These are the areas behind handles and the undersides of upper cabinets where steam collects. Proper ventilation is vital during this stage to mitigate the health risks of paint fumes and chemical vapors that arise from heavy cleaners and solvents.
The Sanding and Grain Filling Reality
You don’t need to strip the wood to the bare grain, but scuff sanding with 120-grit to 220-grit sandpaper is mandatory. This process creates “teeth” for the primer to grab onto. If you have oak cabinets, skipping grain filler is another one of the DIY cabinet painting mistakes to avoid. Oak has deep, porous pits that paint won’t bridge. Without a dedicated filler, your finished cabinets will look like painted wood rather than the smooth, factory-grade finish most people desire. Dust management is equally critical during this phase. Using a HEPA-filtered vacuum attachment can reduce airborne particles by 95 percent in a residential kitchen. If the prep work feels overwhelming, you can always consult with a professional team to ensure the foundation is handled correctly.
Application Errors: The Truth About Brushes vs. Professional Spraying
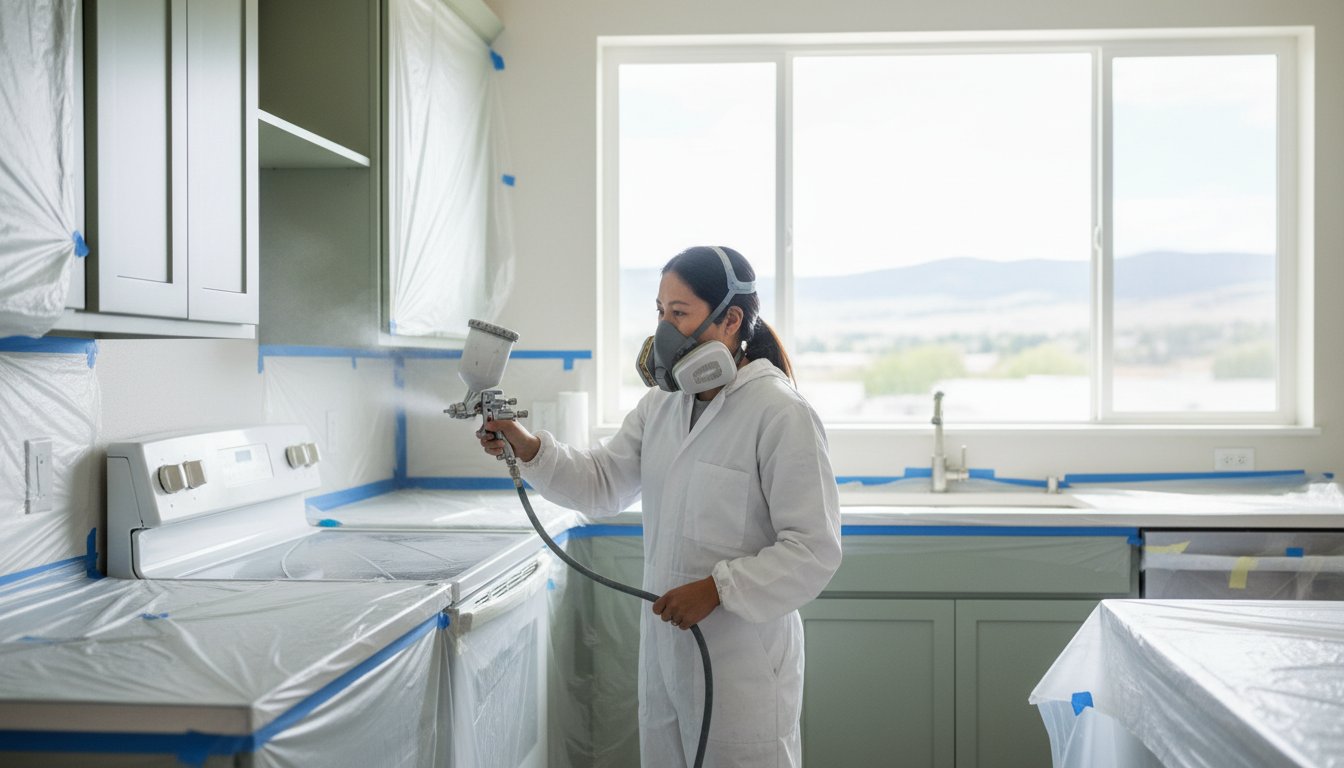
Achieving a factory finish is the ultimate goal, but brush marks are the reality for most home projects. One of the most common DIY cabinet painting mistakes to avoid is the belief that a high-quality brush can replicate the results of a professional sprayer. Brushes, even expensive ones with synthetic filaments, leave micro-tracks in the paint film. Foam rollers often fare slightly better but frequently leave a “stippled” or orange-peel texture that looks amateur under kitchen lighting. If you want a mirror-smooth surface, an HVLP (High Volume Low Pressure) sprayer is the only tool that atomizes paint into fine enough droplets to create a seamless finish.
Patience is often the first casualty of a weekend project. Many DIYers apply thick coats to “get it done faster,” but this leads to disastrous results. Thick paint doesn’t cure properly from the inside out, leaving the surface prone to peeling and denting for months. Professional cabinet painting Denver services bypass these issues by using off-site spray booths. These controlled environments eliminate dust, hair, and debris that inevitably land on wet cabinets in a home kitchen. Following a comprehensive cabinet painting guide helps you understand that multiple thin layers will always outperform one heavy layer.
The Physics of Paint Leveling
Paint reacts to its environment the moment it hits the wood. Gravity is your enemy on vertical cabinet doors, causing “sags” or “curtains” if the product is applied too heavily. Temperature also plays a massive role. Ideally, you should paint in a space between 65 and 75 degrees Fahrenheit. If it’s too hot, the paint dries before it can level out. This makes it nearly impossible to maintain a “wet edge,” which is the technique of overlapping new paint onto wet paint to prevent visible seams.
Why Primer is Your Most Important Layer
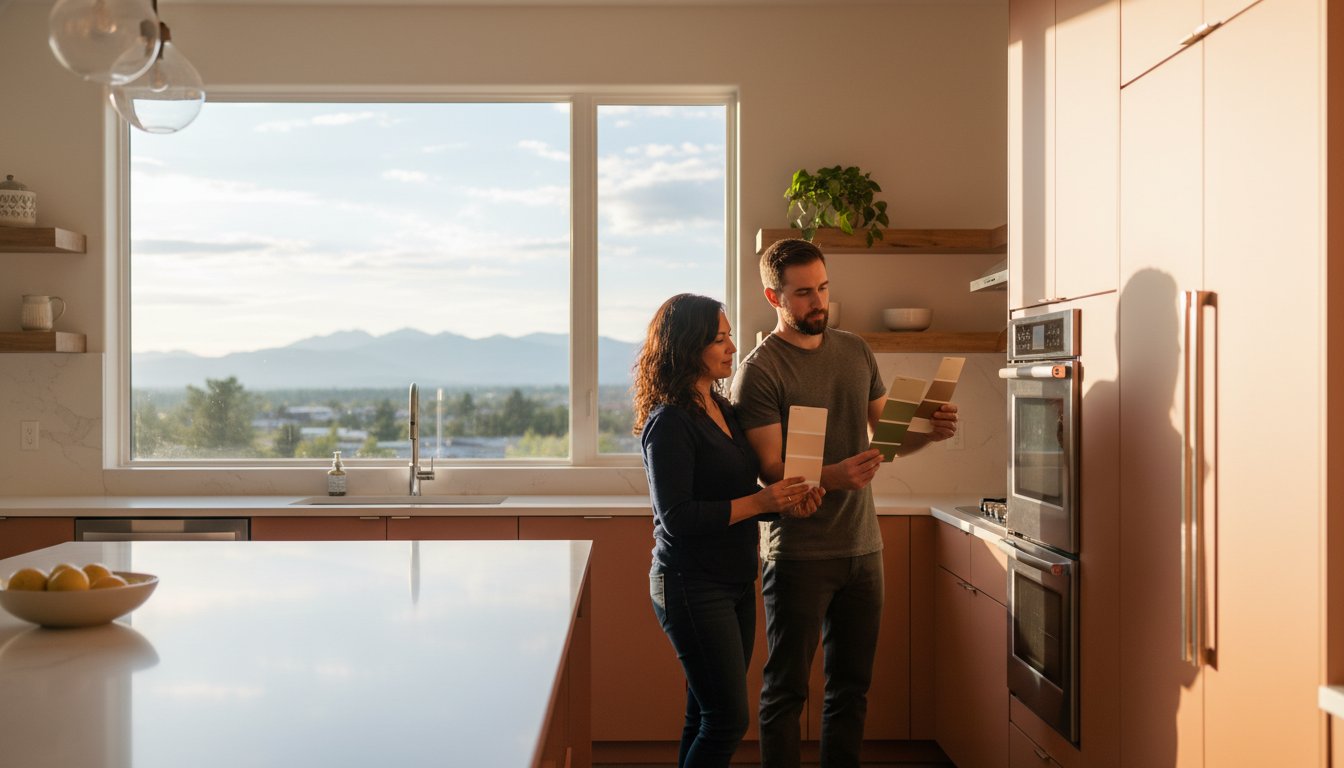
Don’t fall for the marketing myth of “Paint + Primer” in a single can. Cabinets are high-touch surfaces that require a dedicated bonding bridge. Without a proper primer, you’ll likely face tannin bleed, where the natural oils in woods like oak or cherry seep through, turning your crisp white cabinets a muddy yellow. In 2026, while water-borne alkyd primers have improved significantly, shellac-based primers remain the gold standard for blocking stains and ensuring the topcoat sticks for the long haul. Using the wrong sealer is a top-tier DIY cabinet painting mistake to avoid if you want your kitchen to last more than a single season.
- Brushes: Best for tight corners but prone to visible strokes.
- HVLP Sprayers: Provides the highest quality “factory” aesthetic.
- Shellac Primer: Essential for blocking wood tannins and kitchen grease.
- Humidity: Keep it under 50% to ensure proper chemical curing.
Product and Climate Blunders: Denver’s Environmental Impact on Your Finish
Denver’s environment is a silent killer for many home improvement projects. One of the most common DIY cabinet painting mistakes to avoid is ignoring the 15% average humidity levels often found along the Front Range. In such an arid climate, paint doesn’t just dry; it “flashes.” This means the surface cures before the liquid has a chance to level out. The result is a permanent “orange peel” texture or visible brush strokes that make your expensive cabinets look like a rushed weekend project.
Using standard latex wall paint is another critical error. While wall paint is designed to be flexible, cabinets require a hard, furniture-grade coating. Standard latex remains soft, leading to “blocking” where the doors stick to the frames and eventually peel. In 2026, professional results require specialized coatings. You can find detailed breakdowns of these products in our guide on the best paint for cabinets, which focuses on urethane-modified alkyds that provide the necessary durability.
Chemical compatibility is the final hurdle in this category. Many older Denver homes have cabinets finished with oil-based stains or paints. If you apply a modern water-based paint directly over these without a high-quality bonding primer, the new layer won’t adhere. It might look fine for a week, but the finish will eventually bubble or scrape off with the light touch of a fingernail.
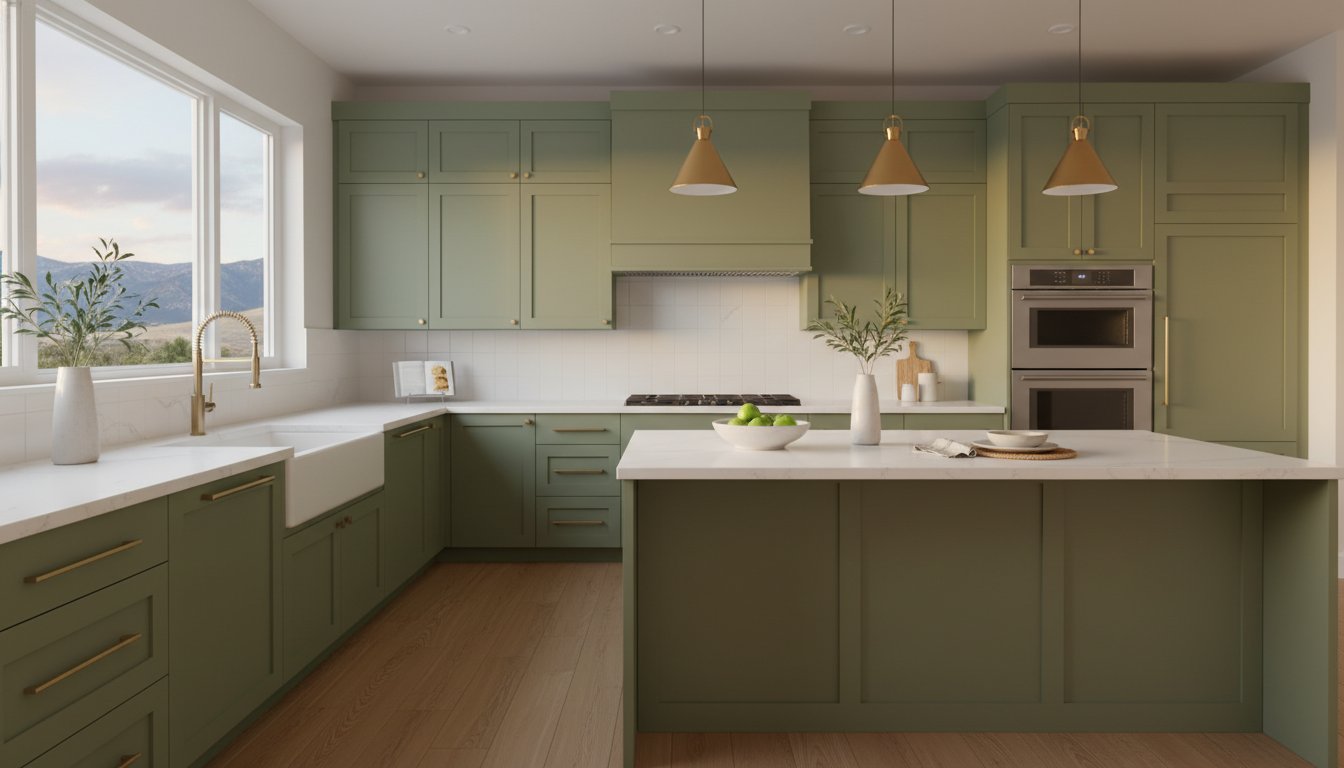
Choosing the Right Sheen for Durability
Sheen isn’t just about style; it’s about physics. Flat finishes are porous and trap grease, making them impossible to clean in a kitchen. Satin is the “sweet spot” for most homeowners because it hides 40% more micro-imperfections than glossier options while remaining scrubbable. High-gloss finishes increase the project’s difficulty by roughly 80% because they highlight every speck of dust and every slight tremor in your hand. Stick to satin or semi-gloss urethanes to achieve a factory-like hardness that resists scratches.
Managing the Denver Dryness
At an altitude of 5,280 feet, thinner air and low moisture accelerate chemical outgassing. This can cause pinholes in the finish if the top layer traps gases escaping from the layers beneath. To prevent this, use a paint extender to increase “open time” by 10 to 15 minutes, allowing the paint to flow together smoothly. Don’t assume that a nice day outside is a nice day for painting. If your HVAC system is running to combat the dry Colorado air, it can create a localized micro-climate in your kitchen that’s far too arid for proper paint curing.
If you want to ensure your kitchen survives the Colorado climate without the stress of DIY errors, contact our team of Denver cabinet experts for a professional finish that lasts.
Recognizing the Limit: When DIY Becomes a Costly Liability
Calculating the true cost of a kitchen transformation involves more than just a receipt from the paint store. A standard project often requires 40 to 60 hours of focused labor. This timeline excludes the hours spent clearing out cabinets, cleaning surfaces, and managing the inevitable mess. When you factor in the expense of high-quality sandpaper, tack cloths, premium primers, and specialized trim paint, the perceived savings often evaporate. Perhaps the most expensive of all DIY cabinet painting mistakes to avoid is the “Fix-It” Tax. If the DIY finish fails, professionals must perform a full chemical strip or heavy mechanical sanding to remove the mess. This extra labor can make a professional intervention significantly more expensive than if they had handled the project from the start.
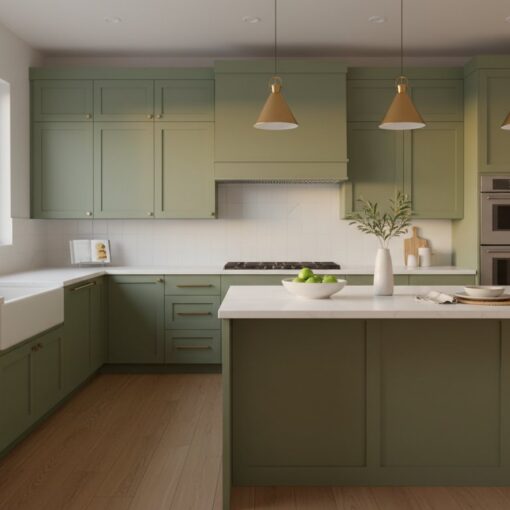
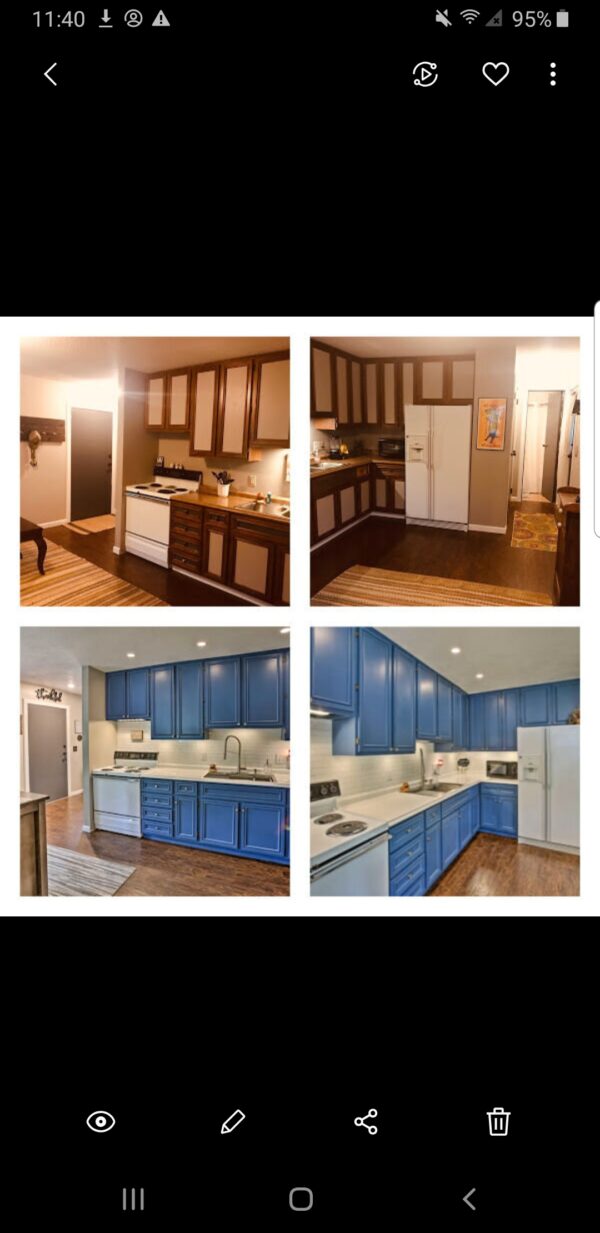
In the 2026 Denver housing market, buyers have high expectations for kitchen aesthetics. A DIY job with visible brush strokes or drips can stall a sale or lead to lower offers. If you want to keep the warmth of your existing cabinetry without the hassle of solid paint, consider the benefits of cabinet refinishing instead. This process highlights the natural grain while providing a fresh, updated look that maintains home value.
The Professional Advantage
Contractors bring industrial-grade coatings to the table that outperform anything found at a local hardware store. These finishes are designed to withstand the heat and humidity of a busy kitchen for a decade or more. Professionals also work in controlled, dust-free environments using specialized spray equipment. This setup eliminates the risk of airborne particles ruining your wet paint. Beyond the equipment, you’re investing in a warranty and the expert re-installation of doors and hardware; this ensures everything hangs straight and closes tightly.
Final Checklist: Are You Ready to DIY?
Review this 5-point honesty check before you commit to the project. It’s the best way to prevent common DIY cabinet painting mistakes to avoid before they cost you money:
- Can I realistically dedicate 40+ hours of labor over the next 10 days?
- Do I have a dedicated, dust-free space to lay out 20 to 40 cabinet doors?
- Am I comfortable with my kitchen being a construction zone for over a week?
- Do I have the physical stamina for hours of repetitive sanding and cleaning?
- Is my goal a “temporary fix” or a “forever finish” for my home?
If these questions give you pause, call for a professional quote to compare your options. Choosing quality over short-term savings ensures your kitchen remains the heart of your home rather than a source of frustration.
Secure a Flawless Finish for Your Denver Kitchen
Navigating the complex world of DIY cabinet painting mistakes to avoid requires more than just a brush and a spare Saturday. Industry data from the Paint Quality Institute shows that 70% of coating failures stem directly from improper surface preparation. In Denver’s unique climate, where the 33% average humidity causes paint to dry significantly faster than in coastal regions, avoiding visible brush strokes becomes nearly impossible for most homeowners. You don’t have to settle for a finish that peels or looks amateur after just 12 months.
Choosing a professional path ensures your cabinets withstand the test of time. Our locally owned Denver experts utilize a professional HVLP spray finish to create a factory-smooth surface that brushes simply can’t replicate. We provide industrial-grade durability that’s designed to handle daily wear and tear for years. Stop worrying about the technical hurdles and let us handle the heavy lifting. Get a Free Professional Cabinet Painting Quote in Denver to see the difference quality makes. Your dream kitchen is closer than you think.
Frequently Asked Questions
Why is my DIY cabinet paint peeling after only a few months?
Peeling usually happens because of poor surface preparation or lingering grease. About 85% of adhesion failures involve cooking oils or wax left on the wood grain. If you skip the degreasing step, your paint sits on top of the grime instead of bonding to the substrate. You’ll likely see chips within 90 days of completion. Using the wrong primer accounts for another 10% of these common failures.
Do I really need to sand my cabinets before painting in 2026?
Yes, you must scuff-sand your cabinets with 220-grit sandpaper to create a mechanical bond. Even with modern “no-sand” primers, 90% of professional contractors still perform a light sand to ensure longevity. Sanding removes the top layer of old factory finish, which is often too slick for new paint to grab. This 15-minute task per door prevents 70% of future peeling issues on high-touch areas like drawer pulls.
What is the best way to clean cabinets before painting to ensure the paint sticks?
Use a heavy-duty degreaser like TSP to remove every trace of kitchen grease. This step eliminates the most common DIY cabinet painting mistakes to avoid such as bubbling or fish-eyeing. Mix 0.5 cups of TSP with 2 gallons of warm water. Scrub every inch of the surface with a non-scratch pad. Rinse with clean water twice to ensure no chemical residue remains. This ensures your primer bonds 100% to the wood.
Can I paint my cabinets without removing the doors and drawers?
You can paint them while hanging, but you face a 40% higher risk of drips and visible runs. Gravity causes wet paint to sag around hinges and corners when surfaces aren’t laying flat. Removing 100% of the hardware and doors allows you to reach the frame edges properly. It also prevents paint from gumming up your hinges. Taking the doors down adds 2 hours to your project but doubles the quality of the finish.
How long should I wait between coats of paint on my kitchen cabinets?
You should wait at least 4 to 6 hours between coats in a room that’s 70 degrees Fahrenheit. If your humidity level is above 50%, extend that wait time to 8 hours. Rushing this process leads to “solvent trap,” which causes the finish to remain soft for weeks. Proper drying ensures the paint reaches its 5H pencil hardness rating. Most DIY cabinet painting mistakes to avoid involve impatience during the drying phase.
What happens if I use regular wall paint on my kitchen cabinets?
Wall paint will remain tacky and likely peel within 12 months of application. It lacks the chemical hardeners found in dedicated cabinet enamels or urethanes. Wall paint isn’t designed to withstand the 3,000 touches a typical cabinet door receives every year. You’ll notice “blocking,” where the door sticks to the frame every time you close it. Within 6 months, the finish will likely show permanent finger marks and stains.
Is it cheaper to paint cabinets myself or hire a professional in Denver?
DIY painting saves on labor, but you’ll spend roughly 50 to 60 hours on a standard 20-piece kitchen. Professionals in the Denver metro area use industrial sprayers that provide a finish 3 times smoother than a brush. You also avoid spending 15% of your total budget on tools like sanders and high-end brushes. While you save money upfront, 25% of DIYers eventually hire a pro to fix mistakes. It’s a balance between your cash and your free time.
Why do my white cabinets look yellow after I painted them?
Yellowing is usually caused by tannin bleed from the wood or using an oil-based topcoat. 100% acrylic or waterborne alkyd paints won’t yellow over time. If you didn’t use a shellac-based primer, wood tannins can seep through 3 layers of paint within weeks. This is especially common in oak or maple cabinets. Switching to a high-quality stain-blocking primer prevents 99% of this discoloration from occurring.
