
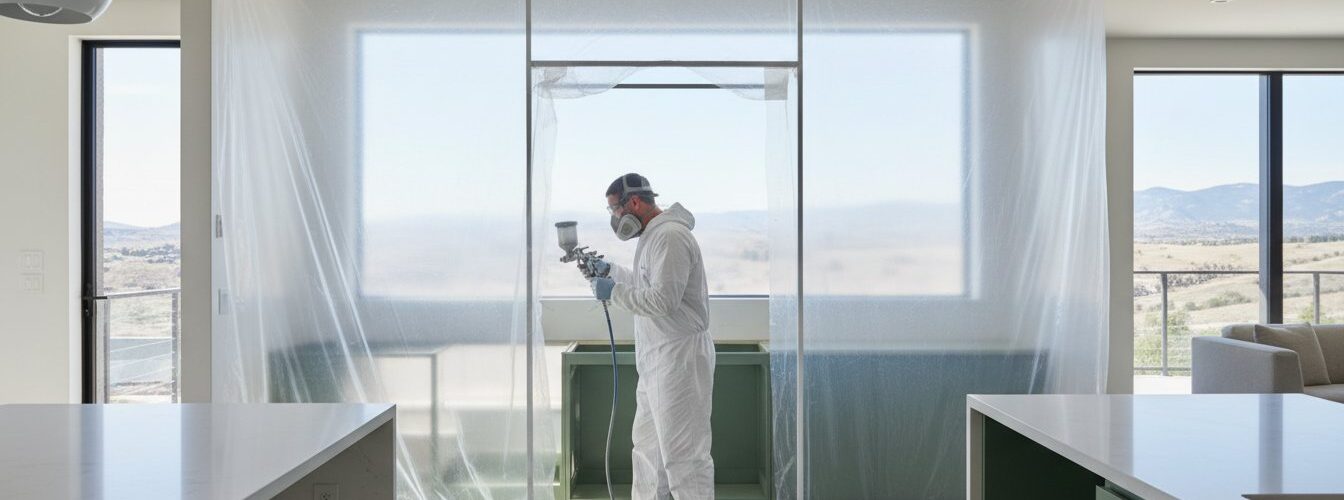
A professional cabinet transformation is not a simple cosmetic upgrade; it is a high-precision manufacturing project executed within your residential environment. Success depends on rigorous cabinet painting project management to maintain technical standards and safety protocols. You likely worry that your kitchen will remain a construction zone for weeks or that fine dust will settle into every corner of your home. These concerns are valid, especially with the 2026 EPA lead dust standards requiring stricter containment for homes built before 1978.
You deserve a process that prioritizes procedural clarity and a predictable timeline. This guide helps you master the logistics and technical oversight required for a flawless, stress-free cabinet transformation. We provide a structured framework you can plan around. This includes clear criteria for evaluating professional quality and specific steps to ensure minimal disruption to your daily household functions.
Key Takeaways
- Identify project boundaries by defining specific requirements for box painting, door processing, and hardware upgrades.
- Establish a predictable timeline through professional cabinet painting project management that balances on-site preparation with off-site shop work.
- Implement high-level site protection using 6-mil plastic containment and heavy-duty floor shielding to maintain a clean residential environment.
- Evaluate technical quality based on industrial standards, such as the three-coat minimum and HVLP spray application for a factory finish.
- Protect your investment by following strict post-project protocols during the 30-day hard cure period to ensure finish durability.
Defining the Scope: The Foundation of Cabinet Painting Project Management
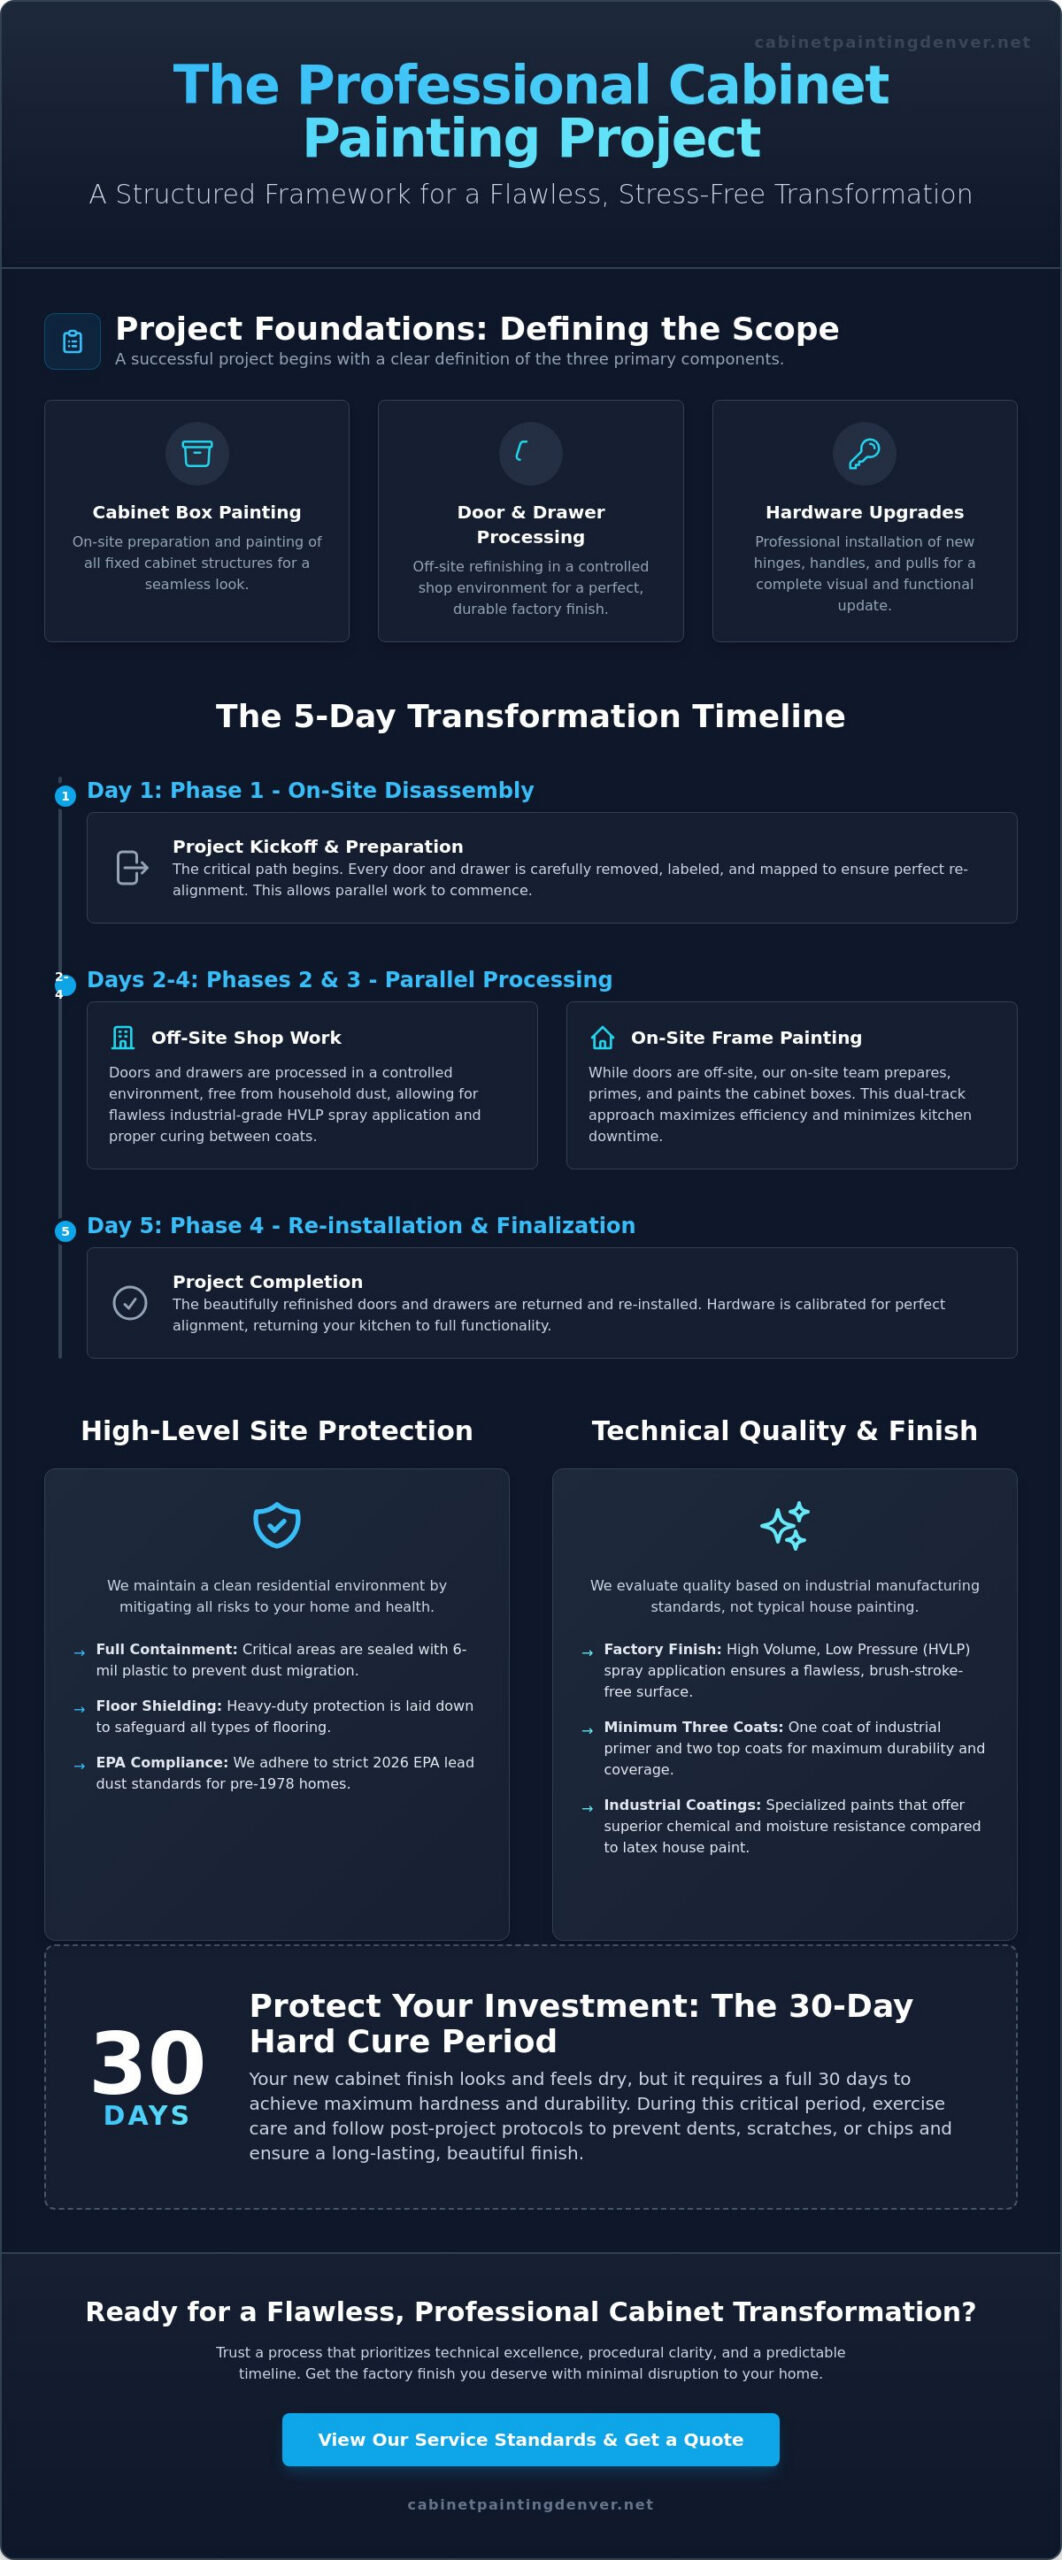
Effective cabinet painting project management is more than a simple color change. It is the systematic coordination of resources, timelines, and technical standards to ensure a factory-grade result. By applying established project management principles, homeowners can transition from a vague renovation idea to a structured execution plan. A successful project begins with a clear definition of the scope, which typically includes three primary components: box painting, door refinishing, and hardware upgrades. Without these boundaries, the project risks shifting timelines and unexpected logistical hurdles.
The “Critical Path” of any cabinet project begins with door removal. This is the first non-negotiable step because it dictates the flow of both on-site and off-site labor. When doors are removed and labeled immediately, it allows the on-site team to begin box preparation while the doors move to a controlled shop environment. Budgeting for these projects should rely on a physical door and drawer count rather than square footage. This method provides a transparent and accurate assessment of the labor and materials required for your specific Kitchen Cabinet Painting project.
To better understand the technical requirements of preparing your home for this process, watch this helpful video:
Assessing Substrate Integrity
Before the first drop of primer is applied, a thorough audit of the existing materials is necessary. Different wood species like Oak, Maple, and MDF react differently to paint. For example, Oak requires specific grain-filling techniques to ensure a smooth finish, while Maple provides a naturally tight grain that accepts industrial coatings more readily. We also perform a structural audit to identify failing hinges or drawer slides that need replacement. It’s essential to distinguish between a standard repaint and a full cabinet refinishing project, as the latter involves more intensive restoration of the wood surface. Understanding the integrity of your substrate ensures the final finish remains durable for years.
Material and Finish Selection
Selecting the right sheen is a functional decision based on light reflection and durability. Satin finishes offer a modern, sophisticated look with lower reflection, while semi-gloss provides higher moisture resistance for high-traffic areas. Our cabinet painting project management framework prioritizes industrial-grade coatings over standard latex house paint. These specialized coatings provide the chemical resistance needed to withstand kitchen oils and cleaners. Finally, a color consultation ensures the selected palette complements the specific lighting and architecture found in Denver homes, resulting in a cohesive aesthetic that increases property value.
Scheduling and Logistics: Managing the Project Timeline
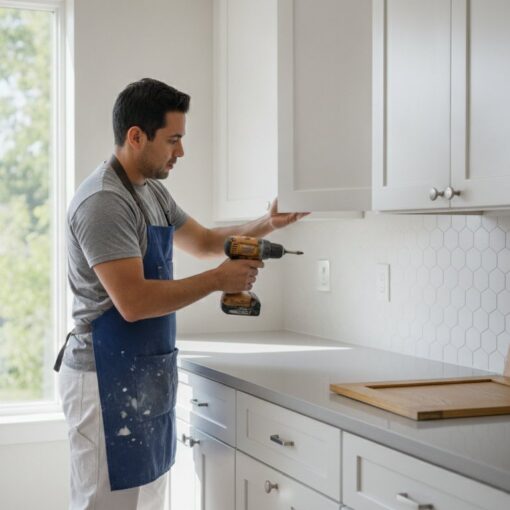
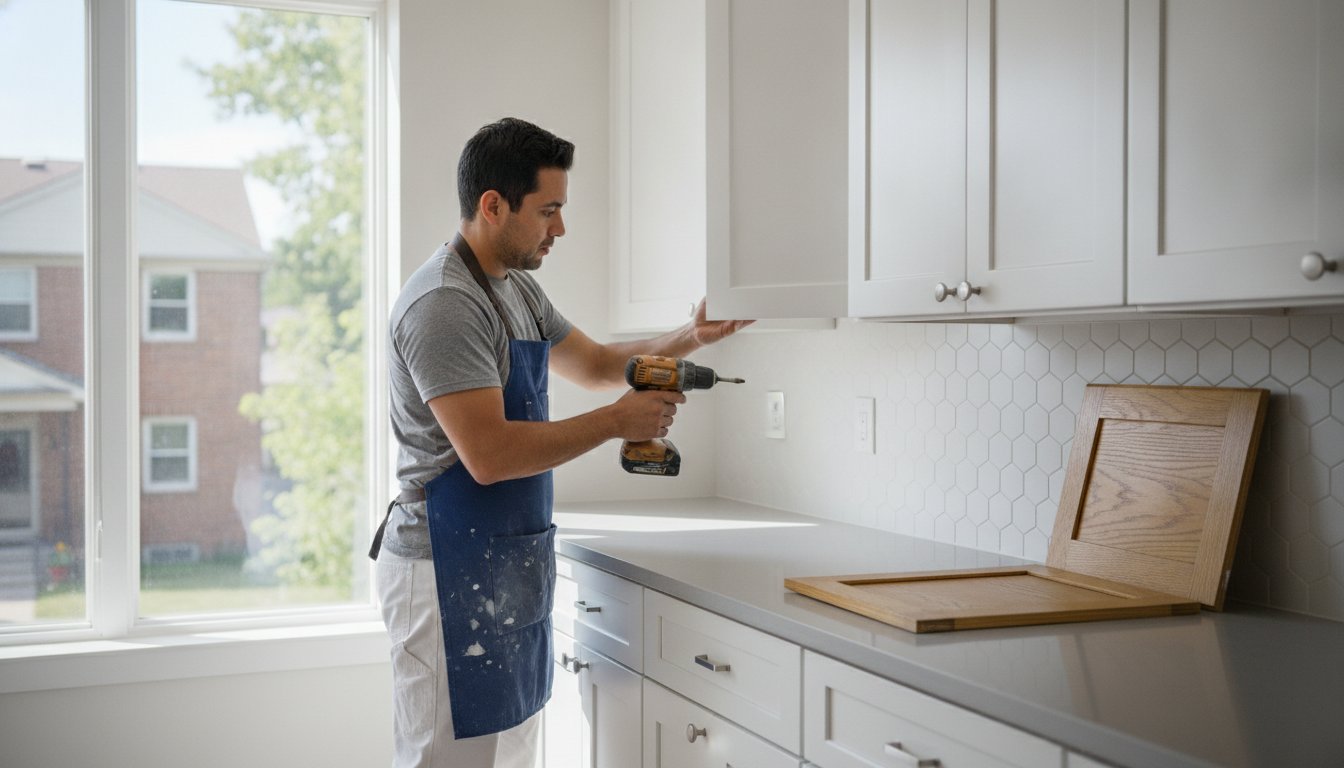
A predictable timeline is the hallmark of professional cabinet painting project management. Without a structured schedule, a project can quickly devolve into weeks of kitchen downtime. A standard project for a 20 to 40 door kitchen follows a four-phase logical sequence. Phase 1 begins on Day 1 with on-site disassembly. Every door and drawer front is labeled and mapped to ensure perfect re-alignment during the final stage. This organization prevents the common frustration of misaligned hinges or uneven gaps during reassembly.
Phase 2 and Phase 3 occur simultaneously to maximize efficiency. Between Days 2 and 4, all removable components undergo off-site shop processing. This allows for a controlled environment where industrial coatings can be applied without the risk of household dust. On Days 2 and 3, the focus shifts back to your home for Phase 3: on-site frame preparation and painting. Finally, Phase 4 concludes on Day 5 with re-installation and hardware calibration. This streamlined flow ensures your home returns to full functionality within a single work week. If you are planning a renovation, you can view our service standards to see how we maintain this rigorous schedule.
The 5-Day Professional Sequence
The 5-day sequence is designed to minimize household disruption while maximizing coating durability. Cure time is the most misunderstood variable in this process. While paint may feel dry to the touch within hours, the chemical bonding process requires specific intervals between coats. For a standard kitchen, the gap between on-site frame work and off-site door spraying is managed through a strict hand-off protocol. This ensures that all surfaces reach the necessary hardness before they are handled for re-installation on the final day.
Denver Climate and Cure Logistics
Denver’s unique environmental factors play a significant role in logistical planning. The region’s low humidity, which often drops below 20%, accelerates initial dry times. This is an advantage for cabinet painting project management because it allows for faster recoat windows. However, high altitude and seasonal temperature swings in Colorado require careful monitoring. If a home was built before 1978, we also integrate EPA lead-safe work practices into the schedule to manage potential lead dust hazards safely. Your cabinet painter should provide daily status updates to confirm that both temperature and humidity levels remain within the coating manufacturer’s specifications. This level of transparency ensures the finish cures properly despite the volatile Colorado weather.
Strategic Site Preparation: Mitigating Risks to Home and Health
Professional cabinet painting project management requires more than just drop cloths and tape. We establish a “Clean Zone” by isolating the work area with 6-mil plastic sheeting and spring-loaded zip-poles. This creates a physical barrier that prevents airborne particles from migrating into your living spaces. To meet PCA Industry Standards, we ensure every seam is taped and sealed. This maintains a controlled environment that protects both your home and the integrity of the final finish. Isolation is the only way to ensure that the rest of your house remains functional and dust-free during the process.
Protection extends to the flooring and mechanical systems. Standard canvas drop cloths are insufficient for high-traffic renovation zones because they can shift or allow liquids to seep through. We utilize heavy-duty RAM board to provide a rigid, impact-resistant layer over hardwood, stone, or tile. This prevents damage from dropped tools or moving equipment. Additionally, HVAC management is a critical step that many overlook. We seal all supply and return vents within the work zone. This prevents dust from entering your ductwork and ensures the furnace fan doesn’t pull overspray into other rooms. Proper ventilation is maintained through independent exhaust systems to manage VOCs and ensure family safety.
Advanced Containment Systems
We deploy negative air machines equipped with HEPA filtration to scrub the air during sanding phases. This technology captures 99.97% of particles, ensuring a safe environment. Surface preparation also involves precise chemical degreasing. We use Trisodium Phosphate (TSP) for heavy grease removal on Kitchen Cabinet Painting projects, followed by a denatured alcohol wipe-down. This sequence removes all residues that might interfere with coating adhesion. Finally, masking protocols are applied to all appliances, countertops, and backsplashes using automotive-grade tape for sharp, clean lines.
Homeowner Preparation Checklist
Successful projects require clear communication and preparation. We recommend emptying all cabinet boxes completely. This prevents dust from settling on dishes and allows technicians to paint the interior lips of the frames without obstruction. Homeowners should also clear a “Work Path” from the entry point to the kitchen. This allows our team to move safely through the home without risking accidental damage to furniture. Setting up a temporary coffee or meal station in a separate room helps maintain your household function while the kitchen is sealed. These steps are essential for a stress-free experience during the five-day project window.
Execution and Quality Assurance: Technical Standards
Technical execution is the core of cabinet painting project management. High-quality results require a “Three-Coat Minimum” protocol. This consists of one specialized high-adhesion primer coat and two topcoats of industrial-grade coating. This process ensures the finish resists household chemicals, moisture, and physical wear. By following this standard, we provide a surface that maintains its integrity far longer than standard residential paint applications.
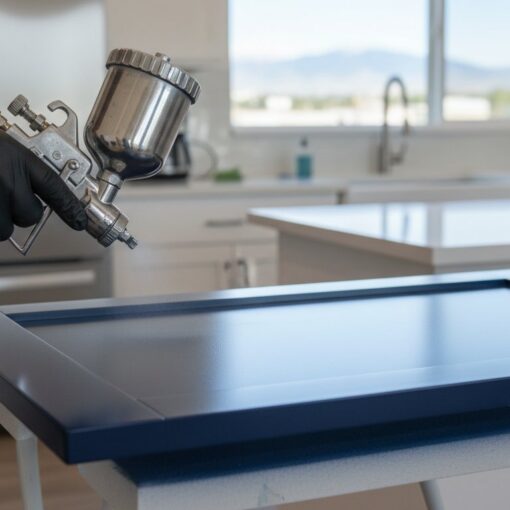
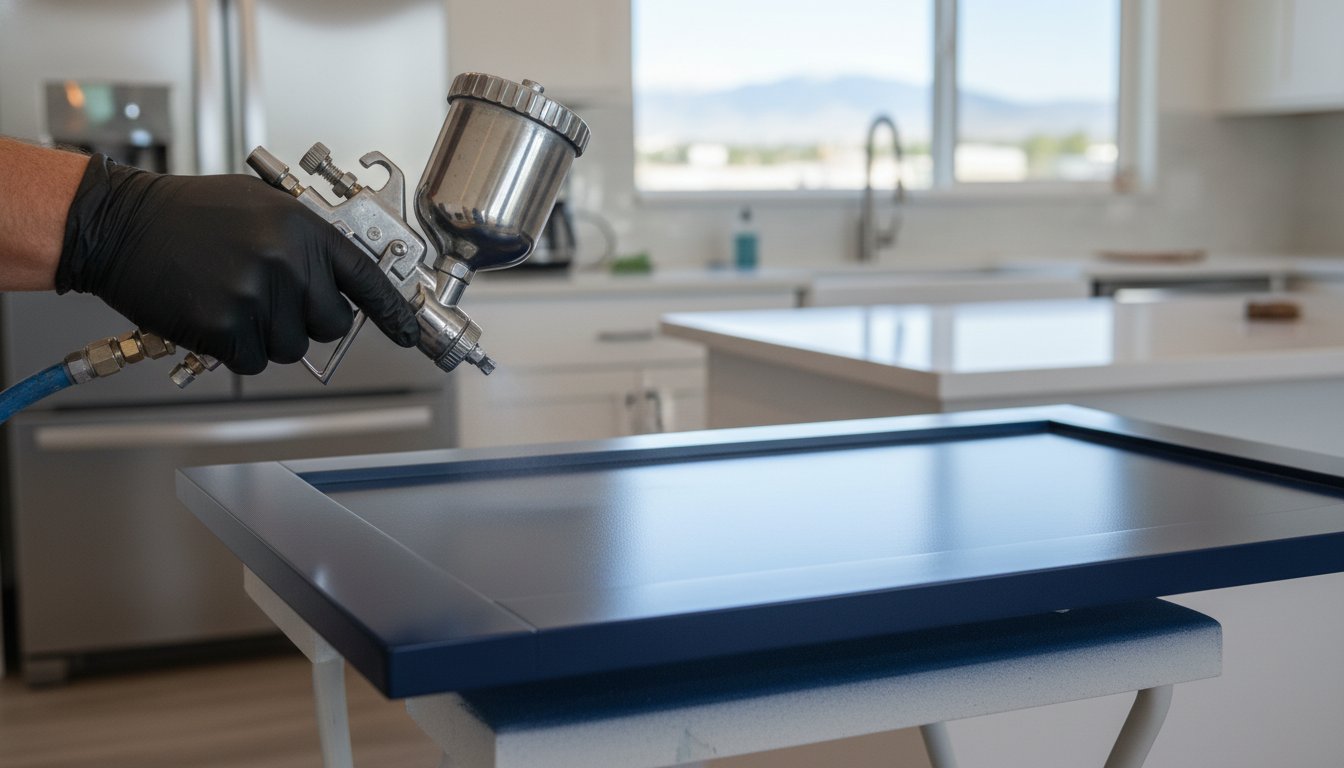
We utilize High Volume Low Pressure (HVLP) spray systems for all removable components. This technology is the industry standard for achieving a smooth, factory-like surface. Unlike traditional airless sprayers, HVLP provides greater control and significantly reduces material waste. This precision is necessary for maintaining a clean residential environment while delivering a finish that is indistinguishable from new cabinetry.
Inter-coat sanding is a mandatory step in our framework. Technicians sand the surface between every application using fine-grit abrasives. This removes dust nibs and micro-imperfections while creating a mechanical profile for the subsequent layer to bond with. This step is the secret to the “factory-smooth” feel that distinguishes professional work from amateur attempts. Skipping this phase leads to a gritty texture and poor long-term adhesion.
The Spraying Process
Technicians monitor “wet film thickness” (WFT) during each pass to ensure durability. Maintaining a WFT of 4 to 5 mils per coat ensures the coating is thick enough for protection but thin enough to prevent sagging or runs. Doors and drawers are processed in a controlled shop environment to eliminate airborne contaminants. On-site frames are hand-finished or sprayed with the same industrial coatings to ensure a perfect color match. This dual-environment approach guarantees edge-to-edge coverage, even on complex Shaker or Raised Panel profiles where paint often pools or thins out.
The Professional Inspection Framework
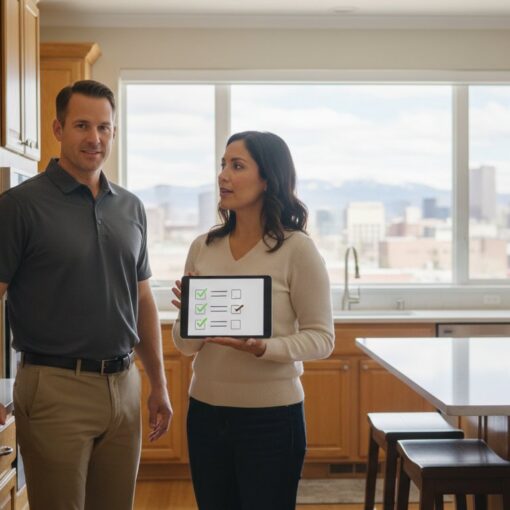
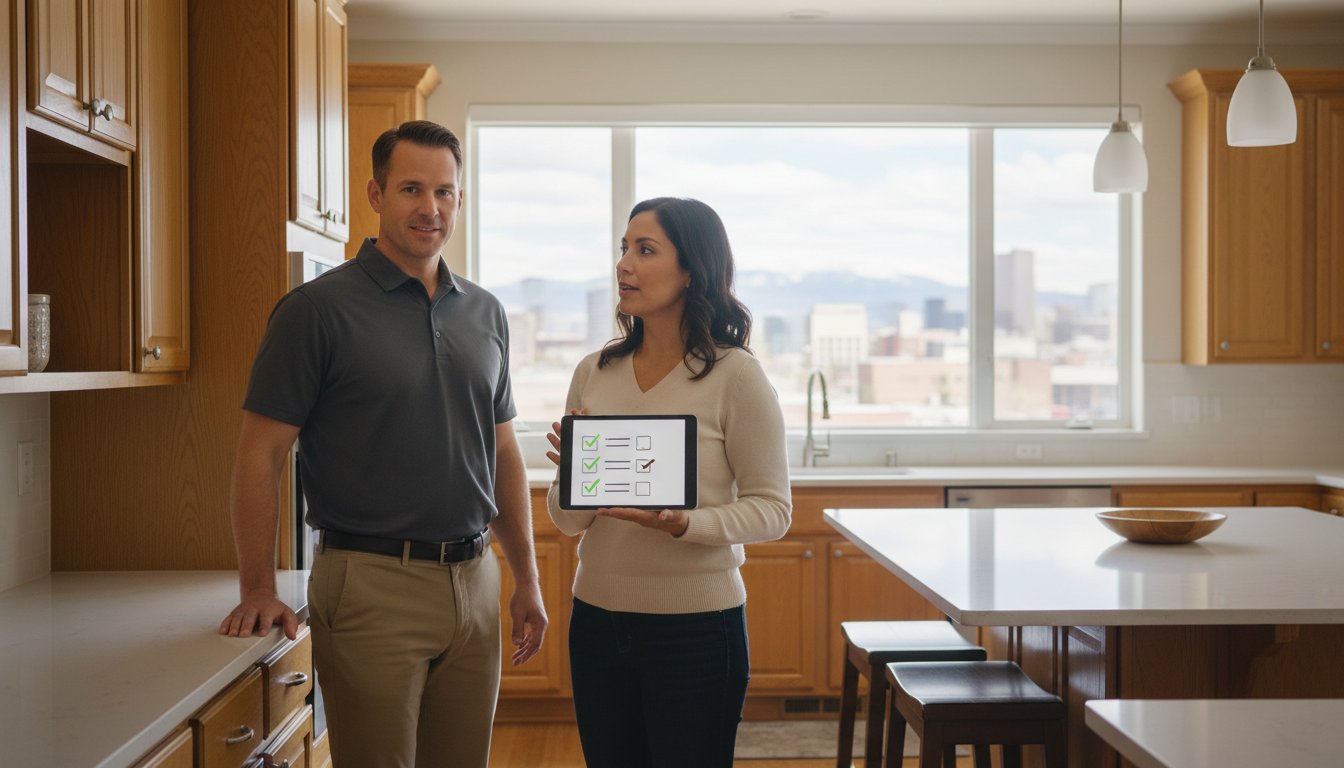
Homeowners should use specific metrics to evaluate project quality. We provide a Quality Assurance (QA) milestone inspection before the final walkthrough. Check for “orange peel,” which is an uneven texture resembling the skin of a citrus fruit. A professional finish should be uniform and free of visible brush marks or roller stipple. Use the “Light Test” by shining a 1,000-lumen work light at a low angle across the cabinet faces. This reveals hidden drips, thin spots, or trapped debris that are invisible under standard kitchen lighting. Finally, verify that all hardware is re-installed with precision alignment. Doors must be level, and drawer fronts must be centered within the frame with consistent gaps. To ensure your project meets these rigorous technical requirements, schedule a professional consultation today.
Closing the Project: Post-Painting Care and Local Expertise
The project concludes when the final hardware is calibrated, but the responsibility of cabinet painting project management extends into the initial weeks of use. A critical 30-day “hard cure” period follows the application of industrial coatings. During this window, the finish is susceptible to mechanical damage and chemical softening. You must handle the cabinets with care. Don’t scrub the surfaces or use heavy cleaning agents during this time. Avoid hanging damp towels over cabinet doors. Moisture can penetrate the coating before it reaches maximum hardness, which can compromise the bond to the substrate.
Every professional project must include a touch-up kit. We provide a labeled sample of the specific coating used for your Kitchen Cabinet Painting. This allows for seamless repairs of minor chips that may occur over years of daily use. Having the exact batch and color on hand is the only way to ensure a perfect match for future maintenance. Understanding the nuances of cabinet painting in Denver requires knowledge of local home builds. Our arid climate affects wood stability differently than more humid regions, making post-project care even more vital for longevity.
Long-Term Maintenance Strategy
Maintain your finish using a simple cleaning protocol. Use a mild soap solution and soft microfiber cloths. Never use abrasive sponges or cleaners containing ammonia or bleach. These chemicals can degrade the sheen and compromise the protective topcoat. In Denver, managing indoor humidity levels is also vital. Significant fluctuations in humidity cause wood to expand and contract. This movement can lead to hairline fractures at the joints of your cabinet doors. Keeping your home’s humidity between 30% and 50% helps stabilize the wood and preserves the finish. If you notice structural shifts, contact a professional for a technical assessment rather than attempting DIY fixes. Regular inspections of high-use areas, like the sink base and trash pull-out, will help you identify wear before it becomes a larger issue.
The Denver Professional Advantage
Local expertise is essential for navigating the architectural diversity of our region. Whether you own a historic bungalow in Highland or a modern estate in Cherry Creek, the substrate and construction methods vary. We understand how these different builds respond to industrial coatings. Older homes often feature solid wood frames that require different preparation than the engineered materials found in newer developments. A local warranty provides peace of mind that your investment is protected by a team that understands the Colorado environment. Responsive customer service ensures that any post-project questions are addressed promptly. Professional cabinet painting project management doesn’t end when the tape comes down. It ends when you are fully equipped to care for your new kitchen. To start your transformation, Contact Cabinet Painting Denver for a professionally managed quote.
Executing Your Professional Cabinet Transformation
A successful kitchen upgrade depends on moving beyond simple aesthetics to embrace a structured technical process. You now understand that cabinet painting project management isn’t just about color; it’s the essential discipline required to balance speed with industrial-grade durability. By prioritizing site containment and following a strict 5-day sequence, you can avoid the common pitfalls of household disruption and finish failure. This framework ensures that your Bathroom Cabinet Painting or kitchen project meets the highest standards of the 2026 residential market.
We provide the expertise needed to deliver a Factory-Quality HVLP Spray Finish while maintaining a Dust-Free Containment Guarantee. Our team follows a Detailed 5-Day Project Timeline to return your home to full functionality as quickly as possible. If you’re ready to move forward with a transparent and predictable renovation, we’re here to assist. Get Your Professionally Managed Cabinet Quote in Denver today. Your path to a flawless, stress-free cabinet transformation is clear, and we look forward to delivering a result that enhances your home’s value and beauty.
Frequently Asked Questions
How long does a professional cabinet painting project actually take?
A standard project for a 20 to 40 door kitchen typically takes five consecutive business days to complete. This timeframe includes one day for on-site disassembly, two to three days for frame preparation and painting, and a final day for re-installation and hardware calibration. Shop processing for doors and drawers occurs concurrently at an off-site facility to maintain this efficient schedule.
Do I need to move out of my house during the cabinet painting process?
You don’t need to move out of your home while the work is performed. We isolate the work area with 6-mil plastic containment and zip-poles to keep dust and odors contained within the kitchen zone. While the kitchen itself is inaccessible during active spraying hours, the rest of your home remains fully functional and safe for your family to occupy.
What is the difference between a project manager and a standard painter?
A project manager coordinates the technical sequence, resource allocation, and quality milestones, whereas a standard painter focuses primarily on the coating application. Effective cabinet painting project management ensures that logistics, such as off-site door processing and on-site preparation, align perfectly with the 30-day cure cycle. This oversight prevents scheduling delays and technical failures that often occur without professional supervision.
How much disruption should I expect in my kitchen during the work?
Your kitchen will be a designated work zone and will be non-functional for cooking for approximately three to four days. We seal all appliances, countertops, and flooring under protective masking and RAM board. We recommend setting up a temporary meal station in another room to maintain your daily routine while the frames are prepared and sprayed in the isolated kitchen area.
What are the most common risks in cabinet painting project management?
The most common risks include substrate failure due to improper degreasing and dust contamination during the drying phase. Inadequate cabinet painting project management can also lead to scheduling conflicts between on-site work and shop-side door finishing. We mitigate these risks through multi-stage cleaning protocols using TSP and denatured alcohol, combined with climate-controlled shop environments for all removable components.
How do I verify the quality of the finish before the final payment?
Verify the finish by performing a “Light Test” with a high-lumen work light to check for uniform sheen and the absence of texture imperfections like “orange peel.” Ensure all doors and drawers are perfectly aligned with consistent gaps throughout the kitchen. The finish should feel factory-smooth to the touch, which indicates that the team performed proper inter-coat sanding and applied industrial-grade coatings.
Is cabinet painting project management different for bathroom vanities?
The management framework for Bathroom Cabinet Painting is similar but often operates on a compressed two to three day timeline due to the smaller door count. Because bathrooms are high-moisture environments, we prioritize moisture-resistant industrial primers and topcoats. The containment protocols remain strict to protect your bathroom fixtures and flooring from overspray in these smaller, enclosed spaces.
Will the paint smell linger in my home after the project is closed?
Odors don’t linger long because we use independent exhaust systems and negative air machines to scrub the air during the application process. While you may notice a slight scent during the first 24 hours of the 30-day hard cure period, it dissipates rapidly once the kitchen is unsealed. Proper ventilation and VOC management ensure your home returns to a neutral state quickly after the project concludes.
