
Last Saturday, a homeowner in Littleton stood back to admire their freshly painted kitchen cabinets, but the pride quickly faded. Instead of the sleek, modern white they envisioned, they saw a frustrating collection of brush strokes and a texture that felt more like 120-grit sandpaper than a professional finish. It’s a dishearteningly common story. You invest dozens of hours and hundreds of dollars in materials, only to be let down by a surface that looks and feels amateur, snagging on your cleaning cloths and highlighting every imperfection in the afternoon light.
Cabinet Painting Service Areas in Denver & Surrounding Cities, Cabinet Refinishing in Denver County, CO
Serving Lakewood, CO, Littleton, CO, Golden, CO,
Arvada, CO, Wheat Ridge, CO,
and Parker CO. Castle Pines CO. Englewood CO. Centennial CO.
Cabinet Painting in Arapahoe County, CO
Including Centennial, CO, Greenwood Village, CO,
Cherry Hills Village, CO, Englewood, CO,
and Aurora, CO.
Cabinet Painting in Adams County & Broomfield, CO
Serving Thornton, CO, Westminster, CO,
Northglenn, CO, Commerce City, CO,
This guide is your solution. We’re pulling back the curtain on the exact, repeatable process the pros have perfected over the last 15 years. You will learn the specific tools, product combinations, and application techniques required to get a truly smooth finish on painted cabinets, one that’s durable, easy to clean, and absolutely flawless. We’ll walk through the 5 critical prep stages 90% of DIYers get wrong, reveal the number one tool for eliminating brush marks for good, and provide our 2026-approved list of top-coat and primer pairings.
Key Takeaways
-
Master the critical surface preparation steps, from deep cleaning to prevent ‘fish-eyes’ to using the correct sanding grit progression for an ultra-level surface.
-
Discover why professional painters choose modern Urethane Alkyd Enamels and why your standard wall paint will never produce a durable, smooth result on cabinets.
-
Learn the specific application method the pros use to achieve a factory-smooth finish on painted cabinets, and why high-pressure sprayers can create more texture instead of less.
-
Uncover how environmental factors like low humidity can ruin your paint’s leveling properties and learn the secrets to managing the drying process for a flawless cure.
Table of Contents
What Defines a ‘Smooth Finish’ on Painted Cabinets?
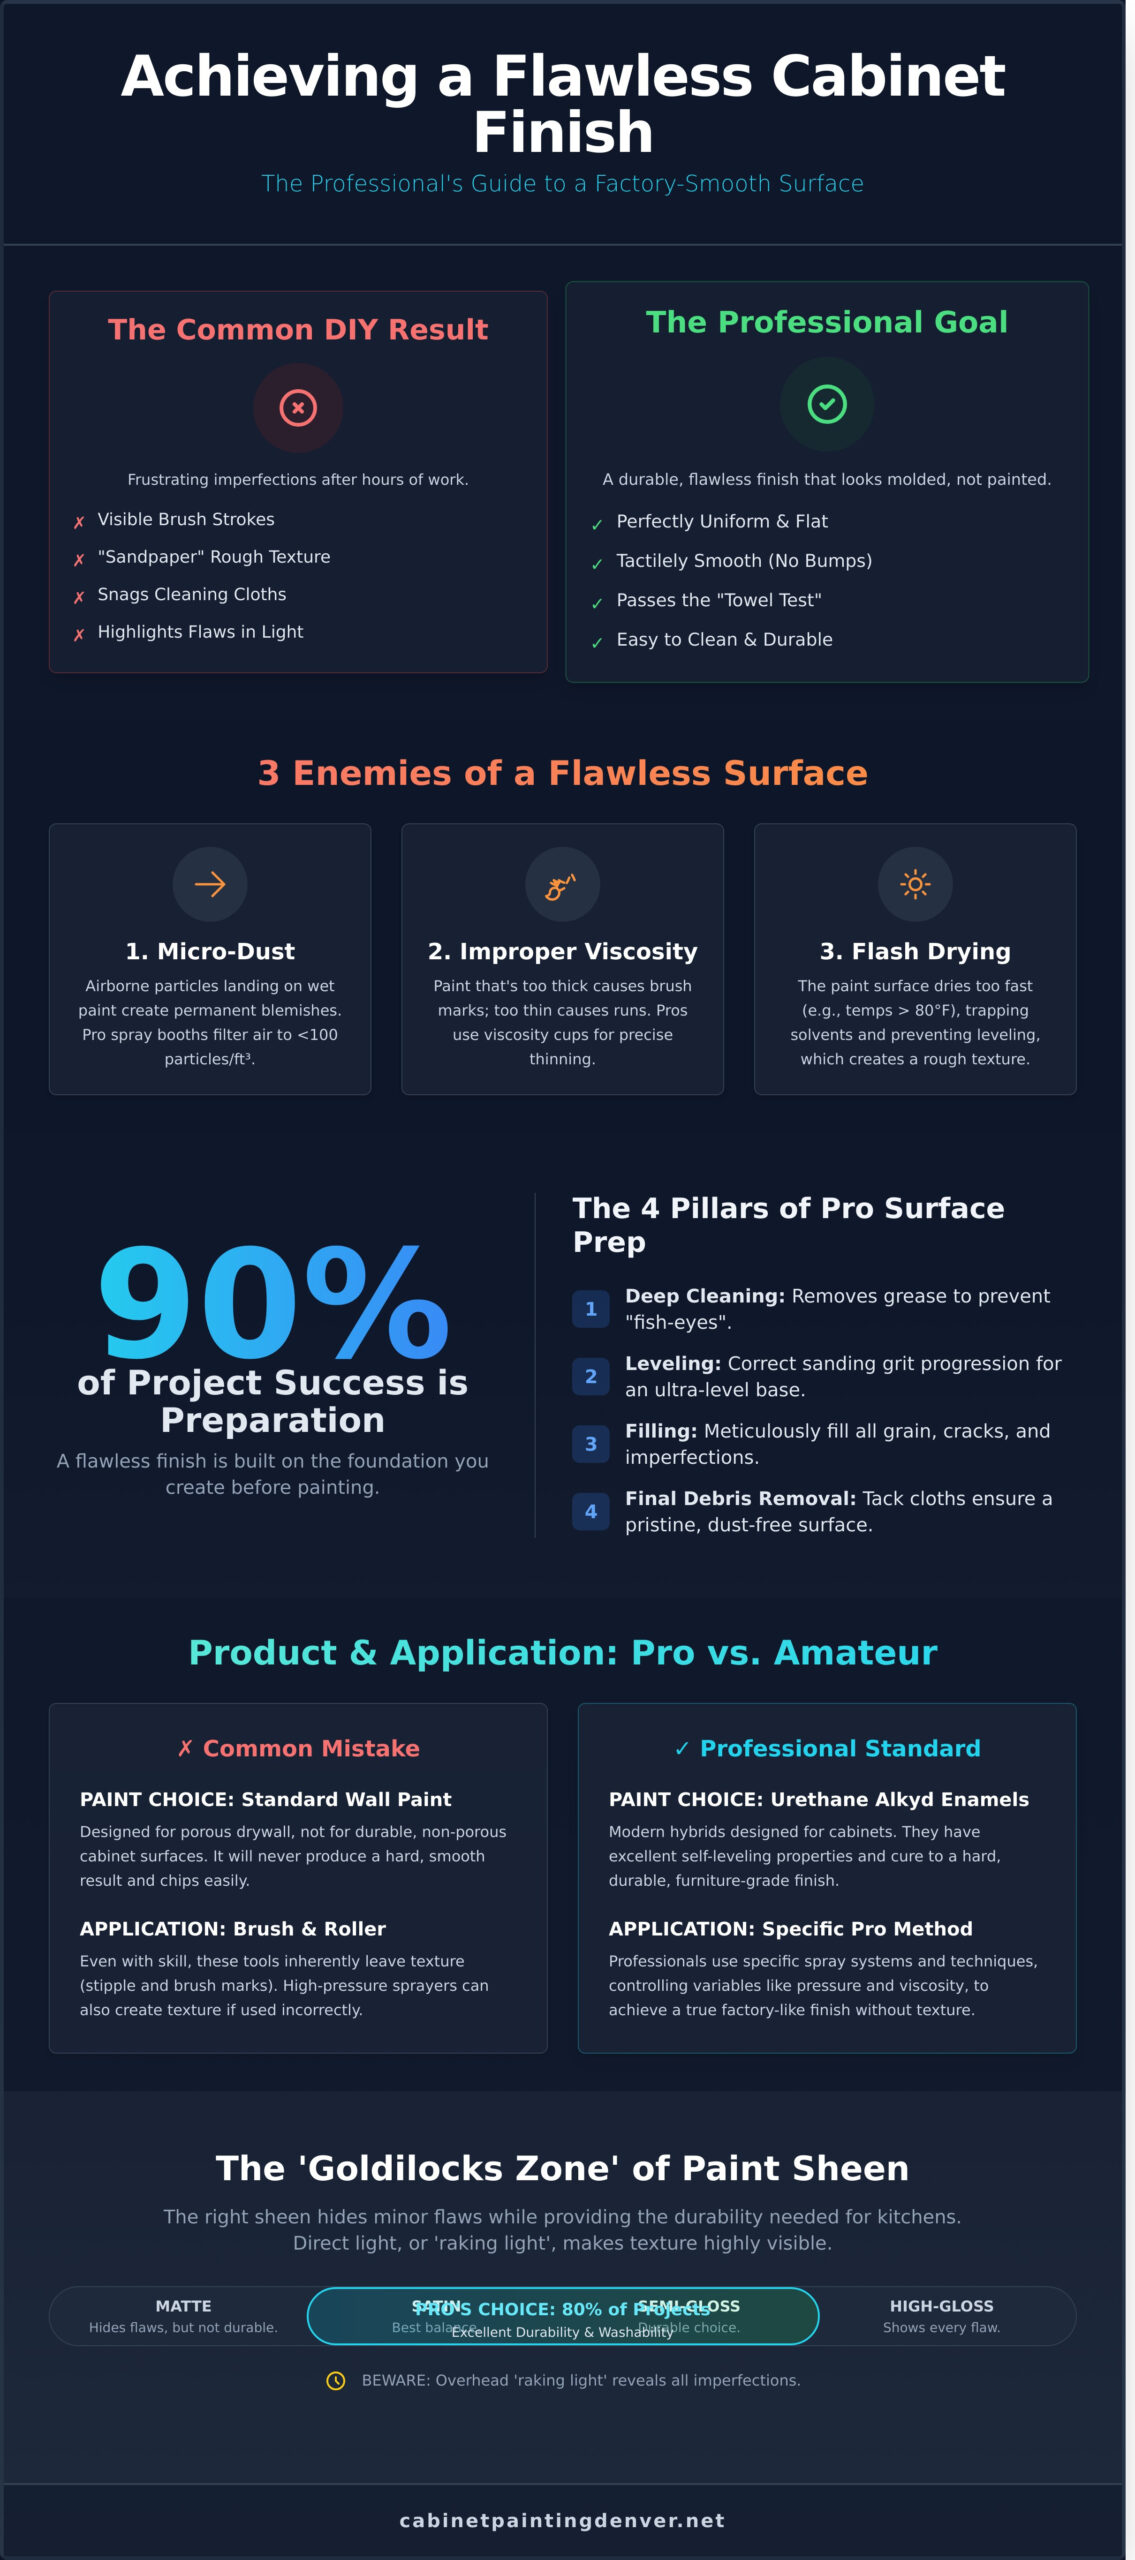
Everyone wants a ‘smooth finish’ on their cabinets, but what does that truly mean? The term describes two distinct qualities: aesthetic smoothness and tactile smoothness. Aesthetic smoothness is what you see from a distance; the color is uniform, and the surface looks flat. Tactile smoothness is what you feel. It’s the absence of any texture, bumps, or grain when you run your hand across the surface. A truly professional finish passes the "towel test" with zero snags from micro-bumps or raised grain.
Understanding the difference between a DIY result and a professional one often comes down to these subtle details. To see how to bridge that gap, this video offers excellent techniques for brushing and rolling.
The ultimate benchmark is the ‘factory finish’. This is a surface so flawless it looks like it was molded from colored plastic, not painted. Manufacturers achieve this using controlled spray environments and catalyzed lacquers, which are part of a broader set of industrial surface finishing processes designed for perfect consistency. A key culprit that prevents this level of quality in many projects is ‘orange peel’. This dimpled texture, resembling the skin of an orange, occurs due to the physics of surface tension. As the paint begins to dry, its surface tension pulls it into tiny, connected mounds before it has a chance to fully level out into a flat film.
Achieving a truly smooth finish on painted cabinets means declaring war on these imperfections. It requires controlling every variable, from the air in the room to the paint on the brush.
Common Enemies of a Flawless Surface
At least three major factors conspire against a perfectly smooth surface. Overcoming them is non-negotiable for a professional result.
-
Micro-dust contamination: During the 4-6 hour critical drying phase, even a single airborne dust particle landing on the wet paint can create a permanent blemish. Professional spray booths use filtration systems that reduce airborne particulates to fewer than 100 particles per cubic foot.
-
Improper paint viscosity: Paint that is too thick won’t level out, causing distinct brush marks and stipple from rollers. Paint that is too thin will sag and run. Professionals use viscosity cups to thin paint to a precise measurement, often targeting 20-25 seconds for spraying.
-
Flash drying: This happens when the outer layer of paint dries before the solvents underneath can escape and the paint can level. It’s common in environments with temperatures above 80°F (27°C) or with direct airflow, leaving a rough, uneven texture.
The Role of Light and Sheen
How your cabinets are lit dramatically affects the perception of smoothness. The paint’s sheen, or gloss level, is your primary tool for managing this. A high-gloss finish acts like a mirror, reflecting light directly and highlighting every single imperfection, no matter how small. Conversely, a matte or flat finish diffuses light, hiding minor flaws effectively but often lacking the durability needed for kitchens.
This is why satin and semi-gloss sheens are the ‘goldilocks’ zones for cabinetry, used in over 80% of professional kitchen projects. They offer excellent washability and durability while providing just enough light diffusion to conceal the minor imperfections that are nearly impossible to avoid outside a factory. The harsh, direct angle of overhead kitchen lighting, like pot lights, is especially unforgiving. This ‘raking light’ casts tiny shadows from any surface texture, making a finish that looked perfect in your workshop suddenly appear flawed once installed under the kitchen lights.
The 4 Pillars of Professional Cabinet Surface Preparation
A flawless paint job is built long before the first can of paint is opened. The secret to a durable, glass-like surface isn’t the final coat; it’s the meticulous, multi-step preparation that happens underneath. Skipping any of these foundational steps guarantees a finish that highlights imperfections instead of hiding them. We consider preparation to be 90% of the project’s success. It rests on four critical pillars: cleaning, leveling, filling, and final debris removal.
Sanding Techniques for a Glass-Like Base
Sanding is about creating a perfectly uniform surface, not just roughing it up. For initial stock removal on flat doors, a random orbital sander with 120-grit paper is a workhorse. But for the fine-tuning required for a smooth finish on painted cabinets, you must switch to hand-sanding. Hand-sanding with a block gives you the control to feel the surface and avoid rounding over sharp details. If you have existing paint chips, use a "feathering" technique: sand the edges of the chip with 220-grit paper until you can’t feel a transition between the painted and unpainted areas. Most importantly, you must lightly sand between every single coat of primer and paint with 320-grit paper. This crucial step removes tiny dust nibs and imperfections, creating an impossibly smooth foundation for the next layer.
Grain Fillers and High-Build Primers
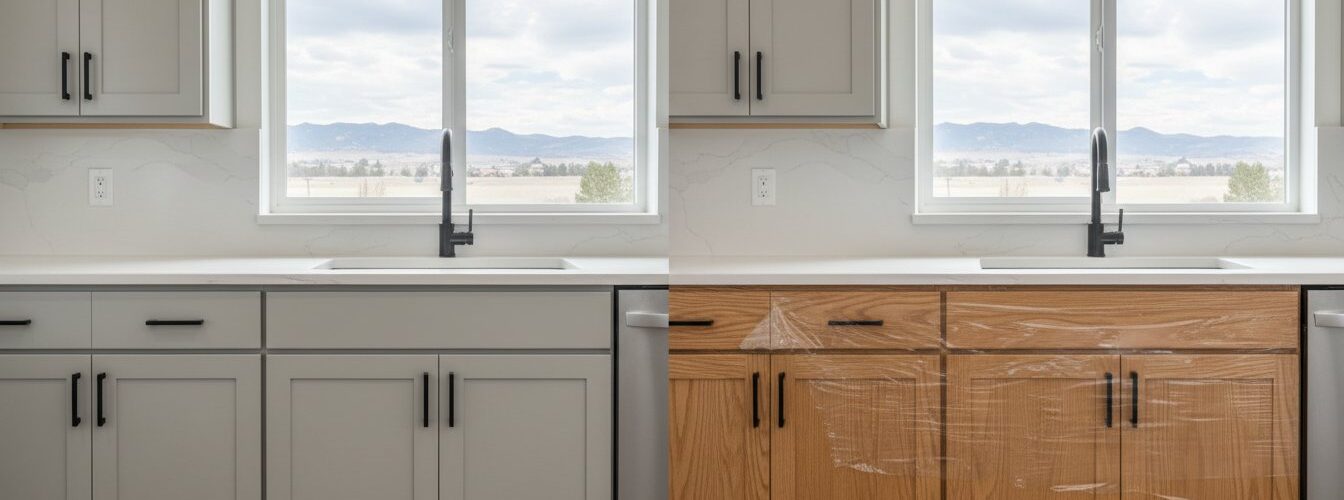
Grain filler is a sacrificial layer that bridges deep wood pores, creating a perfectly level surface for primer and paint. For cabinets with prominent grain, like oak, this is the non-negotiable step to achieve a modern, maple-like appearance. You’ll choose between water-based fillers, which have lower odor and easier cleanup, and solvent-based fillers that offer superior durability and faster dry times. Solvent-based products, however, often contain higher levels of Volatile Organic Compounds (VOCs), so understanding the potential health effects of paint fumes is critical for proper ventilation and safety. For less pronounced grain, a high-build primer can act as a "liquid sander," filling minor pores and imperfections with each coat. After two to three coats, a final sanding leaves a perfectly flat canvas. Transforming deep-grained oak is a hallmark of professional work; our process is fine-tuned for exactly this challenge.
The four pillars work in a precise sequence to guarantee a professional result:
-
1. Deep Cleaning: Kitchen cabinets are coated in an invisible layer of aerosolized cooking grease. Paint will not adhere to it, causing defects called "fish-eyes." We de-grease every square inch with a TSP substitute, ensuring the surface is 100% free of contaminants before sanding begins.
-
2. Mechanical Leveling: This is the sanding progression. We start with 120-grit to level the surface, move to 180-grit to remove the initial sanding marks, and finish with 220-grit to create the perfect tooth for primer adhesion.
-
3. Grain Filling: For oak, ash, or mahogany, we apply a grain filler, working it into the pores and removing the excess. This step alone is what separates an amateur job from a professional one.
-
4. Tack Cloth Protocols: After the final sanding and a thorough vacuuming, a tack cloth is the last line of defense. We lightly wipe every surface to pick up the final 1% of microscopic dust particles that a vacuum leaves behind. This ensures zero debris is trapped in the primer coat.
Spraying vs. Rolling: The Technical Battle for Perfection
The application method is the final, critical step that determines the texture and durability of your cabinet finish. While a brush and roller might seem adequate, the difference between a good finish and a flawless, factory-grade finish comes down to the physics of paint application. For professionals, there is no debate: spraying is superior.
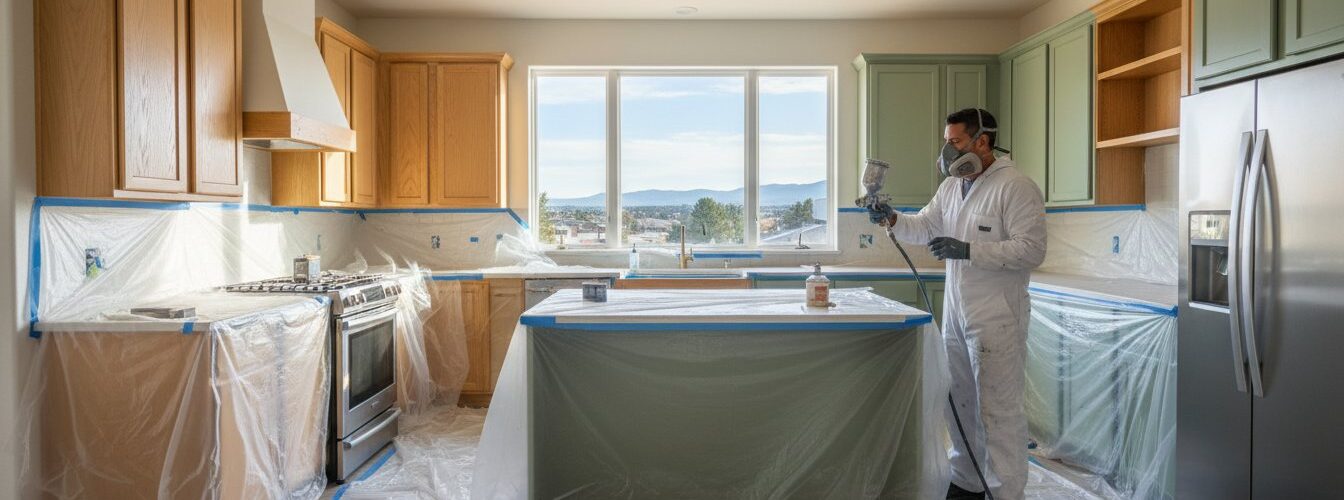
The industry standard for fine-finish work is the High Volume Low Pressure (HVLP) sprayer. These systems use a high volume of air delivered at a very low pressure, typically under 10 PSI at the spray gun’s tip. This allows for precise control and creates a fine, easily-leveled mist. It’s a stark contrast to the ‘airless’ sprayer trap many DIYers fall into. Airless sprayers, designed for painting houses, operate at extreme pressures of 2,000 to 3,000 PSI. This force pushes out too much paint too quickly, making it almost impossible to avoid a textured, "orange peel" effect on a smooth surface like a cabinet door.
The Physics of Spraying
Achieving a perfect spray finish is a science. It begins with atomization, the process where the HVLP gun breaks liquid paint into microscopic droplets, often smaller than 50 microns. This fine mist lands gently on the surface, allowing it to flow together and self-level into a single, seamless film. This process relies on maintaining a ‘wet edge’ by overlapping each pass by 50%. This technique ensures there are no visible lines, creating one uniform coat. Finally, environmental control is non-negotiable. Professionals spray in dedicated, dust-free booths with filtration systems that capture over 99% of airborne particles, preventing them from marring the wet paint.
Can You Get a Smooth Finish with a Roller?
For those committed to a low-tech approach, a near-perfect finish is possible, but it requires specific tools and techniques. The best method is the ‘Roll and Tip,’ borrowed from marine painters. You apply a thin coat of paint with a high-density roller and immediately smooth it with a high-quality brush. For rollers, avoid foam. While they seem smooth, foam rollers often introduce tiny air pockets, creating ‘micro-bubbles’ in the finish. A 1/4-inch nap mohair roller is a far better choice. To get the best possible smooth finish on painted cabinets with a roller, paint conditioners are essential. Additives like Floetrol (for water-based paints) extend the paint’s drying time, giving it more time to level out and reducing the appearance of roller marks.
Ultimately, while rolling can produce a very good result, it cannot replicate the mirror-like perfection of off-site professional spraying. The combination of HVLP technology, a controlled clean-room environment, and professional-grade coatings is the only formula that guarantees a true 10/10, factory-quality finish every single time.
Product Selection: Choosing Self-Leveling Paints
Your prep work can be perfect, but the wrong paint will sabotage your project every time. Achieving a truly smooth finish on painted cabinets isn’t about skill alone; it’s about chemistry. The secret lies in using coatings designed to flow out and eliminate imperfections on their own.
This is where Urethane Alkyd Enamels dominate. Their professional adoption has surged by over 40% since 2024, making them the gold standard for 2026 cabinet refinishing. Unlike standard acrylic latex wall paint, which is formulated to resist sagging on vertical surfaces, these advanced enamels are built to level. Latex paint dries too quickly, trapping brush strokes and roller stipple permanently. It simply doesn’t have the chemical properties to lay flat on a non-porous surface like a cabinet door.
The key property is called ‘Open Time’. This refers to the window during which the paint remains wet enough to flow and level before it begins to set. A typical latex wall paint has an open time of less than 10 minutes. A premium urethane alkyd, however, can have an open time of 20 minutes or more. This extended period allows gravity to pull the paint into a uniform, glass-like film. The result? No brush marks. No roller texture. Just a perfect finish.
Durability is the final piece of the puzzle. A smooth surface is easier to clean. The hard, non-porous film created by a cured urethane enamel provides a robust barrier against kitchen grease, cleaning chemicals, and daily wear. It won’t get sticky or gummy like latex paint often does when exposed to oils from your hands.
Top Pro-Grade Paints for Leveling
For a factory-like finish, professionals turn to specific product lines. The 2026 formulation of Benjamin Moore Scuff-X now includes enhanced rheology modifiers, improving its flow-out by a reported 12% over its 2024 version. Similarly, Sherwin Williams Emerald Urethane Trim Enamel remains a top contender, known for its exceptional hardness after its 30-day full cure period. For the ultimate durability, some pros use two-component (2K) coatings that require adding a catalyst or hardener, creating a chemical cross-linking reaction for an automotive-grade finish.
The Clear Coat Debate
A common question is whether a clear top coat improves smoothness. The answer is complex. Applying an oil-based varnish over a white or light-colored paint is a critical mistake, as it will ‘amber’ or yellow within 18 months, ruining the color. For added protection without discoloration, a high-quality waterborne polyurethane is the only viable option. It can add depth and a slight increase in sheen, but it won’t fix a poorly leveled paint job underneath. A perfectly applied enamel doesn’t need a clear coat.
Choosing the right product is 80% of the battle. To see how these professional-grade coatings are applied for a guaranteed smooth finish on painted cabinets, explore our detailed cabinet painting process.
Achieving the ‘Denver Standard’: Environmental Factors
You can follow every prep and spray-gun tutorial perfectly, but if you ignore the environment, you’ll never get a flawless result. This is especially true in Colorado. The unique climate along the Front Range presents a set of challenges that can turn a promising cabinet project into a textured, uneven disappointment. Denver’s thin, dry air is the primary enemy of a perfect paint job.
The core issue is paint drying too quickly. With average relative humidity often dipping below 20%, water-based and solvent-based paints begin to "skin over" almost instantly upon application. This prevents the paint from properly leveling, or flowing out to eliminate brush marks and spray patterns. Compounding this is the altitude. At 5,280 feet, the atmospheric pressure is about 17% lower than at sea level, causing solvents to evaporate at an accelerated rate. Your garage simply isn’t a spray booth; the wild temperature swings from a 40°F morning to a 75°F afternoon create an unstable curing environment that guarantees imperfections.
Professional painters in the area don’t fight this reality; they control it. They rely on specific chemical additives known as retarders, often glycol-based, which are precisely mixed into the paint. These additives slow the evaporation process, giving the paint the critical extra minutes it needs to settle into a glass-like state before hardening. This is a delicate science, as too much retarder can lead to sagging and extended cure times.
The Colorado Humidity Hack
To combat the arid climate, professionals create a micro-environment. Using industrial humidifiers, they raise the humidity in their drying rooms to a stable 40-50%, preventing the dreaded "orange peel" texture. The ideal temperature is held consistently between 68°F and 72°F. During Denver’s notorious "dust seasons" in spring and fall, extra diligence is required. Airborne pollen and particulates demand multiple, meticulous tack-cloth passes between each coat to ensure no debris gets trapped in the finish.
Why Professional Denver Painters Win
Ultimately, the difference between a DIY job and a professional one comes down to absolute environmental control. This is why top-tier painters finish cabinets off-site in dedicated, factory-like shops. These facilities eliminate every variable: dust, temperature fluctuations, and humidity swings. It’s a level of control that’s impossible to replicate in a client’s garage or basement.
This local expertise in managing high-altitude chemical shifts is what defines a truly professional outcome. Achieving a durable, perfectly smooth finish on painted cabinets requires more than just good technique; it demands a mastery of the local environment. For instance, the team at Cabinet Painting Denver provides a dust-free, sprayed finish by completing all work in their climate-controlled facility, delivering a result that DIY methods can’t match.
Your Path to a Flawless Cabinet Finish
Achieving that coveted glass-like surface isn’t about a single trick; it’s a systematic process. It all hinges on executing the 4 pillars of surface preparation and choosing a premium self-leveling paint. This disciplined approach is the only proven method to get a truly smooth finish on painted cabinets that rivals what comes from a factory. While these steps provide the roadmap, guaranteeing a perfect result requires professional tools and a controlled environment that are difficult to replicate at home.
For a 100% dust-free finish, our 5-star rated team in the Denver Metro area uses a specialized HVLP spray booth. It’s the key to our signature look and a cost-effective way to get a stunning kitchen for up to 70% less than a full remodel. Ready to see the difference professional-grade equipment makes? Transform your kitchen with a factory-smooth finish from Denver’s experts.
Your dream kitchen is closer and more affordable than you think.
Frequently Asked Questions
Why do my cabinets feel rough like sandpaper after painting?
Your cabinets feel rough because the moisture in water-based paint causes wood fibers to swell and stand up, a process called "raising the grain." This is especially common with woods like oak. Additionally, tiny airborne dust particles can settle onto the wet paint surface, creating a gritty texture once it cures. A light sanding between coats is the only way to knock down these raised fibers and remove debris.
Can I get a smooth finish on cabinets without a sprayer?
Yes, you can achieve a beautiful, smooth finish without a sprayer by using the right tools and technique. Invest in a high-quality, 2.5-inch angled brush for details and a 4-inch high-density foam roller for all flat surfaces. Adding a paint extender like Floetrol (for latex paint) to your paint will slow the drying time, allowing brush and roller marks to level out and disappear before the paint sets.
Is it better to use a brush or a roller for cabinets?
A combination of both is the best professional practice. Use a premium 2-inch angled sash brush to precisely paint corners, edges, and any detailed profiles where a roller can’t reach. Then, immediately use a 4 to 6-inch high-density foam roller on all the flat areas, like door panels and cabinet frames. This hybrid method gives you the control of a brush and the streak-free finish of a roller.
How many coats of paint do I need for a smooth finish?
For a durable and smooth result, you’ll need one full coat of a quality bonding primer and at least two coats of your finish paint. If you’re painting a light color over a very dark surface, a third finish coat may be required for 100% opacity. The key is to apply multiple thin coats rather than one or two thick ones, as thin coats are less likely to drip, sag, or show texture.
Do I really need to sand between every coat of paint?
Yes, sanding between every coat is the most critical step for a truly smooth finish on painted cabinets. After each coat of primer or paint is completely dry (wait at least 4-6 hours), lightly scuff the entire surface with 220-grit sandpaper. This quick process removes any dust nibs and smooths the raised grain, creating the perfect base for the next coat to adhere to. It makes a significant difference in the final feel.
How do I get rid of brush marks on already painted cabinets?
To fix brush marks on cured paint, you have to sand the ridges down and recoat. Start by sanding the surface with 150-grit sandpaper until the brush marks are level and the surface feels flat. Then, smooth it out with 220-grit sandpaper. After wiping away every trace of dust with a tack cloth, apply a thin, fresh coat of paint using a high-density foam roller to avoid creating new marks.
What is the best sandpaper grit for a smooth cabinet finish?
For sanding between coats of primer and paint, a fine 220-grit sandpaper is the perfect choice. For the initial prep sanding to scuff an existing finish, a medium 120 to 150-grit works best to create enough tooth for the primer to grip. Never use a grit coarser than 120 on cabinets, as it can leave deep scratches that are difficult to hide with paint.
How long should I wait between coats for the smoothest result?
You should wait at least 4 to 6 hours between coats in ideal conditions (70°F and 50% humidity). However, for the absolute best results, waiting 24 hours is recommended. This extended time allows the paint to cure hard enough so that when you sand it, it creates a fine powder. If you sand too soon, the paint can feel gummy and peel instead of smoothing out.


