
What if you could get a flawless, factory-finish kitchen for 70% less than the cost of a full tear-out remodel? It’s a frustrating feeling to walk into a kitchen you no longer love. You see the dark, dated wood and feel a pang of embarrassment, worrying that a quick-fix paint job will just chip and peel within a year. You’re right to be skeptical of anything that seems too good to be true, especially when the average Denver kitchen renovation now exceeds $65,000.
Cabinet Painting Service Areas in Denver & Surrounding Cities, Cabinet Refinishing in Denver County, CO
Serving Lakewood, CO, Littleton, CO, Golden, CO,
Arvada, CO, Wheat Ridge, CO,
and Parker CO. Castle Pines CO. Englewood CO. Centennial CO.
Cabinet Painting in Arapahoe County, CO
Including Centennial, CO, Greenwood Village, CO,
Cherry Hills Village, CO, Englewood, CO,
and Aurora, CO.
Cabinet Painting in Adams County & Broomfield, CO
Serving Thornton, CO, Westminster, CO,
Northglenn, CO, Commerce City, CO,
This guide is here to show you the stunning reality of professional spray painted kitchen cabinets before and after their transformation. You’ll discover exactly how our specialized process creates a durable, silky-smooth surface that rivals brand-new cabinetry and can boost your home’s resale value. We’ll break down the costs, showcase incredible local projects, and explain why this has become Denver’s top-rated kitchen ROI strategy heading into 2026.
Key Takeaways
-
Learn the technical reason professionals use sprayers to achieve a flawless, factory-quality finish that brushing and rolling simply cannot replicate.
-
See stunning spray painted kitchen cabinets before and after photos to understand the visual impact of modern color strategies like the "Tuxedo Kitchen" trend.
-
Understand the powerful ROI of refinishing by comparing the typical project cost to a full replacement and learning how it boosts your Denver home’s appraisal value.
-
Discover why local expertise matters, from proper surface preparation to accounting for Colorado’s climate, to ensure a beautiful and durable result.
Table of Contents
-
The Visual Impact: Why Spray Painted Kitchen Cabinets Before and After Photos Tell the Whole Story
-
Spraying vs. Brushing: The Technical Reason Professionals Achieve a Flawless Finish
-
The Anatomy of a Professional Cabinet Spraying Project in 2026
-
Beyond the Aesthetics: Calculating the Durability and ROI of Refinishing
-
Transforming Your Denver Kitchen: Why Local Expertise Matters for Your Project
The Visual Impact: Why Spray Painted Kitchen Cabinets Before and After Photos Tell the Whole Story
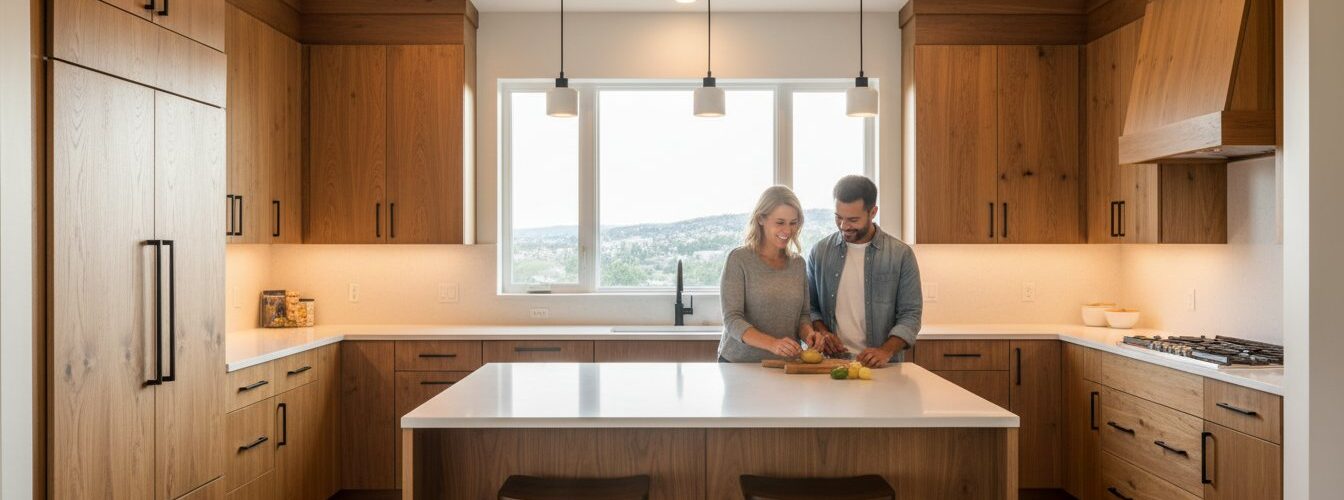
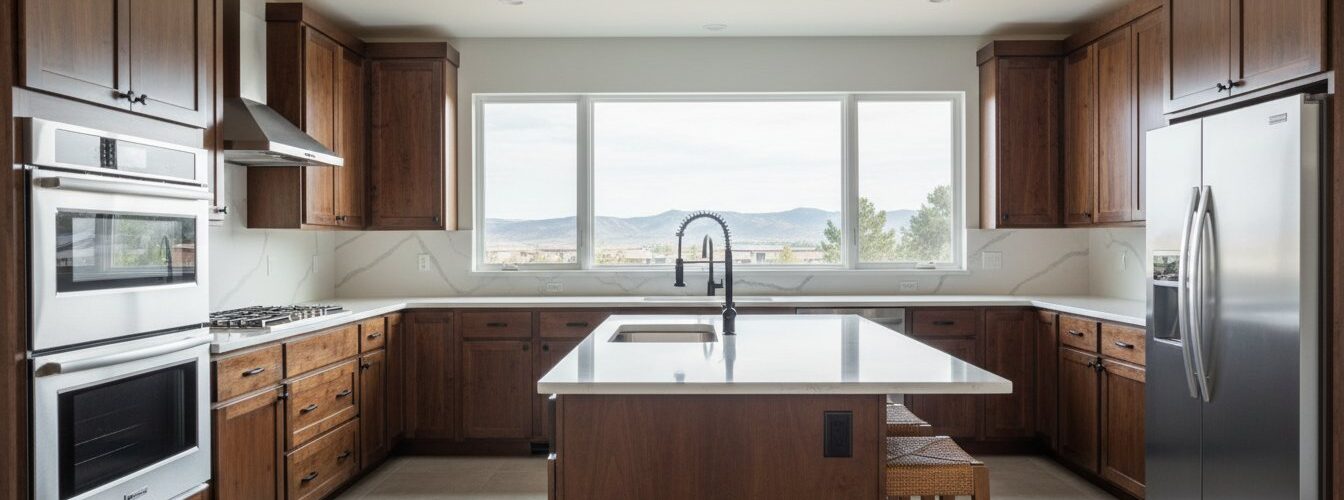
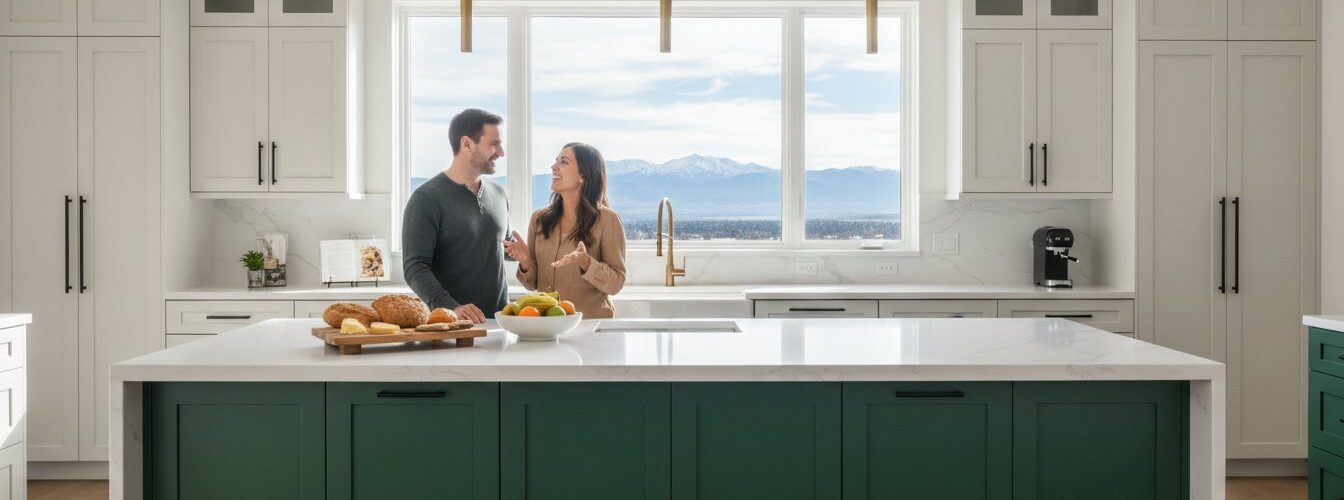
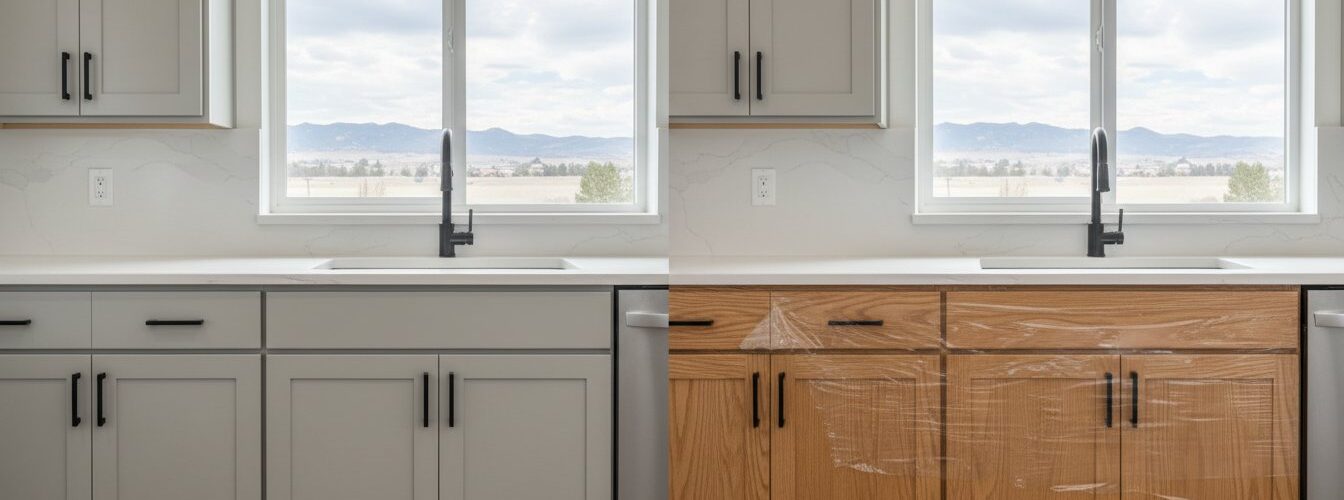
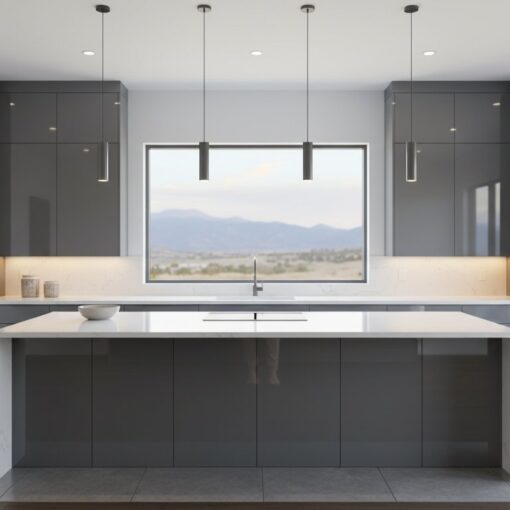
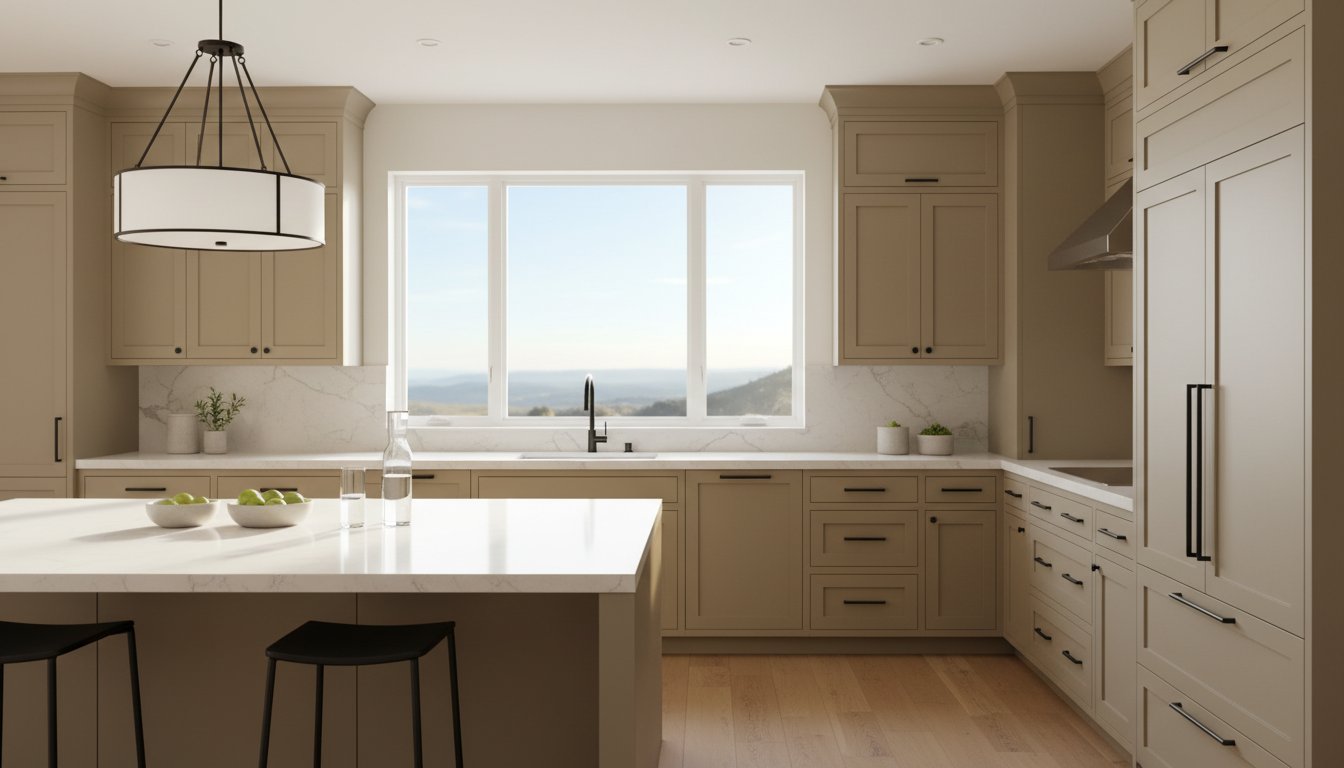
A picture is worth a thousand words, but a gallery of spray painted kitchen cabinets before and after photos tells a complete novel. It captures the dramatic psychological shift that happens when a space is reborn. That heavy, golden oak kitchen from 1998, once the heart of the home, can feel dated and heavy by 2026 standards, absorbing light and shrinking the room. The ‘after’ photo, showcasing a clean, modern aesthetic, isn’t just about new paint; it’s about a new feeling of openness, cleanliness, and elevated home value.
To see this transformation in action, watch how a professional spray finish completely changes a kitchen’s character:
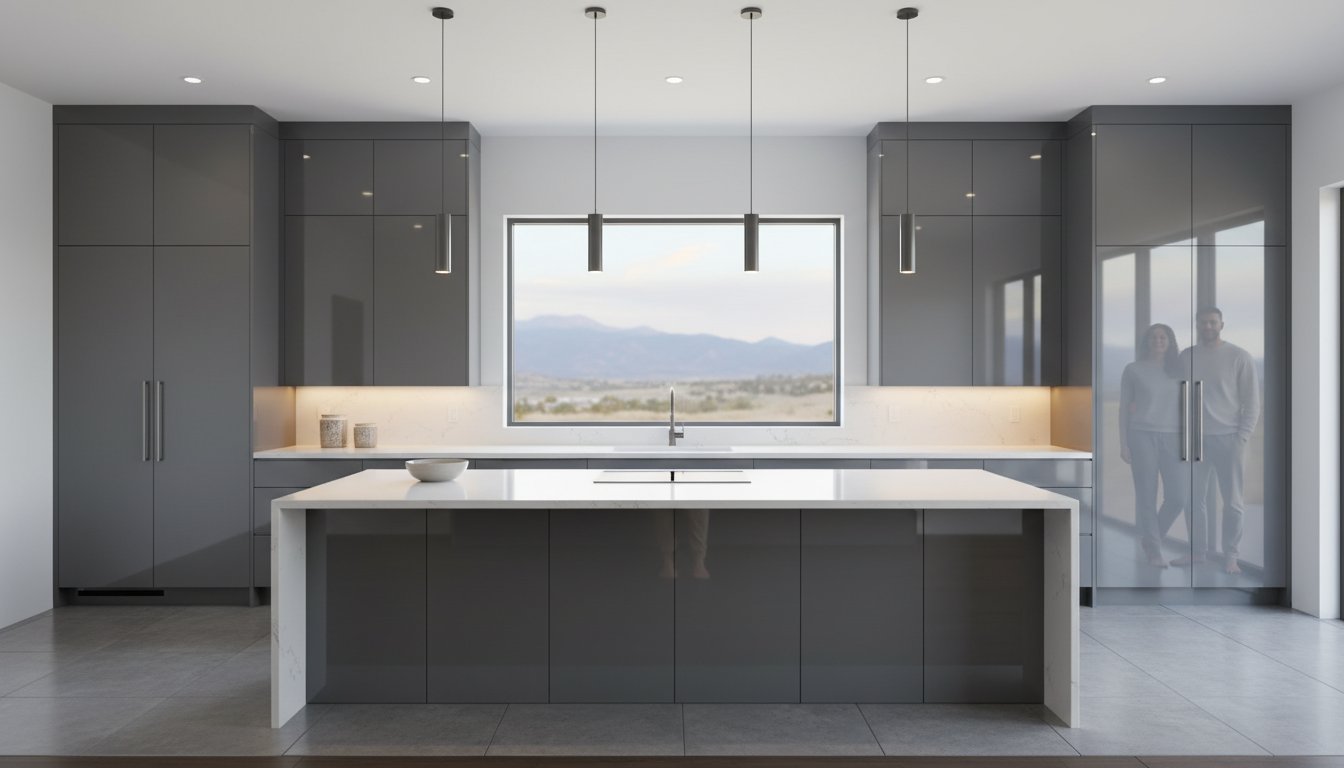
One of the most impactful trends we’ve seen in Denver’s open-concept homes is the ‘Tuxedo Kitchen.’ By spraying lower cabinets a dark, grounding color like Sherwin-Williams’ Iron Ore (SW 7069) and the uppers a crisp white like Alabaster (SW 7008), you create a visual anchor that defines the kitchen area without walls. This contrast adds depth and sophistication that a single color can’t achieve. However, the success of these photos depends heavily on lighting. Professional galleries use multi-point soft lighting to eliminate shadows and accurately represent the color and sheen, a factor to consider when you’re comparing online portfolios.
When you’re scrolling through images, it’s critical to know the red flags of a low-quality job. A discerning eye can spot them even in a photo. Look for:
-
Poor Texture: A bumpy, ‘orange peel’ surface indicates improper spray technique or paint that was thinned incorrectly.
-
Visible Grain: If you can still clearly see the deep, porous grain of old oak cabinets, the painter skipped the crucial step of grain filling.
-
Inconsistent Sheen: Watch for dull spots on a satin finish or overly shiny patches. This points to uneven application and a lack of professional quality control.
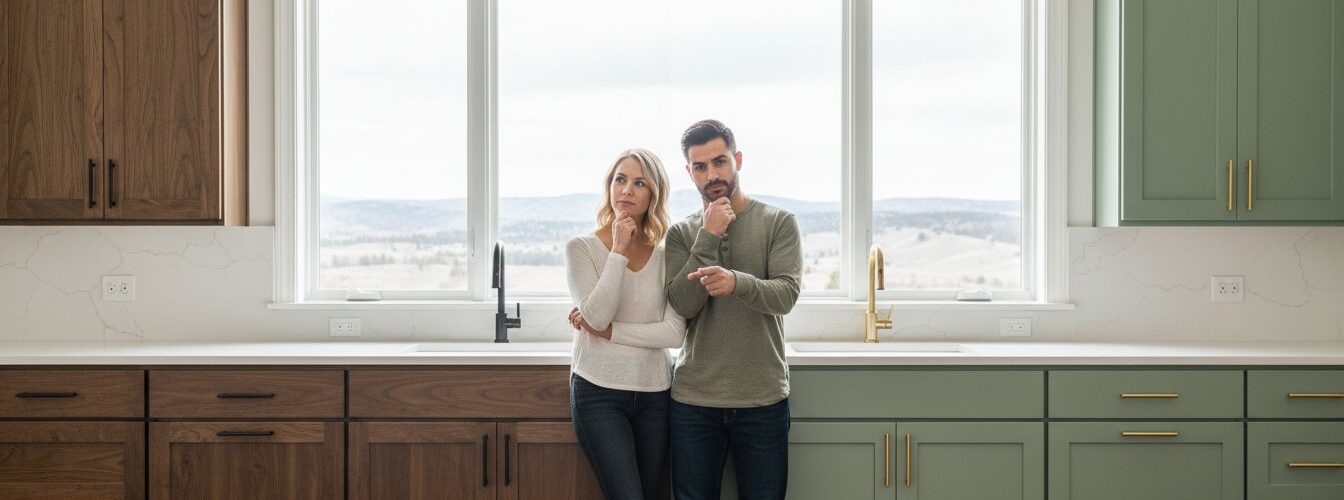
From Dated Oak to Modern Minimalist
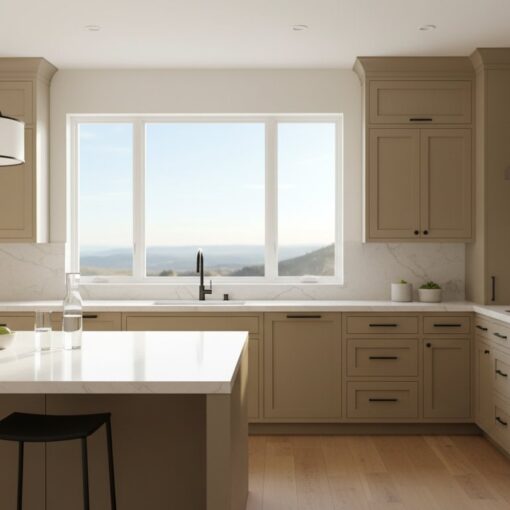
The number one challenge with cabinets from the 1990s is their heavy oak grain. A professional approach neutralizes this ‘oak look’ by applying multiple coats of high-build, catalyzed primers that are sanded smooth between coats. This meticulous process, a core part of cabinet Refinishing, creates a perfectly flat canvas. While classic white remains a top choice, the 2026 Denver aesthetic embraces earthy tones. Colors like Benjamin Moore’s October Mist (1495) connect the home to Colorado’s natural landscape. We recently transformed a typical suburban Littleton kitchen from honey oak to this serene green in just 5 business days, completely updating the home’s core.
The ‘Factory Finish’ vs. The ‘Painted Look’
Homeowners today demand a ‘factory finish,’ which means the surface is perfectly smooth and durable, just like a brand-new cabinet. This is only achievable with professional spray equipment and coatings. The biggest enemy of a high-end ‘after’ photo is the brush mark. Even the slightest stroke is a dead giveaway of a DIY or non-specialist job. The final piece of the puzzle is sheen. A matte finish is chic but can be less scrubbable. High-gloss is hyper-modern but shows every fingerprint. That’s why over 75% of our clients choose a satin finish; it offers a sophisticated, soft luster with excellent durability for a busy kitchen.
Spraying vs. Brushing: The Technical Reason Professionals Achieve a Flawless Finish
The dramatic difference seen in spray painted kitchen cabinets before and after photos isn’t just about a new color. It’s about a fundamentally different application method that relies on physics, not just a steady hand. While a brush or roller physically drags paint across a surface, a professional sprayer creates a finish that is applied without direct contact, resulting in a smooth, factory-grade look that’s impossible to replicate by hand.
This process is all about control. A professional doesn’t just "paint" a cabinet; they apply a precise, engineered coating designed for maximum beauty and durability. The secret lies in achieving a perfectly uniform layer, measured in microns, that cures into a hard, seamless shell. Let’s break down the science behind that flawless "after" photo.
The Leveling Factor
The magic begins with atomization. Atomization is the process of breaking a liquid coating into a fine, controllable mist of microscopic droplets. This fine mist lands gently and evenly on the cabinet surface, forming a thin, wet film. High-end cabinet coatings are formulated to be "self-leveling," meaning this wet film has just enough time to flow and settle, erasing any microscopic imperfections before it begins to cure. The result is a glass-smooth surface. A roller, by contrast, creates high and low spots in the paint film, which results in a stippled texture known as "orange peel" that traps dirt and looks distinctly DIY.
Equipment Matters: Pro-Grade vs. Consumer-Grade
Not all sprayers are created equal. The $400 airless sprayer from a big-box store is designed for painting walls; it pushes out a high volume of paint at immense pressure (upwards of 2,000 PSI). For fine-finish work, this is overkill and leads to excessive overspray and a thick, uneven coat. Professionals use High Volume, Low Pressure (HVLP) systems, which cost over $1,500 and are engineered for precision. HVLP systems use a large volume of air at a very low pressure (around 10 PSI) to create superfine atomization for ultimate control.
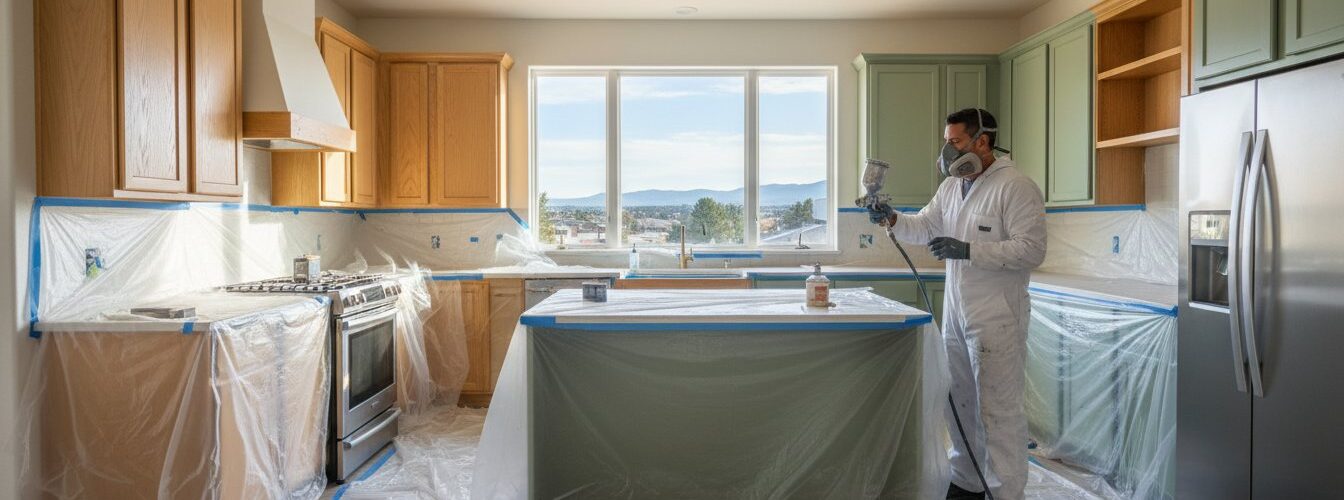
Beyond the sprayer itself, the environment is non-negotiable. Professionals spray cabinet doors and drawers off-site in a dedicated spray booth. This controlled space uses powerful ventilation and filtration to eliminate dust, hair, and other airborne contaminants that would otherwise ruin the finish. These controlled environments are critical for managing fumes and airborne particles, following the strict safety protocols for professional spray finishing mandated by agencies like OSHA. This investment in a clean, safe, and controlled environment is a key reason why the results seen in professional spray painted kitchen cabinets before and after projects are so consistent. When you hire a professional, you’re not just paying for their time; you’re leveraging an investment in thousands of dollars of specialized equipment. To truly appreciate the difference this makes, you can explore the steps in our professional process and see why it delivers a superior result.
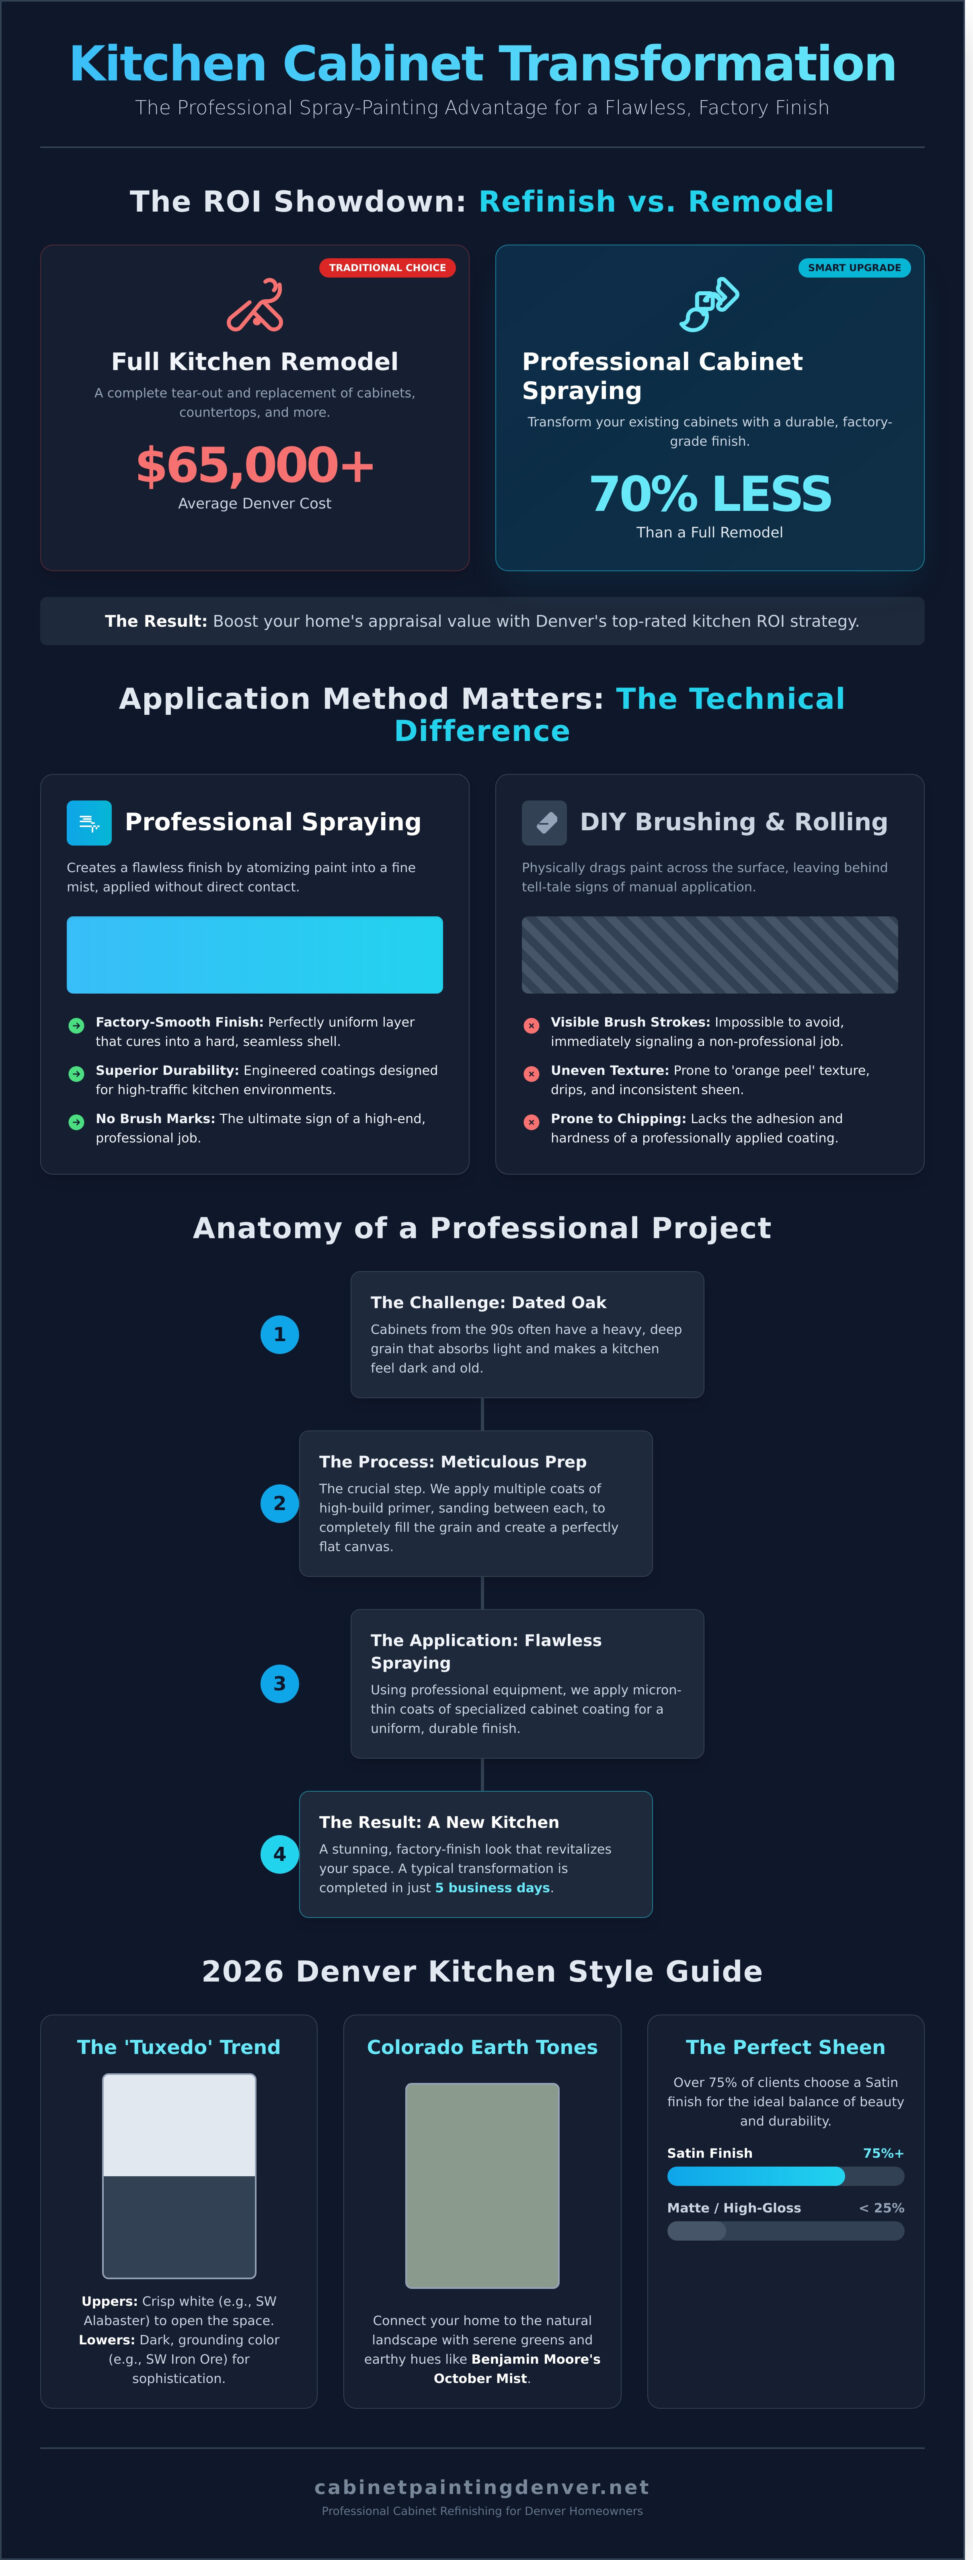
The Anatomy of a Professional Cabinet Spraying Project in 2026
The stunning spray painted kitchen cabinets before and after photos you see online aren’t the result of a simple weekend paint job. They are the product of a systematic, multi-day process where 70% of the work happens before a single drop of color is applied. This meticulous preparation is what separates a finish that lasts 18 months from one that looks factory-new for over a decade. Let’s break down the five core stages of a professional project.
-
Step 1: Decontamination. First, every square inch of your cabinetry is chemically degreased and mechanically cleaned. We use specialized industrial-grade solutions to break down years of aerosolized cooking oils and grime that household cleaners can’t touch. This ensures the primer can form a permanent chemical bond.
-
Step 2: Precision Masking. Your kitchen is transformed into a controlled environment. We use 3M plastic sheeting and professional masking tape to completely seal off countertops, appliances, floors, and walls, creating a self-contained spray booth that protects your Denver home from any overspray.
-
Step 3: Multi-Stage Sanding. A critical step for mechanical adhesion. We sand all surfaces to de-gloss the old finish and create a microscopic profile for the primer to grip. This isn’t a quick pass; it’s a detailed process that includes sanding between every single coat of primer and paint.
-
Step 4: Industrial Primer Application. This is the secret to the ‘before and after’ magic. We apply a high-solids, stain-blocking polyurethane primer designed to bond tenaciously to the old surface and provide the perfect, non-porous foundation for the topcoat.
-
Step 5: Two-Coat Finish System. Finally, we apply two coats of your chosen color using industrial lacquers. This application happens in our controlled off-site spray booth for doors and on-site for cabinet boxes, ensuring a flawless, glass-smooth finish free of dust, drips, or brush marks.
Preparation: 70% of the Final Result
Attempting to ‘just paint’ over existing cabinets is the number one reason for coating failure. Kitchens are harsh environments; years of steam and atomized cooking oils create a surface film that repels standard paint, leading to peeling within 12 to 24 months. Our sanding protocol, which involves sanding with 180-grit paper before priming and 320-grit between each subsequent coat, is non-negotiable for achieving a smooth, durable finish. This is also the stage where we can fill deep oak grain or old hardware holes for a truly custom, modern appearance.
The Coating System: Beyond Standard Paint
The difference in a lasting finish comes down to chemistry. At Cabinet Painting Denver, we use premium 2K (two-component) polyurethane coatings, often leveraging advanced Italian pigments for color richness and clarity. These aren’t just paints; they are industrial coatings engineered to meet or exceed KCMA standards. The Kitchen Cabinet Manufacturers Association tests for resistance to common kitchen spills like vinegar, coffee, and mustard. Using a KCMA-certified system ensures your cabinets can handle daily life and protects the return on your investment, which a 2019 Forbes analysis placed as high as 80.5% for minor kitchen redos. After the final coat, there is a 24-hour initial cure window where the doors are reinstalled. While you can use your kitchen lightly, the coating achieves its maximum hardness over the next 7 to 14 days.
Beyond the Aesthetics: Calculating the Durability and ROI of Refinishing
A stunning visual transformation is just one part of the equation. A professionally refinished kitchen delivers a powerful return on investment, both in long-term durability and financial gain. While a full kitchen demolition and cabinet replacement in the Denver area can easily cost upwards of $40,000, a professional spray refinishing project typically lands between $5,000 and $8,000. This isn’t just about saving money; it’s about making a smarter, more sustainable investment in your home’s most important asset.
The materials used by professionals are fundamentally different from what’s available at a hardware store. We use industrial-grade, catalyzed lacquers and conversion varnishes that are chemically cured, not air-dried. This process creates a non-porous, factory-hard shell that resists heat from stovetops, moisture from dishwashers, and stains from common kitchen spills. These finishes are rated to withstand common household cleaners that would strip consumer-grade paints in months. This level of resilience is what separates a short-term fix from a long-term solution.
Beyond the financial and functional benefits, there’s a significant environmental advantage. Each year, thousands of tons of construction material end up in Colorado landfills. Refinishing keeps your existing high-quality wood cabinets, often made of solid oak, maple, or cherry, out of the waste stream. It’s a choice that enhances your home while honoring our state’s commitment to sustainability.
The 10-Year Test
A DIY job with latex paint often looks great for the first year, but by year three, it typically shows signs of chipping, peeling, and yellowing, especially on high-touch surfaces. A professional spray finish is engineered to last a decade or more with minimal care. The catalyzed finish resists UV degradation, so your white cabinets stay pure white. If a deep gouge or chip does occur, a professional can perform a seamless spot repair, perfectly matching the original color and sheen.
To keep your cabinets looking pristine, maintenance is simple:
-
Clean surfaces weekly with a soft, damp cloth and a mild soap solution.
-
Avoid abrasive scrubbers, harsh chemicals like bleach, or ammonia-based cleaners.
-
Wipe up spills, especially acidic liquids like coffee or wine, immediately.
-
Use handles and knobs to open doors and drawers, minimizing contact with the finished surface.
Denver Real Estate Trends
In Denver’s competitive housing market, a dated kitchen can be a major liability. A Zillow report from 2023 noted that homes with modern, "move-in ready" kitchens sold, on average, 12% faster than comparable homes with outdated ones. The visual proof in spray painted kitchen cabinets before and after photos directly translates to buyer appeal. Buyers see a project they don’t have to undertake, and they’re willing to pay a premium for that convenience and style.
This premium results in a fantastic return on investment. Remodeling’s 2024 Cost vs. Value Report for the Mountain region shows that even a minor kitchen remodel recoups over 85% of its cost. Because cabinet refinishing achieves a similar aesthetic impact for a fraction of the price, homeowners often see an ROI of 80-100% upon sale. You can learn more about the investment by reviewing the Average Cost to Paint Kitchen Cabinets: What to Expect. Ready to calculate the potential return for your home? Get a detailed, no-obligation quote for your kitchen today.
Transforming Your Denver Kitchen: Why Local Expertise Matters for Your Project
Choosing a contractor for your kitchen cabinet transformation involves more than just looking at a portfolio. Here in the Front Range, our unique environment presents specific challenges that a national chain or out-of-state painter simply won’t understand. A successful project that lasts for years depends on a deep, practical knowledge of Denver’s climate, architecture, and lifestyle. This is where local expertise isn’t just a bonus; it’s a necessity.
The Colorado climate is a primary factor. With an average relative humidity that often hovers between 20-30%, paint and wood behave differently than they do in more humid regions. While low humidity can speed up drying times, it can also lead to paint that cures too quickly, resulting in a brittle finish prone to cracking. More importantly, wood cabinets expand and contract with seasonal temperature swings. A painter without local experience might use a standard primer and paint system that can’t flex with this movement, leading to cracked seams and chipped corners within the first year. We use specialized, high-solid primers and acrylic urethane topcoats specifically formulated for our arid climate, ensuring a durable yet flexible finish that moves with your cabinetry.
This is why local references and real Denver-based galleries are your best insurance. A gallery of beautiful kitchens from Florida or California doesn’t prove a company can deliver a lasting finish at 5,280 feet. You need to see proof that their process holds up in homes just like yours. Our extensive gallery of spray painted kitchen cabinets before and after transformations from across the Denver metro area demonstrates a proven track record of success in this demanding environment. At Cabinet Painting Denver, we deliver a true, factory-quality finish that feels as smooth as it looks, all for an average of 60-75% less than the cost of a full cabinet replacement.
The Denver Advantage
We understand the difference between the historic Craftsman homes in Washington Park and the modern, open-concept builds in Highlands Ranch. This knowledge informs our color consultations and finish recommendations, ensuring your updated cabinets complement your home’s unique character. Our process is built around minimizing disruption to your life, using dust-control systems and an efficient off-site spraying schedule. See Our Work: Denver Kitchen Cabinet Painting Gallery to view projects in your neighborhood.
Your Next Steps to a Dream Kitchen
Getting started on your project is simple. Your stunning "after" photo is just a few steps away. Our consultation process is designed to be efficient and informative, giving you a clear and precise path forward for your kitchen update.
-
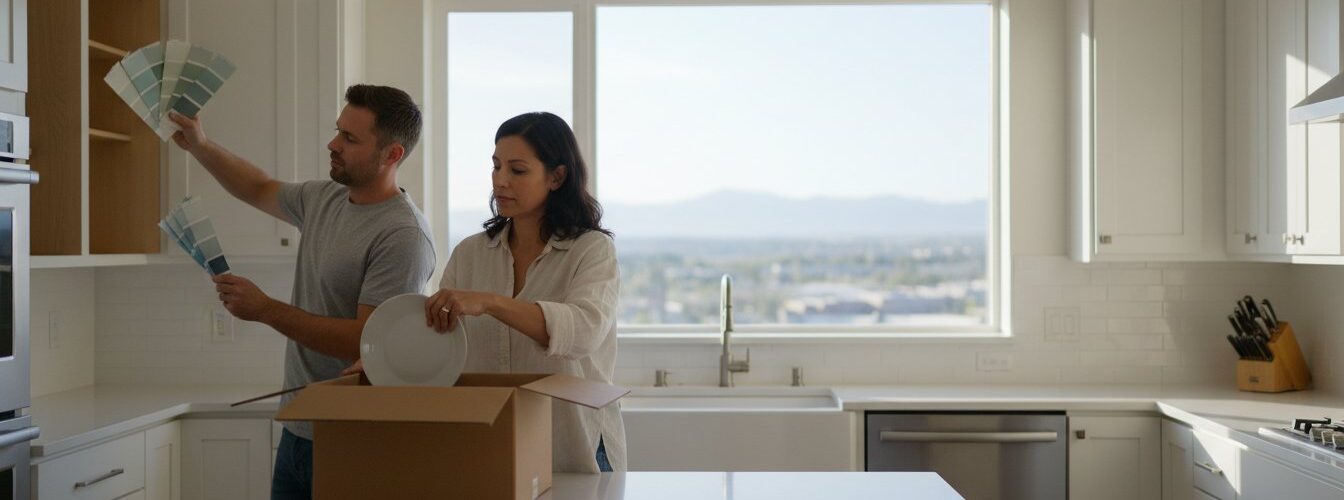
For Your Initial Consultation: To help us provide the most accurate quote, please have a rough count of your cabinet doors and drawers ready. It’s also helpful to gather a few inspirational photos that capture the style and color you’re aiming for.
-
Your First Week’s Timeline: A typical project follows a 5-7 day schedule. Days 1-2 involve our team carefully removing your cabinet doors and drawer fronts for off-site spraying while we meticulously prep, clean, and mask your kitchen. Days 3-4 are for spraying and curing in our controlled shop. By Day 5, we return for reinstallation and final touch-ups, revealing your brand-new kitchen.
Ready to see your own amazing spray painted kitchen cabinets before and after results? Contact us today to schedule your no-obligation consultation and take the first step toward the kitchen you’ve always wanted. Get Your Free Cabinet Painting Quote in Denver and let’s start planning your transformation.
Your Kitchen’s Flawless Future Starts Today
The dramatic spray painted kitchen cabinets before and after transformations we’ve explored prove one key point: professional technique is everything. Specialized HVLP spray technology delivers a seamless, factory-grade finish that DIY brushing simply can’t replicate. This isn’t just a temporary facelift, either. By using KCMA-rated industrial coatings, this process becomes a smart investment that adds measurable durability and value to your home for years to come. With over 15 years of dedicated experience right here in Denver, our team has perfected the process for achieving these stunning results.
Ready to create your own incredible "after" photo? See what our expertise can do for your space. Get Your Free Denver Cabinet Refinishing Quote Today and let’s start planning your transformation. Your dream kitchen is closer than you think.
Frequently Asked Questions About Cabinet Spray Painting
How long does a professional spray painted kitchen cabinet last?
A professional spray painted finish on kitchen cabinets lasts between 8 and 12 years. This impressive longevity is achieved by using industrial-grade coatings, like catalyzed lacquers, which are much tougher than standard house paint. The key is the multi-step process: thorough cleaning, sanding, priming, and multiple thin coats applied in a controlled environment. This creates a hard, durable shell that resists chipping and wear for over a decade.
Is it better to spray or brush kitchen cabinets for a long-term finish?
Spraying is definitively better than brushing for a durable, long-term cabinet finish. A sprayer atomizes the paint, creating a perfectly smooth, even layer that cures into a hard, seamless surface with no brush strokes. This factory-like finish is non-porous, making it easier to clean and significantly more resistant to chipping, moisture, and daily wear. A brushed finish, in contrast, can show texture that traps grime and is more prone to wear.
What is the average cost of professional cabinet spraying in Denver?
The average cost for professional cabinet spraying in the Denver area typically ranges from $3,000 to $6,500. This price is for an average-sized kitchen with approximately 25 to 30 cabinet doors and drawers. Your final quote will depend on the total number of cabinets, their current condition, the complexity of the layout, and the specific type of finish you choose. We always provide a detailed, transparent estimate before any work begins.
Can you spray paint cabinets that are already painted or laminate?
Yes, we can absolutely spray paint cabinets that are already painted or have a laminate surface. The success of the project hinges entirely on meticulous preparation. For previously painted cabinets, we sand the old finish to ensure adhesion. For laminate, we scuff the surface and use a specialized high-adhesion bonding primer. This critical prep work guarantees the new coating bonds permanently for a beautiful, long-lasting result.
How do I clean my spray-painted cabinets without damaging the finish?
You should clean your spray-painted cabinets with a soft microfiber cloth and a gentle, non-abrasive cleaning solution. A simple mixture of a few drops of mild dish soap in a gallon of warm water is highly effective. Lightly dampen the cloth, wipe the surface, and then dry it with a separate clean cloth. Avoid using harsh chemicals, ammonia-based cleaners, or abrasive scouring pads, as they can dull or degrade the protective topcoat over time.
Do I need to empty my cabinets before the professional painters arrive?
Yes, we require that you completely empty all cabinets and drawers before our crew arrives for preparation. This is a crucial step to protect your dishes, food, and other belongings from the fine dust created during the sanding process. It also ensures our team has unobstructed access to clean and prep every interior surface properly, which is essential for achieving a flawless, professional-grade finish that lasts.
How long will my kitchen be out of commission during the spraying process?
Your kitchen will be accessible but not fully operational for about 4 to 7 days. Day 1 is dedicated to on-site prep, masking, and removing doors and drawers. For the next 2-4 days, we spray those items at our facility while your kitchen remains usable. The final 1-2 days involve on-site spraying of the cabinet boxes and reinstallation. This efficient process delivers those stunning spray painted kitchen cabinets before and after transformations with minimal disruption.
Can I change my cabinet hardware during the refinishing process?
Absolutely; the cabinet refinishing process is the perfect opportunity to install new hardware. If you’re switching from knobs to pulls or changing sizes, we can fill the old screw holes with a durable wood filler and sand them smooth before painting. Once the new finish is cured, we will drill precise new holes to match your new hardware specifications. This ensures a clean, custom look for your updated kitchen.
